Good question. It wasn't what I wanted to do, actually. When my Voron parts were printed with the Voron PIF program a few months back, Stealthburner had not been released, so my parts are for Afterburner. I was planning the LGX at the time so they provided the LGX adapter for the Afterburner. So I'm working with what I have. I did make one attempt at printing some ABS+ with my Prusa MK3 in a temporary enclosure, but adhesion was terrible and rather than debug that now I decided to go with the parts I have on hand. Once the Trident is up and running I'll probably print Stealthburner parts, though perhaps I'll focus on the Salad Fork parts first. The main advantage of Stealthburner is for printing PLA, due to the better cooling setup. Afterburner is a good printhead but falls a bit short on the cooling for fast PLA printing. So while I definitely want the Stealthburner it isn't a priority now. The LDO kit I have was released for Stealthburner with Clockworks 1 (a slightly odd combination), normally the SB uses Clockworks 2 but it can work with CW1. But the LDO kit doesn't contain printed parts, so I'm working through a puzzle of parts combinations from PIF and LDO and my own collection of bits and upgrades. Once I get a viable ABS printer going I'll choose a different path. ")
LGX is compatible with Stealthburner. I do have the parts for Clockworks 1 that normally goes with the Afterburner, but there are advantages to the larger LGX gears, plus it's less effort to use it than to build up a CW1. The LGX Lite might be a better choice, this LGX was purchased when they came out, before the Lite was released. My LGX Lite is going on the Railcore which is waiting in the wings for me to order some more parts and finish it off.
I did order and receive the connectors for the LGX motor which uses a 2.0mm JST and the LDO cable set doesn't expect that motor so didn't come with a connection for it, and the LGX itself didn't come with any cables or connectors at all, surprisingly. I've got a crimper coming in soon so I'll probably wait for that and between that and the collection of crimpers I already have something should be adequate to get the motor cable done.
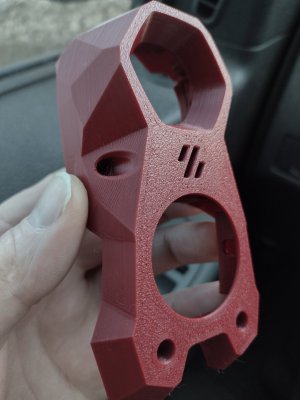
The motor adapter above was PLA which won't last very well, I did reprint it in PETG. It's weird that PETG adheres just fine at 85C and ABS totally failed at 100C, even with Aquanet. It acted like the nozzle was too high, perhaps it had to do with the enclosure elevating temperatures. It wasn't very convenient working with the MK3 in the enclosure so I didn't really spend any time trying to recalibrate it. It instantly and reliably works with PLA, TPU and PETG and completely fails with ABS+.
I see Digikey had some Raspberry Pi CM4 boards this evening while I was out. They didn't last long. Pi boards continue to trickle out.
LGX is compatible with Stealthburner. I do have the parts for Clockworks 1 that normally goes with the Afterburner, but there are advantages to the larger LGX gears, plus it's less effort to use it than to build up a CW1. The LGX Lite might be a better choice, this LGX was purchased when they came out, before the Lite was released. My LGX Lite is going on the Railcore which is waiting in the wings for me to order some more parts and finish it off.
I did order and receive the connectors for the LGX motor which uses a 2.0mm JST and the LDO cable set doesn't expect that motor so didn't come with a connection for it, and the LGX itself didn't come with any cables or connectors at all, surprisingly. I've got a crimper coming in soon so I'll probably wait for that and between that and the collection of crimpers I already have something should be adequate to get the motor cable done.
The motor adapter above was PLA which won't last very well, I did reprint it in PETG. It's weird that PETG adheres just fine at 85C and ABS totally failed at 100C, even with Aquanet. It acted like the nozzle was too high, perhaps it had to do with the enclosure elevating temperatures. It wasn't very convenient working with the MK3 in the enclosure so I didn't really spend any time trying to recalibrate it. It instantly and reliably works with PLA, TPU and PETG and completely fails with ABS+.
I see Digikey had some Raspberry Pi CM4 boards this evening while I was out. They didn't last long. Pi boards continue to trickle out.