-
Welcome back Guest! Did you know you can mentor other members here at H-M? If not, please check out our Relaunch of Hobby Machinist Mentoring Program!
You are using an out of date browser. It may not display this or other websites correctly.
You should upgrade or use an alternative browser.
You should upgrade or use an alternative browser.
(Used) Grizzly G0709 14x40 Ownership Thread
- Thread starter wachuko
- Start date
- Joined
- Nov 23, 2014
- Messages
- 2,606
Correct; two different ways to skin the cat. A collet chuck draws the collet into the chuck to hold the stock. The 5-C collet closer draws the collet into the spindle adapter (5MT to 5C) to tighten the collet on the stock.Can you further explain to a newbie? That means I do not need to buy that chuck?
I saw in this thread where @BGHansen was able to use/adapt model H5948 5C closer... but those do not seem to be available anymore...
View attachment 390563
In theory, the lever style holder allows you to loosen the collet and position stock while the lathe is still running. Hang the stock out of the collet, throw the lever to tighten the work, do your turning, part it off, throw the lever to loosen the collet and position the material by hard to make the next part, throw the collet lever and go to town on the next part. I'm a wouldn't recommend it though, something about putting my hands on or near stock loosely rubbing on a collet with the lathe under power just doesn't set well with me. Especially when you have a brake on the G0709 that'll stop it in a heartbeat.
Bruce
- Joined
- Nov 23, 2014
- Messages
- 2,606
I've had my G0709 for 6+ years and have had minimal issues with it. I have a slow leak in the QCGB that I haven't looking into yet. The leak is relatively high, so my oil level is at about 1/8" above the bottom of the sight glass. Maybe a retirement project . . .
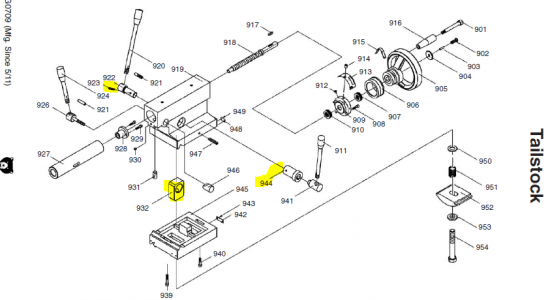
The most annoying thing was the throw lever for my tailstock stopped working. Our of laziness I went to using the socket wrench attachment on the front side. I didn't shoot pictures of it, but fixed it this past summer. The design uses a spring pin (923) that pins a collar (922) to an eccentric (944). The eccentric rides in a block (932) that pulls up/lowers the clamp (952). My #923 spring pin broke so the backside lever was inop. The spring pin on my lathe did not completely go through parts 922 and 944, only halfway through. I drilled the hole completely through parts 923/944 and used a dowel pin instead of a spring pin.
Bruce

- Joined
- Aug 6, 2015
- Messages
- 3,886
Bruce @BGHansen ,
Thank you for those comments.
On the 5C:
I checked the different alternatives. Cost and simplicity wise, best for me to go with the 5C collect chuck from Precision Matthews. 345.00 shipped and it is just a bolt on solution.
What you used is no longer available. So out of luck on that option. That would have been cool.
I looked at the Grizzly adapter and with the additional parts, not counting the aluminum stock needed for the end threaded section, was around 200.00 shipped... And looking at a few videos, seems that it will make it difficult to use with the tapper attachment...
On the issues you have had:
I hope the leak in the QCGB is easy to fix.
Good to know about the issue with the tailstock lock handle. Mine is working fine, but I need to check as it seems to interfere with the handle that locks the quill... Probably not really an issue thinking about it now... I was just testing both and I had to lock one before locking the other.. Now, thinking about the workflow, I should not have an issue... first I should be moving the tailstock and locking it before messing with the quill... humm... so never mind my comment
Just for my reference:
923 - part number P07090923 now replaced with Grizzly PRP05M - ROLL PIN 5 X 30
- Joined
- Jan 6, 2017
- Messages
- 1,214
Figured I would start a thread on this new-to-me Grizzly G0709 metal lathe I got on December 23rd, 2021.
It all started looking for a milling machine... and then seeing if I could also find a bigger lathe before the PM1236 arrived. Out of pure luck I found a machine shop selling both... I was able to buy both for a little more than I was paying for the new PM1236.
This lathe has less than 20 hours of use as it was their backup unit. They had three of these and one of the larger Grizzly lathes...
View attachment 390506
Well, PM1236 ordered was cancelled... got the milling machine and a few days later went to pick up the lathe.
I needed a drop deck trailer to make it easy to unload at home... Could not find a larger one as everything was rented out. Somehow the seller managed to load it... Not the best way as it was in the back of the axle... I was fortunate that the shop I bought it from was only 26 miles away from my house. Slow driving got me home safely.
View attachment 390507
I stopped a few times to check everything was still secured and fine...
View attachment 390509
Once home, my son helped me getting it inside the garage... We had to remove the tag in the trailer to be able to unloaded with the pallet jack. Since the seller used a forklift, he just went over it... The pallet jack does not go that high so tag came off and we got it out.
View attachment 390512
View attachment 390511
View attachment 390523
Took the cover off and was inspecting everything to make sure it was all well after the move and unloading...
View attachment 390513
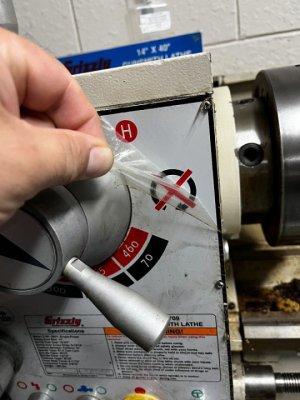
All the original plastic film were still on...
View attachment 390514
Missing was the thin black cover inside the lower select knob/dial
View attachment 390515
That missing cap for the lower left shift knob, is an upgrade opportunity.

- Joined
- Nov 14, 2016
- Messages
- 3,002
I didn't realize the Grizzly you got was a 14x40, I'd say that is quite an upgrade from the PM1236. You may out grow your garage, but I don't see you out growing this lathe and mill anytime soon, looks like you got a great deal.
- Joined
- Aug 6, 2015
- Messages
- 3,886
A few parts/accessories came in...
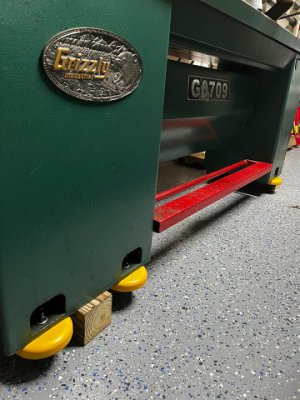
Leveling pads. And of course I forgot to bring the Johnson Prybar I just bought... left it in the other house... I will use the engine hoist to lift it and remove the 4x4's
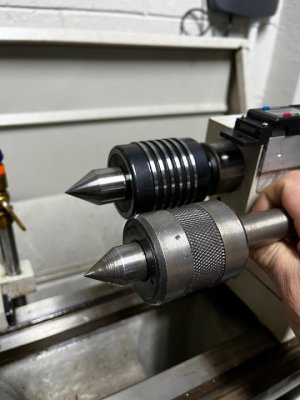
Heavy duty live center... much, much better than the one that came with the lathe. The lathe might only have 20 hours, but this live center they gave me has seen heavy use... I will use it for wall decoration...
The handles from McMaster-Car arrived as well...
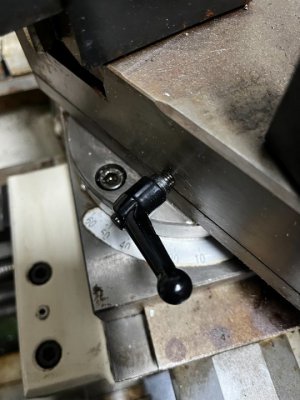
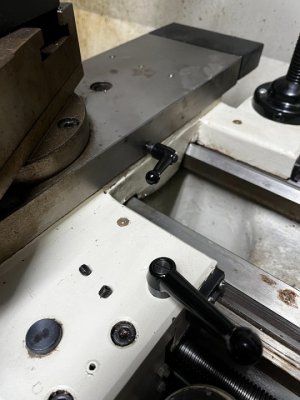
Oh, and I had to order the angle plate (Cross Slide Scale) that has the numbers... I wanted to clean the area for the photo and grabbed the Carburetor Cleaner, sprayed that on a paper towel and cleaned the area... that was way too aggressive and it took out the numbers... Cleaned on the left, dirty on the right...
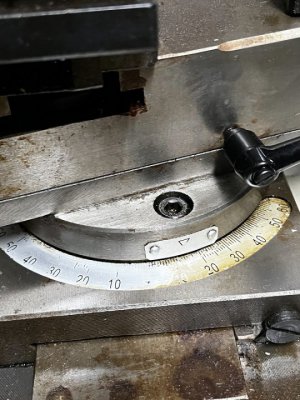
I also got the missing cover plate for the bottom dial... I have seen them silver, black... this one came in gray...
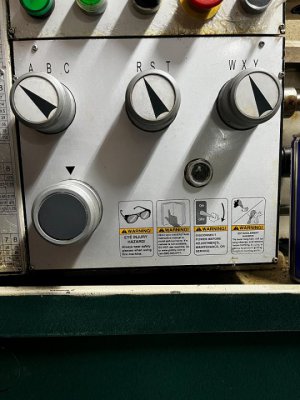
Leveling pads. And of course I forgot to bring the Johnson Prybar I just bought... left it in the other house... I will use the engine hoist to lift it and remove the 4x4's

Heavy duty live center... much, much better than the one that came with the lathe. The lathe might only have 20 hours, but this live center they gave me has seen heavy use... I will use it for wall decoration...

The handles from McMaster-Car arrived as well...


Oh, and I had to order the angle plate (Cross Slide Scale) that has the numbers... I wanted to clean the area for the photo and grabbed the Carburetor Cleaner, sprayed that on a paper towel and cleaned the area... that was way too aggressive and it took out the numbers... Cleaned on the left, dirty on the right...

I also got the missing cover plate for the bottom dial... I have seen them silver, black... this one came in gray...

Last edited:
- Joined
- Aug 6, 2015
- Messages
- 3,886
Looking at how to mount the DRO on the tailstock... I made a quick bracket for the sliding block. Still need to make the bracket/clamp for the quill...
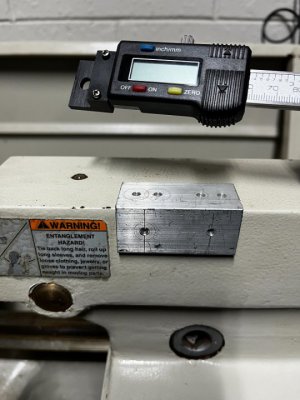
The sliding block has M3 threaded holes in the back...
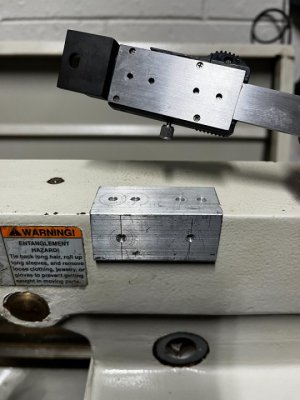
Once I decide where to mount the bracket, I will drill and tap the tailstock for two M3 bolts. Or just fix it in place with epoxy and avoid any drilling to the tailstock...
I also removed the cover to the cooling tank... need to empty whatever is in there. Then I need to decide what coolant to use, if any... not sure if I even need coolant at this time.
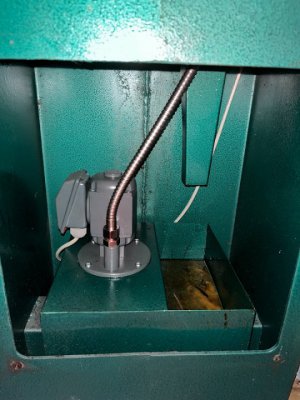

The sliding block has M3 threaded holes in the back...

Once I decide where to mount the bracket, I will drill and tap the tailstock for two M3 bolts. Or just fix it in place with epoxy and avoid any drilling to the tailstock...
I also removed the cover to the cooling tank... need to empty whatever is in there. Then I need to decide what coolant to use, if any... not sure if I even need coolant at this time.

Last edited:
- Joined
- Aug 6, 2015
- Messages
- 3,886
Off the 4x4's !!
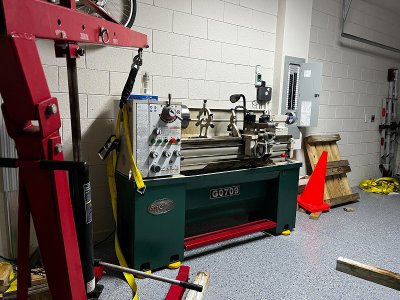
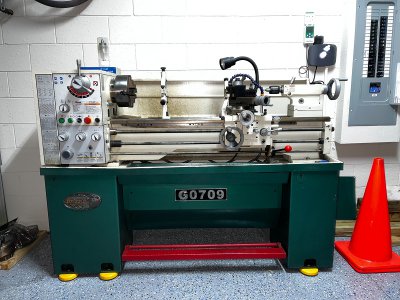
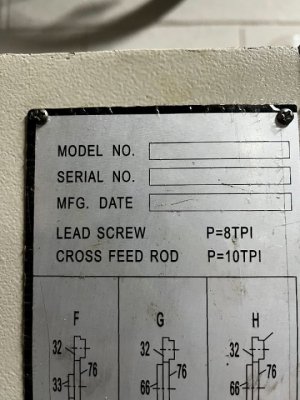
The piece of information that I was looking for was serial number and date of build... For the life of me, I could not find it!
I was only seeing this... empty, not stamped...
Well... that was not it... information was staring me straight at my face...
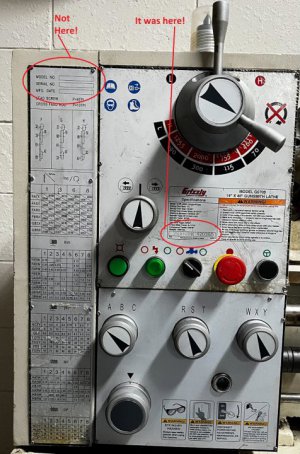
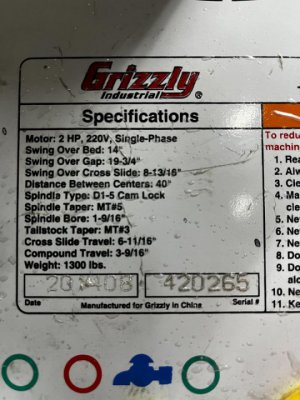
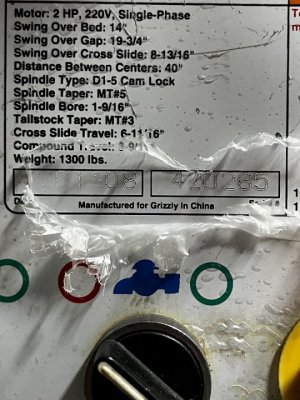
I will update the first post with this information... and once I get it all clean, I will remove all the protective film...


The piece of information that I was looking for was serial number and date of build... For the life of me, I could not find it!
I was only seeing this... empty, not stamped...

Well... that was not it... information was staring me straight at my face...


I will update the first post with this information... and once I get it all clean, I will remove all the protective film...



 I like the leveling pads!