South Bend Heavy 10 restoration

Sometimes on some of them you can just grind a little of the casting away for clearance and then just unscrew it. I don't know if that will work on yours, it looks pretty close. It worked on mine, I only removed a small amount of material and then sanded it and you can't even tell I ground on the casting. I used teflon tape when re installed it.
 
The threads go into a metal plug that press fits into the spindle casting.
I have seen other posts that say to wrap the oiler with a piece of leather or something similar (to protect it from bending) and use pliers to wiggle out the plug.
I did the process on the left one, but not yet on the right.

I am restoring my Heavy 10 at the same time as you.
Thankfully I have no missing or broken parts.
I'll subscribe to this thread to keep posted on your progress.

Also, I am impressed with the results you are getting from your soak tub.
I see one picture of it, but I would appreciate some details of construction so I can make one for myself.

Thanks for documenting your process,
Jim

Thanks Jim. I will gingerly give that a try. The Left one doesn't have the press fit in mine, I don't think. But that one is not the issue.

The process you see me using is what's commonly referred to as electrolysis rust removal. The setup you see with the saddle is a new configuration I just put together and it is working nicely. You make an electrolyte solution (I use washing soda, so do most people. Then you connect the negative to the piece you want to clean, and the positive to the sacrificial anode (I forget if it's called that or electrode in this situation) using a car battery charger.

Any way. It would be best for you to look it up as I'm not reinventing anything here and there is a myriad of information on it out there. I would be happy to answer any questions you might have pertaining to my own experience and set up with it though.

I love the process.
 
Go over to the yahoo group Heavy 10 and look for Steve Wells Heavy 10 restoration project,he made a tool for removing the cup and the plug.Lots of pics and good reading material.Myself I did what Woodtick said,took a 4" angle grinder and remove alittle metal,testing each time to see if cup would clear.Tape off the cup just in case you bump it with the wheel.I think I remove almost 1/8 material then I was able to remove the cup but it was still hitting the side.Once out I round over the edge that I made,painted the headstock install the cup and had to just touch it up alittle.
Your project is looking great---kroll
If I knew how I would try to cope Steves pics and post them but it would not let me.
 
PAINT!

Finally the paint arrived today! Thanks to my good buddy who sent me some leftover paint he had from painting his South Bend 9. With the snow, I have had some time off work and I have been going nuts. The paint has been holding me up and it should have been here on the 16th, but after seeing the package, I realized, the box exploded and there it sat in Harrisburg for who knows how long, until they taped it back up and sent it on it's way.

It's a Sherwin williams Pro industrial alkyd enamel. Gauntlet grey is the color. The color in person is very similar to the pictures at: http://www.lathes.co.uk/southbend9-inch/page9.html In my pictures it looks more grey, but this paint has more green in it, giving it a slight look of a drab. I am very happy with it. I wanted something that was just a tad off from GREY.

Thankfully he put the paint in these quart containers and not a standard paint quart.
Look at that damage! No leaks though!
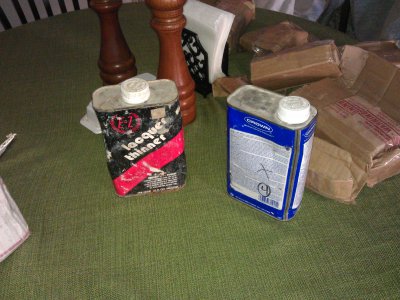
IMG_20140122_152745.jpg

Also, in the goody box was some scrap metal stock (a few pieces were missing which I assume they are rolling around on the floor at some sort facility)
Got a boring bar and boring bar holder, also an atlas micrometer carriage stop for my atlas, which I never have had one for.
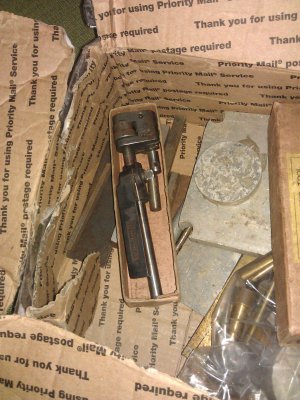
IMG_20140122_152755.jpg

I built that shelf in the kitchen. I can use it for what I want. :roflmao: This is all for my sanity.
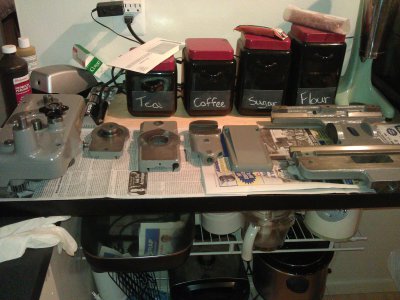
IMG_20140122_182454.jpg

Like I said. Looks more grey in these pics than it really is in person. I can see a hint of green in the pics on my end though. It's interesting, I noticed, depending on the light, it takes on different shades, from more olive drab, to a more plain grey.
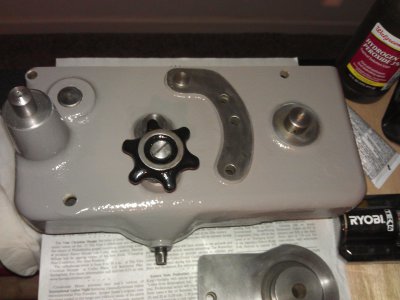
IMG_20140122_182503.jpg

First coat is done. Will do the second tomorrow, hopefully. Then I can get these parts put all back together and move on to the rest of the lathe. I want to complete what I have taken apart so far as to not get too confused about which parts go where and space is also an issue.

Thanks for looking.

- - - Updated - - -

Go over to the yahoo group Heavy 10 and look for Steve Wells Heavy 10 restoration project,he made a tool for removing the cup and the plug.Lots of pics and good reading material.Myself I did what Woodtick said,took a 4" angle grinder and remove alittle metal,testing each time to see if cup would clear.Tape off the cup just in case you bump it with the wheel.I think I remove almost 1/8 material then I was able to remove the cup but it was still hitting the side.Once out I round over the edge that I made,painted the headstock install the cup and had to just touch it up alittle.
Your project is looking great---kroll
If I knew how I would try to cope Steves pics and post them but it would not let me.


I've been trying to find that thread, but Yahoo is.... Can you send me the link?

IMG_20140122_152745.jpg IMG_20140122_152755.jpg IMG_20140122_182454.jpg IMG_20140122_182503.jpg
 
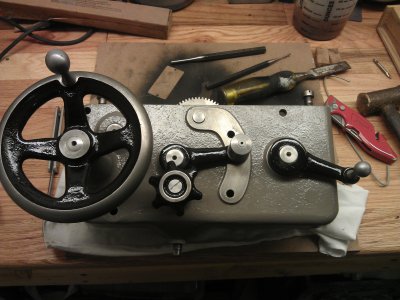
Apron Complete

Quick post here on progress. Completed the apron today. You can't see in the pic here, but I did the modification to the hand wheel adding an oiler.

IMG_20140125_153446.jpg

Next is to finish putting together the compound, cross slide and saddle.

IMG_20140125_153446.jpg
 
Things are going a little slow with the project.

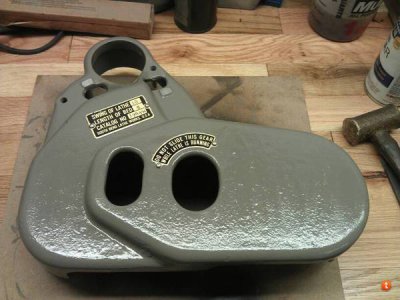
Here's a picture of the gear cover finished. Put a coat of clear over the tags I fixed up.
ysagyvus.jpg

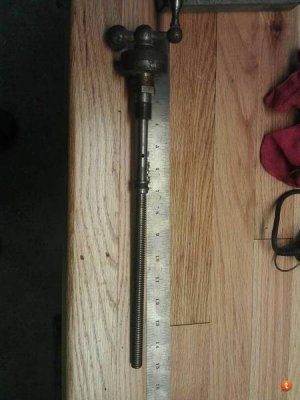
I'm having trouble with my cross slide screw and dial assembly. Take a look and see if any of this makes sense.

That's all the parts.... It's missing something.
me2usyqe.jpg
 
Back
Top