South Bend Heavy 10 restoration

Head stock oil cup bosses removed.

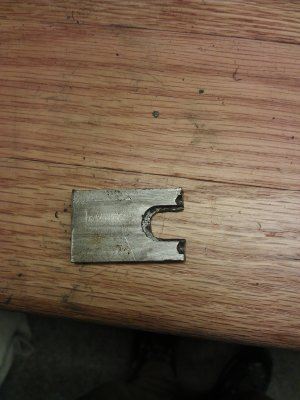
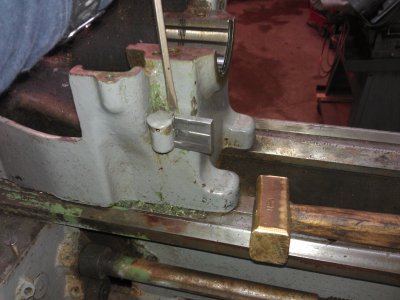
I whipped up a sort of puller today to pull the bosses that the oilers thread into on the head stock. I considered grinding the casting to make clearance for the right hand oil cup, but it seemed like I would have to grind too much. So I went about copying what others had made, a slide hammer puller of sorts. I ended up milling a piece of steel from my scrap bin, and after several tries at fitting and trimming a little more, I got it to fit, quite tightly too, which I wanted, because it's an awkward pull. So I thought, well, heck, maybe this will work as a pry/wedge instead of the slide hammer approach. I was just about to give up on it and cobble together a slide hammer for the piece I milled and it started coming loose. Done! I even pulled the left oiler with it because there was so much sludge and junk in the oil reservoirs, that it was proving difficult to clean.


About 1" wide, 2" long, 1/4" thick. Slot is about 3/8" wide, and the relief slot is 1/2" Pretty rough, but works.
IMG_20140203_130124.jpg

I used a screw driver behind the puller to give it leverage off the casting of the head stock and prevent it from pushing on the boss. So ginger tapping with the good ol' brass hammer and they actually came out quite easily once I got the leverage points just right. It's all about technique!
IMG_20140203_105003.jpg
Note the hammer.....It has steel in it....Does anyone know why a brass hammer would have steel like that in it?

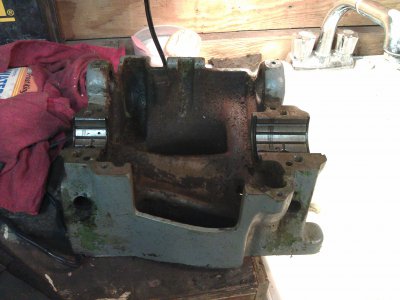
The head stock is in the soup right now. Can't wait till it's ready to be rinsed off.

Thanks for looking.

IMG_20140203_130124.jpg IMG_20140203_105003.jpg
 
Excellent! Glad you got them out. I see your headstock is the very old style before the bronze bearing style, this may also be why the oil cups where so close to the casting.
 
Great thread! I'm getting ready to start on my 9" and this is very inspiring. Thanks for sharing.

Subscribed!
 
The Commodity we like to call time.

The time I have had for almost the past month to work on the lathe has been sparse, let alone update here with my progress. Basically, my goal is to have the LATHE portion completely finished, so that all I will have left to do is the cabinet and drive. This will also allow me to consolidate the parts i have strewn about from the lathe back together again so as to not let things get too confusing. I am currently working on the gearbox, hope to have it done by next week some time.

So, quickly I will get up to speed.

Headstock before electrolysis
IMG_20140203_111907.jpg

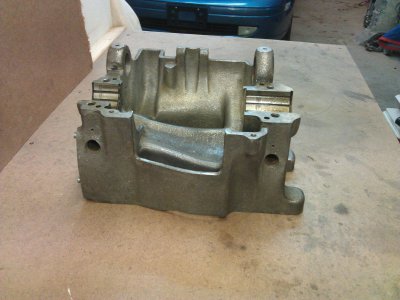
Headstock after electrolysis.
IMG_20140204_164314.jpg

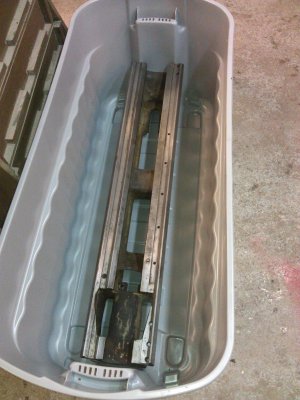
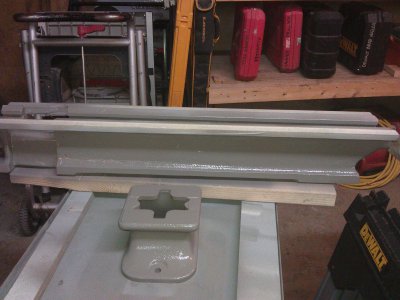
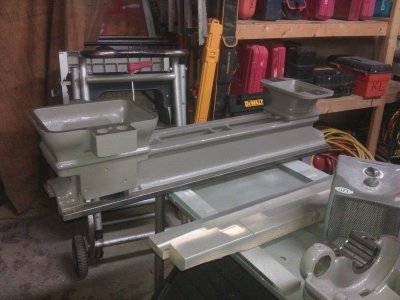
Found a tub big enough to zap the bed in. Worked out pretty well. It took most of the paint off leaving some filler behind which I needle scaled off. I power washed the bed after electrolysis. (wish I had a hot water power washer)
IMG_20140208_161152.jpg


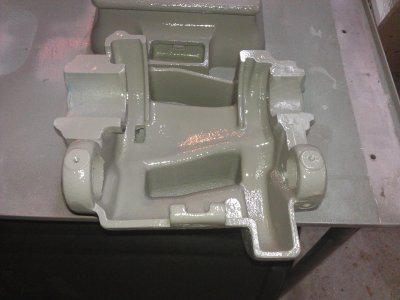
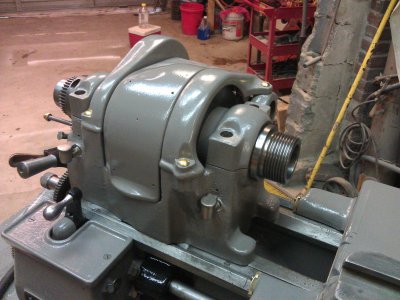
Headstock after a few coats of primer/filler and paint. I sprayed the headstock.
IMG_20140214_171004.jpg

Sprayed the bed and feet as well.
IMG_20140214_170945.jpg


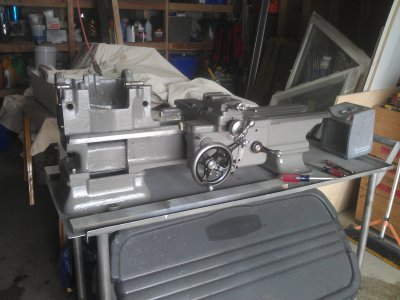
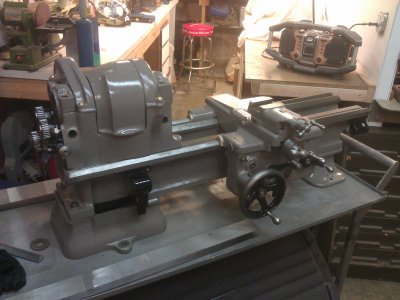
things are starting to come together.....
IMG_20140216_114624.jpg

Yeah baby! This was the point where I finally got over a hump of feeling like i just wanted to get the lathe running and that this was all going to pay off.
IMG_20140216_140852.jpg


Covers in place.....
IMG_20140217_171404.jpg


So, on my agenda and or to-do is to get the spindle installed which is going to be a conversion for 10R to 10L Change the compound you see in the pictures to a different one I have acquired that does not have the corner ground off of it by a chuck, as well as sort out the cross feed screw and dial (procured a worn screw with large dial-mine is large dial but shop made and missing parts) So I need to refurb the worn factory screw as it has the gear on the shaft where mine does not. Finish the gear box. tackle the cabinet and drive (which I am least looking forward to)

Thanks for looking.
IMG_20140204_164314.jpg IMG_20140203_111907.jpg IMG_20140208_161152.jpg IMG_20140214_171004.jpg IMG_20140214_170945.jpg IMG_20140216_114624.jpg IMG_20140216_140852.jpg IMG_20140217_171404.jpg
 
Nice work! She's looking really good. And trust me, it is all worth it in the end. When you are using your new old lathe it just gets into your soul. Doing mine was fun, hard work, a labor of love, rewarding, educational, and in the end so totally worth it! Yours is coming along nicely and I am enjoying watching your work and progress.
 
Thor when your done,that lathe should go into the SB lathe book "Hall of Fame".Its looking so good,I would say awhole lot better than factory recondition.I love the look of the shiny unfinish metal,stands out w/the smokin hot gray paint job----
 
Re: Odds and ends today

Do you have the length and other dimensions for the screw? I need to make one of these, and your post reminded me.

Thanks.

I was missing the retaining screw for the star knob on the apron which is a left hand screw, 32 tpi, od of threads .181".
I'd like to send a special thanks to Kroll for his measurements of the star knob retaining screw that he did for me. Going off of what he measured I decided to just make a screw today as I had some time and was itching to MAKE something anyway. It was a fun project, and was a nice break to be able to make some chips, as opposed to degreasing and whatnot.

Chucked up in the lathe, fit is good. Time to part it off.
View attachment 68025

Finished screw.
View attachment 68026


Installed
View attachment 68027

Today was kind of a mish-mosh of things as I am still waiting impatiently for paint. So I decided to shine up the old rusty spindle pulley cone. Forgot to take before pics. chucked it up on my atlas and went to town with a sponge sanding pad and scotchbrite.

View attachment 68029

Finally, a question for you guys. I can not figure out how to get this oiler off. It is threaded in. I have a hunch that it's threaded into a bushing that was then pressed into the casting.....As you can see, if you try to unthread it, it hits the casting. Has anyone had any luck tackling this magic trick?
View attachment 68028

Thanks for looking.
 
Re: Odds and ends today

Do you have the length and other dimensions for the screw? I need to make one of these, and your post reminded me.

Thanks.

Absolutely. Here is what I made mine to-

Started with 1/2" CR steel. This will give you a very close to original diameter for the head of the screw.

Head thickness is about .160"

Thread diameter is .181" (my suggestion is to sneak up on the thread diameter while checking the fit to your clutch shaft with the piece still in the chuck)

Total length is about 5/8 - 11/16" long from top of head to end of screw.

32 TPI

LEFT HAND SCREW (as you probably know)


Hope that helps.

- - - Updated - - -

Nice work! She's looking really good. And trust me, it is all worth it in the end. When you are using your new old lathe it just gets into your soul. Doing mine was fun, hard work, a labor of love, rewarding, educational, and in the end so totally worth it! Yours is coming along nicely and I am enjoying watching your work and progress.


Thanks very much. Yes....I am growing impatient and daydreaming about being able to hear it purr and cut metal like butter (smoothly hopefully) I do agree it is totally worth it. I just wish I had more free time to be able to dedicate to doing this and knocking it out in a more timely fashion. Oh well.

- - - Updated - - -

Thor when your done,that lathe should go into the SB lathe book "Hall of Fame".Its looking so good,I would say awhole lot better than factory recondition.I love the look of the shiny unfinish metal,stands out w/the smokin hot gray paint job----

Haha! Thanks so much kroll. You're too kind though. I would say it should belong not in a hall of fame but rather in my shop where I will love to use it one of these days! I agree with you about the contrasting between the paint and the metal. I am really glad I did a 2 tode with the black accent too. It seems to add that little bit of pizzaz that I like without any extra labor really.

Thanks for the kind words once again.


And btw, I must congratulate you on the very thorough and nice job you are doing on your Heavy 10
 
I've been slowly pecking away at things.

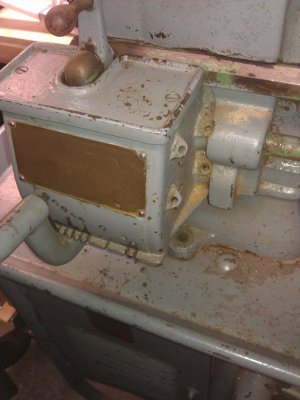
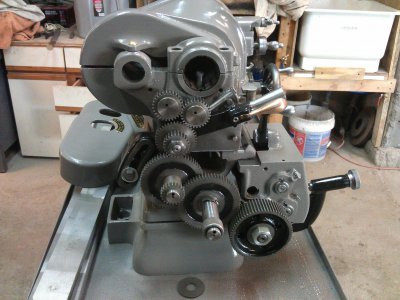
about a week ago I finished the gear box. That was by far the most difficult part so far, and I anticipate it remaining the most difficult. It came apart fairly easily, but going back together was not the same story. I primed the gearbox case and pit one coat of paint inside and out, then reassembled it, and finished the last coat just before putting the levers on.

BEFORE
IMG_20131229_143051.jpg

AFTER
IMG_20140309_162134.jpg

I also fabbed up some bolts with brass heads for the gear train cover.


IMG_20140309_162503.jpg

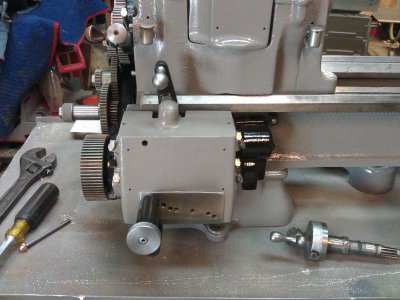
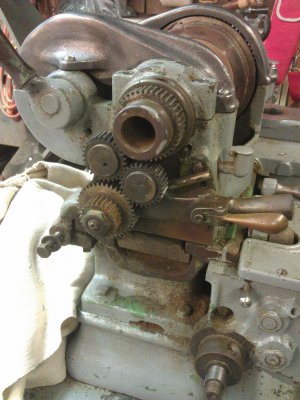
I fitted the banjo on the gearbox and the gear train is complete.

BEFORE
IMG_20131229_143355.jpg

AFTER
IMG_20140309_162129.jpg

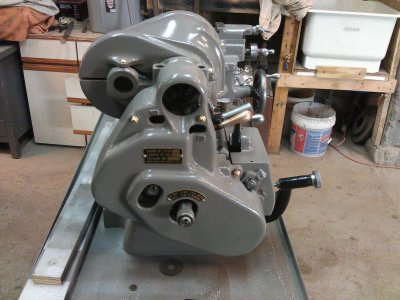
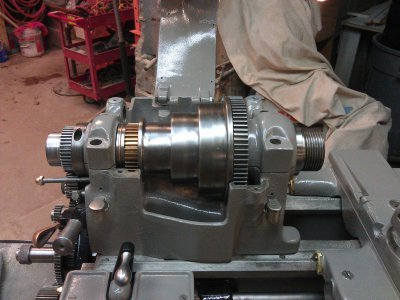
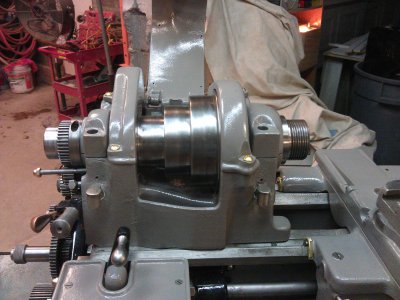
Today I got the spindle "guts" swapped over from the 10R spindle to the 10L spindle. That was fairly painless.

IMG_20140316_170434.jpg

IMG_20140316_170638.jpg

IMG_20140316_170645.jpg

I still need to shim the spindle. Install the back gears. Re-manufacture the cross slide screw.....and then I think the lathe will be complete, and on to the cabinet and under-drive.

QUESTION

Does anyone have any information on refurbishing the cross slide screw? What I have is a large dial no taper attachment. I need to cut the old screw off, leaving the spline gear intact and somehow refit a new screw to the spline gear shaft. I have been searching for info, but have not found much. I'm afraid I am not looking in the right places, so to speak. Any if is appreciated.

Thanks in advance and thanks for looking.

IMG_20140309_162134.jpg IMG_20140309_162503.jpg IMG_20140309_162129.jpg IMG_20131229_143051.jpg IMG_20131229_143355.jpg IMG_20140316_170434.jpg IMG_20140316_170638.jpg IMG_20140316_170645.jpg
 
Nice work, looking real nice. I saw a thread on how to do that shaft repair just like you are saying, but I can't remember where it is. It was pretty slick Used a dowel to line things up at the joint.
 
Back
Top