-
Welcome back Guest! Did you know you can mentor other members here at H-M? If not, please check out our Relaunch of Hobby Machinist Mentoring Program!
You are using an out of date browser. It may not display this or other websites correctly.
You should upgrade or use an alternative browser.
You should upgrade or use an alternative browser.
Chance to buy a South Bend Lathe
- Thread starter ChuckB
- Start date
- Joined
- Mar 10, 2012
- Messages
- 1,368
Thanks Splat. It's only been 2 years) Keep an eye on me and don't let me slack off!
Well ya got me beat.
- Joined
- Jun 22, 2012
- Messages
- 1,552
I just found this thread and read the whole thing, what a great find, I would have bought it too! I will be following this now and if I can be of any help I'll jump in. You already have her looking good! I love to watch other guys machines come together. Nice work.
- Joined
- Jan 2, 2011
- Messages
- 331
I finally finished the crossfeed/taper attachment. The cross feed has about a half a turn of play. I plan on getting a new crossfeed nut and see if that helps.
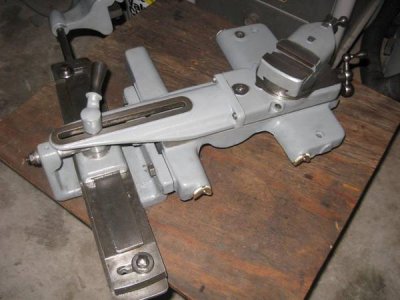
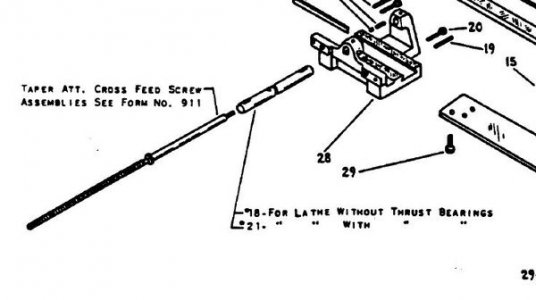
I noticed in the parts manual that it shows that some 10" models had thrust bearings on the crossfeed screw. Mine doesn't, but I am not sure if they are missing, because another manual indicated that some models had them and some didn't. It shows 2 different length cross feed screw sleeves located in the taper attachment. I assume if I have the longer cross feed screw sleeve, it came with no thrust bearings. Does anyone know the 2 different lengths of the sleeves ?
The reason I'm concerned is if you look at the above picture, the sleeve seems to stick out to far of the taper attachament.. or maybe this is normal??
Here are the two different pages from each manual.
Item 18 or 21:
Item 11 and 12 show the bearings in question:
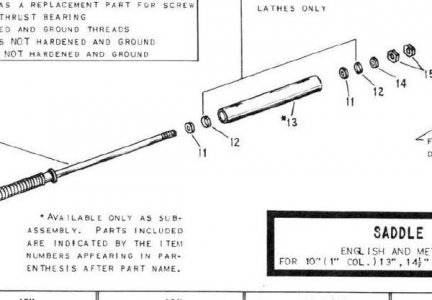

I noticed in the parts manual that it shows that some 10" models had thrust bearings on the crossfeed screw. Mine doesn't, but I am not sure if they are missing, because another manual indicated that some models had them and some didn't. It shows 2 different length cross feed screw sleeves located in the taper attachment. I assume if I have the longer cross feed screw sleeve, it came with no thrust bearings. Does anyone know the 2 different lengths of the sleeves ?
The reason I'm concerned is if you look at the above picture, the sleeve seems to stick out to far of the taper attachament.. or maybe this is normal??
Here are the two different pages from each manual.
Item 18 or 21:

Item 11 and 12 show the bearings in question:

- Joined
- Jan 2, 2011
- Messages
- 331
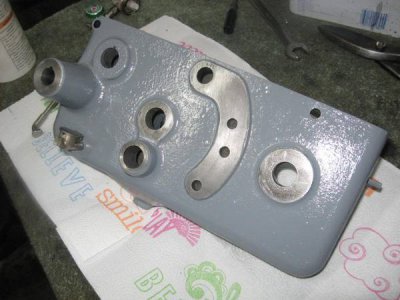
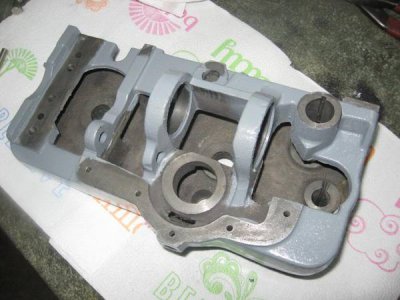
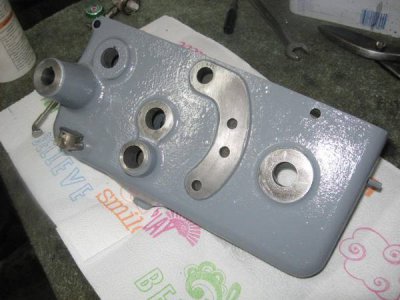
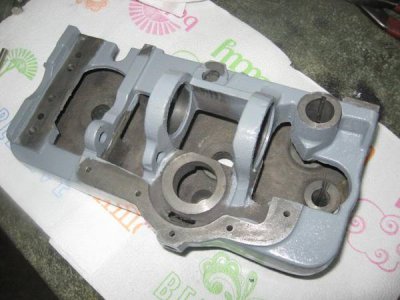
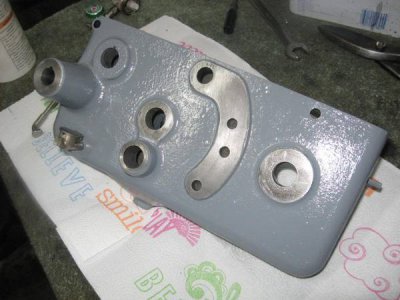
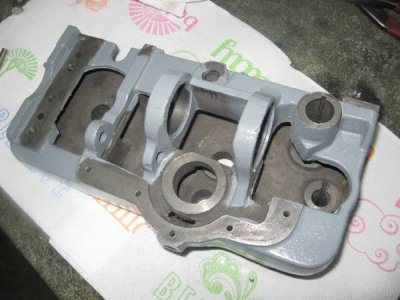
More progress.. Sandblasted and painted the apron.
I initally soaked it in Vapo-Rust a couple days to get all the rust off the interior. Then stuffed paper inside to keep the sand out before blasting. Protected the machined areas with foil tape, which is a ***** to remove, but worth the trouble.
Does anyone know how to install the two long oil cups, located at the top, without damaging them?


Last edited:
- Joined
- Nov 10, 2011
- Messages
- 1
Man you are doing a great job on that. Thank you for sharing, it looks BEAUTIFUL!
- Joined
- Jul 26, 2011
- Messages
- 4,142
If the V ways are worn,especially the front one,there will be a little vertical "cliff" at the top of the way. You can catch it with your finger nail. The cliff will be most significant of the side of the V that faces the chuck. This happens because on the lathe's carriage,where the V's are machined(on the carriage) there are keyway like grooves cut into the female V's so that the tops of the V's on the lathe bed do not touch anything on their tops. Therefore,as the bed wears,the beds' V's will begin to go up into the keyways on the carriage.
The more severe the wear is,the more pronounced these "cliffs" will be. Ultimately,when you get the lathe back together,turn a metal bar several inches long,supported at the outboard end by the tailstock. Make the last cuts very light. Measure up and down this metal bar. If the lathe is worn a lot,the metal test bar will be shaped like a wooden barrel: It will be larger in the center than it is at both ends. You can make a lot of short parts just fine,but will have to resort to carefully filing longer bars while they rotate,to make them acceptably parallel. The only real cure is to have the bed re ground,or re scraped.
The more severe the wear is,the more pronounced these "cliffs" will be. Ultimately,when you get the lathe back together,turn a metal bar several inches long,supported at the outboard end by the tailstock. Make the last cuts very light. Measure up and down this metal bar. If the lathe is worn a lot,the metal test bar will be shaped like a wooden barrel: It will be larger in the center than it is at both ends. You can make a lot of short parts just fine,but will have to resort to carefully filing longer bars while they rotate,to make them acceptably parallel. The only real cure is to have the bed re ground,or re scraped.

