2009 mini cooper clubman, timing chain and valve seals

It just demonstrates to me that they designed this thing to get it through the warranty period and to reduce costs in manufacturing as much as possible.

Sadly, it's how they build things these days. Don't build it to last, build it to maximize profits.
That is right, good thing you've found an aluminium replacement. I always put a thin bead of silicone as an added insurance, in my experience aftermarket solution cheap out on O'Rings and hardware.
 
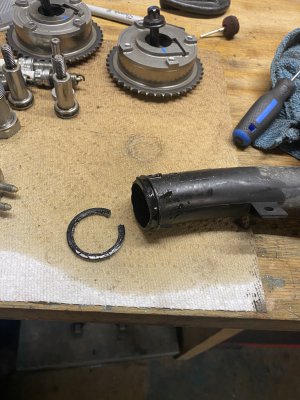
Well well well. Seems I was on borrowed time and didn’t even know it:

IMG_3237.jpeg

Thats the end if the plastic water pipe….cracked completely off.
I woukd have guessed it broke off while being removed, but it slid right out with almost no applied force.

Plastic pipe carrying engine coolant. Yeah, great idea….
 
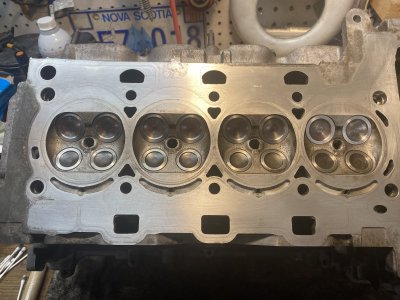
Head cleaned and de-carboned, valves lapped and gasket surfaces cleaned.

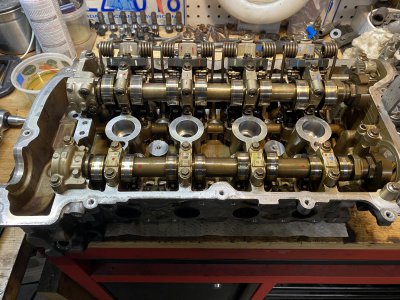
Tomorrow I’ll reassemble the head valve train and then its wait for parts to arrive…
 
Just ticking along:

IMG_3239.jpeg

IMG_3240.jpeg

no need to rush so I’m going nice and slow.

lifters all sat in oil bath for about 30 mins, bearing surfaces all got a light coat of assembly lube. Basically, all load bearing surfaces got a film of assembly lube. No dry starts here…,

Double checked the springs were in the proper slot on their followers with flashlight and mirror. They all went home on the first try.

I also bought the tool kit to do the springs a while ago. I know you can work around not having the tool, but it makes the job of putting the springs back on soooooo easy. Likely never use it again (prob not the timing tools either) but it was worth the money spent for me to make the job a snap to complete.

All the “special tools” will go up on the shelf just in case they’re ever needed again. Once I buy a tool, I keep it forever. Heck, I’ve still got tools I bought when I was 12…..;)
 
Last edited:
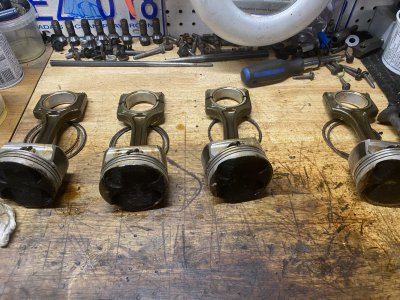
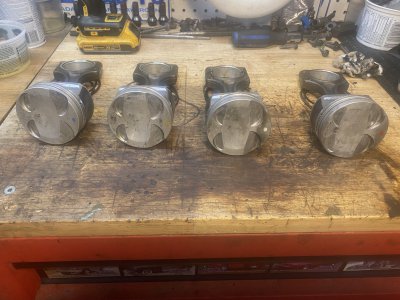
Ok. Pistons are out

IMG_3242.jpeg

Oddly enough, the oil control ring does not appear to have a plastic component.

It appears to be all metal. IT seems to be a one piece (maybe segmented) ring with a metal spring in a middle groove.

definitely not one piece plastic, but not the separate 3 piece oil control rings either. It’s almoat segmented. Lots of little lines/joints in the rings that will let oil bypass. Just a bad design all the way around.

Bearings and crank journal look good. No marks or scratches. I'm on the fence about replacing them or not.

edit: new conrod bearings are only 60 bucks so I ordered up a set. Even if the orginals are good, its seems silly to get this much work and $$$$ into it and then “cheap out” for 60 bucks.

The more I get into the bowels of this thing, the more and more it looks like the engine out of a motorcycle......no, scratch that. My FJ1200 and xvz1200 have more robust timing chains and oil pump drives in them…. Lol!
 
I've never had pistons out of that type of engine but the pistons look massive in comperatin the the conrods. Those are some small conrods and bearings.
 
I've never had pistons out of that type of engine but the pistons look massive in comperatin the the conrods. Those are some small conrods and bearings.
Meh, no big deal to me. Motorcycles have similar sized components, relative to the displacement that is.....you're also getting a bit of perspective error because of the angle the pic is at.
 
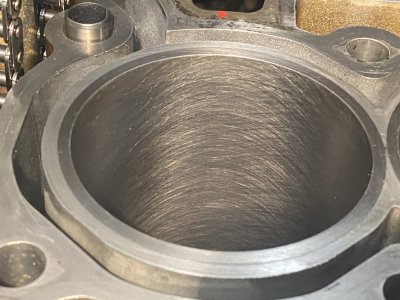
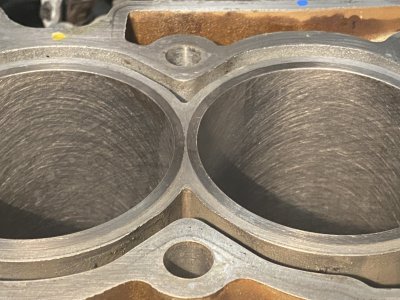
Cylinders honed:

IMG_3270.jpeg

IMG_3271.jpeg

You might think you can see vertical wear lines in the cross hatch, but thats an illusion. The line is from brake kleen running down the bore and drying before I got a chance to wipe it clean. Essentially, its a stain, not a score mark.

Finished the bores with a wipe down with ipa and kimwipes (ie: white, lint free disposable wipes) until the kimwipes came out of the bore as clean as they went in. Basically, it was a “white glove” inspection post honing. Don’t need any honing grit coming loose and wearing on the new rings. I actually had to get my missus to wipe out the cylinders. My hands are too big to fit in the bores!

Currently measuring cylinders and pistons.

once the rings get here, it will be time for ring gap checks and if necessary, filing gaps to size.
 
Last edited:
Well, measured the bores. They all measure out to around 0.001-0.002 thou taper. About the same for out of round.

thats pretty darned good for an engine with around 130,000 kms and an unknown service history.

that low a measurement can be as much my own measuring error as much as actual taper. Always a little tricky to transfer the measurement from the bore gauge to the micrometer. Takes a very practiced “feel” and I’m a little out if practice, despite doing hobby machinist work.

Low wear numbers probably has as much to due with the low friction pistons and rings as much as anything else.

Now I’m ready for parts to show up and start building it back up again.

Should be done just in time to get the mvi done (due end aug).

The missus will get a month or two driving (possibly 2.5-3 months) and then back into winter storage. At least next summer she’ll get a full spring/summer/fall out of it.

Put the inspection scope down the header/converter combo to see what the honeycomb looked like. Surprisingly enough, no melting, no clogging. That, combined with no cat efficiency obd codes, gives me enough confidence to put it back in place and see what I get. If it starts throwing codes or other wise starts causing problems, I can always replace the cat later on…
 
Back
Top