
-
Welcome back Guest! Did you know you can mentor other members here at H-M? If not, please check out our Relaunch of Hobby Machinist Mentoring Program!
You are using an out of date browser. It may not display this or other websites correctly.
You should upgrade or use an alternative browser.
You should upgrade or use an alternative browser.
The Voron kit build thread
- Thread starter Ken226
- Start date
- Joined
- Jan 7, 2016
- Messages
- 3,377
Were you drinking too? LOLI got a few hours of assembly time in today after I got Sailboat, moonscraper and Skipper dialed in.
- Joined
- Jan 6, 2017
- Messages
- 1,252
A little more progress today. It's time to stop working and start boozin.


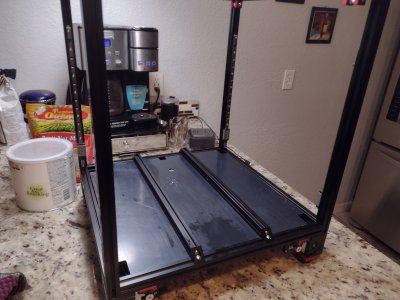
Routing the gantry belts is a tedious job. Luckily, the Voron manual is probably one of the best assembly manuals I've used.
Whoever designed this thing, including the manual, did a fantastic job. Also, the quality of the Voronkits.com parts kit is very good, as is the quality of the CNC machined aluminum parts kit.
The the aluminum parts are designed differently than the parts in the manual, so you have to do some thinking to figure out how it goes together. It also uses different sized fasterners. In some cases, assemblies that use both Voron kit parts and aluminum parts, go together differently and use less shims, shorter screws, etc. All of the screws are included in the kit. Everything fits, and appears to be well made.
So far, i have used every single part from the aluminum kit except the extruder parts.
I'll get to those tomorrow.
Last edited:
I put the Z axes motors/leadscrews/etc in, and the X axis is mounted to the Y axis. Looks like belts are next. I have one plastic part that is supposed to grab the threads of a screw, seems to be wrong hole ID, screw doesn't grab at all, clearance ID instead. Hmmm. Just pulled it out and measured it, this screw was the last one in the m5x40 bag but it is an m5x35. Good thing there is a spares/backup bag in this kit. Found another m5x40 and it works correctly. Lost one M5 nut so far to the floor, but haven't run out yet and I see there are spares in the backup bag. I have more hardware if needed.
The LDO kit is excellent so far. The only real annoyance is the difficulty of getting the T-Nuts into place.
The LDO kit is excellent so far. The only real annoyance is the difficulty of getting the T-Nuts into place.
- Joined
- Jan 6, 2017
- Messages
- 1,252
I put the Z axes motors/leadscrews/etc in, and the X axis is mounted to the Y axis. Looks like belts are next. I have one plastic part that is supposed to grab the threads of a screw, seems to be wrong hole ID, screw doesn't grab at all, clearance ID instead. Hmmm. Just pulled it out and measured it, this screw was the last one in the m5x40 bag but it is an m5x35. Good thing there is a spares/backup bag in this kit. Found another m5x40 and it works correctly. Lost one M5 nut so far to the floor, but haven't run out yet and I see there are spares in the backup bag. I have more hardware if needed.
The LDO kit is excellent so far. The only real annoyance is the difficulty of getting the T-Nuts into place.
My T nuts were easy if slid in from the ends, but where I didn't have access to the rail ends, I dropped them in at an angle, the stuck a small hex wrench into the screw hole and rotated till it snapped in. About 75% of the had to go in that way.
I had a few m5 t nuts in my m3 bag, but otherwise my kit has been perfect.
From the ends is not difficult, but tipping them in was tough. I didn't want to lever on the threads and possibly damage them so I used a spring loaded center punch and made a punch mark to the side of the top at an angle to impart rotation from the impact. Most took two hits to fully rotate.
Belts are on. I cut an extra inch and matched lengths for the second. Then I checked the remainder. There is probably barely enough for another pair left. Maybe. I should just buy a bunch and not worry about it.
")
Last edited:
- Joined
- Jan 6, 2017
- Messages
- 1,252
I've used the original belts on the Prusa MK3 for years. I keep spares but never have needed them.
Yea, same here. I have a drawer full of Flashforge Creator Pro spare parts. An entire heated bed assembly, a motherboard.
It's been several years and the only thing that needed to be replaced are the mk10 ptfe heatbreak tubes and nozzles. Ant that's been surprising to me, considering the number of plastic pulleys, idlers and how small the linear bearings are.
Giving how well this Voron is built, the thing should be utterly reliable.
Last edited:
I've had to relube the MK3 linear bearings, but that was at least partially due to the wrong lube initially. I didn't do anything from the factory because they didn't instruct us to, and later I used oil a few times which didn't last long before the balls start buzzing again. Finally I started greasing them and they have required a lot less maintenance ever since. I have spare bearings but as you have only needed to replace PTFE tubes and nozzles. I have upgrade kits to make it a MK3S+ but I've waited for a breakdown overhaul which hasn't happened. When the Voron is solid perhaps I'll work on the MK3. I also have a Bear frame for it that might be fun. One nice thing about the MK3 is that it is fairly small. It does need extra space for the bed to move, but the frame width is small for the print size, especially when it is not printing it can share some space. So it coexists nicely with things on the bench. The larger printers will probably end up in the room at the back of the garage. I want to keep one upstairs in my office, for now that will be the MK3. Eventually it may be a 160mm Voron Salad Fork which is a scaled down version of the Trident. Perhaps a 350mm Voron 2.4 or a 360mm Prusa XL would be good for the "print farm" for larger objects.