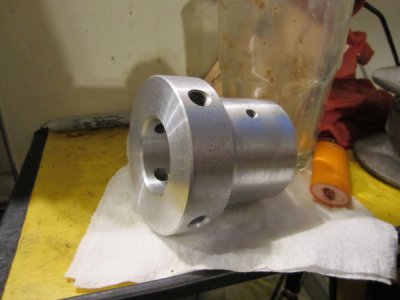
Some Ideas for Ease of Use

Crap. I suck at posting links. Try this one.

For your 3/4" shank cutters you could just make a flange that registers against the spindle nose and stick the shank straight in the TTS spindle collet. If the end mill is too short for that, you'll need an ER32 as you mentioned.

Thanks. I was just looking for a model at Grabcad to see if it had all the dimensions, but I haven't found one, yet. I'd probably need to hold one of the TTS holders in my hand to understand what I have to do.

The tool holders all seem to have a taper on the end that goes into their TTS holder. If I can just take my 3/4" R8 taper EM holder and grind the face flat, that taper can't be an important dimension, right? It has to be there just to help the tool changer pick it up and get it started easier (human or automatic changer).
 
Back to the other topic, I "found" a piece of 1/2" aluminum plate in the shop (it was hidden under some stuff and I forgot I had it!) so it seems natural to cut it to make a tooling plate. It's 20x14.

I don't know what size to make. If I make it wider than the table, I'm sure it doesn't buy me anything. My Y axis travel is a little low, like 6.65 instead of the factory 6.875, so if it's wider than that, I don't see the cutter can reach it. The X travel is normal. Other than supporting something unusually big, I don't see making the tooling plate bigger buys me anything.

Making it smaller: the size of the middle part of the table makes a lot of sense. The area between the outer T-nut channels is 4-1/2 wide, and between the channels on the ends it's 24 3/4 wide. If I make it as long as I can and 4-1/2 wide, I can get clamps from the T slots all the way around the table. I could put tapped holes and holes for 1/8" dowel pins in lots of places. Since my Tee nuts and clamping set all use 3/8-16, that seems like the size to use. As bonus, the middle of the plate would be on the center T-slot, so I can put some short bolts (3/8-16 x 3/4") in a couple of places to help mount it to the table

So it sounds to me like making it 20 long by 4-1/2 wide makes the most sense. Comments?


Bob
 
The taper is just there to ease insertion as you surmised. Probably also to keep a sharp corner from nicking the inside of the R8 collet if the shank is hardened. Put a 30 degree chamfer on the shank and then round it a bit with a file and some sandpaper.

As for your tooling plate... Something I've seen that might be useful to consider would be make it wider then your travels by a bit - maybe 1/2" or 3/4. Then when you're done with drilling/tapping it use an engraver or V-bit and engrave a shallow groove all the way around that helps you visually indicate the machine limits. You'll also need to drill & ream a hole in two corners for dowels that you might use to indicate the plate since the machine won't reach the outside. That, or some other feature(s) for squaring the plate to the X-Y axis if you have to remove it and then re-mount it.

Also, if it's a bit wider than the table you can have threaded holes outside your limits for clamping bit stuff. The clamp holes don't need to be precision located - just a few for some strap clamps.

Something else clever I've seen is to space it up off the table with 1/2" or 1" standoffs. If you use plenty of big diameter standoffs and mounting screws it won't flex that much and will make it WAY easier to clean the swarf out of the holes and the table slots. You won't need to use a million plastic screws to fill the unused threaded holes - just leave them empty and blow them out. The standoffs won't need to be super-precise in length because you'll bolt the plate down and use a fly cutter to deck the whole top a few 'thou with it's in place. That's why I suggested making it a bit bigger than the travels - but not bigger than a 2"-3" fly cutter can reach. Just plan on re-decking it every time you have to re-mount it.

All of this assumes that you aren't using strap clamps to mount it. 1/2" is a little thin, but some 3/8-16 flat head screws countersunk straight in to the T-nuts would keep you from having to worry about clearance heights over clamps at the perimeter. Just counterbore the holes 0.075" before you countersink and that'd give you plenty of extra fat to deck the plate a few times without running in to the screw heads.

If you have a big enough drop or drops from the plate, you could make a tooling plate that fits in your vise. NYCCNC on youtube has a video about this that may give you some ideas.
 
Thanks. I was just looking for a model at Grabcad to see if it had all the dimensions, but I haven't found one, yet. I'd probably need to hold one of the TTS holders in my hand to understand what I have to do.

The tool holders all seem to have a taper on the end that goes into their TTS holder. If I can just take my 3/4" R8 taper EM holder and grind the face flat, that taper can't be an important dimension, right? It has to be there just to help the tool changer pick it up and get it started easier (human or automatic changer).

The idea is that any 3/4 shank tool can be modified to work with the TTS system. The trick is that you need a flange on the tool to bear against the spindle. The TTS shank is about 1-1/2" long, and the flanges are about 5/8" thick. Because the flange has to be locked to the shank, you need some mechanical device to keep the flange from sliding down the shank when the collet tries to pull the shank & flange up against the spindle nose.

Method one is to use a tool with a shank larger than 3/4, and then turn the shank down. The flange then bears against the shoulder.

Method two, which I plan to do, is start with 3/4" ground stock. I'll then turn a groove for a C-clip 2-1/8" from the end of the shank. The 5/8" flange is then pressed (or glued) on the shaft and the C-clip acts as a shoulder to keep the flange from sliding down the shank. The flange is then faced off (on the spindle side) so the flange-to-spindle mating surface is true and the holder isn't pulled to one side when the drawbar yanks it in. Keeps me from having to turn down a perfectly good 1" or 7/8" bar to 3/4" just so I can have a shoulder for the flange.
 
In the interest of full disclosure, I've just started using the TTS system - having finished my drawbar a few weeks ago. I was having some problems setting up my 4th axis (also first 4th part) and noticed some runout on my edge finder when I was trying to touch off the side of the part. Getting the DTI out I measured +/- 0.003" at the end of the wiggler. 0.006" runout is way, way wrong.

Long story short - the Chinese TTS holders, Tormach collet, and my spindle taper are fine - all within 0.0001" or so. I measured "only" about 0.0015" of Z change on the face of the spindle nose, but figured maybe skimming the nose be the ticket. I've seen videos of people taking a light cut on their spindle nose with a lathe tool held in the vise, and Tormach's TTS user manual even describes doing this.

Turns out it was, and that when the TTS tool holder flange gets pulled up against the spindle nose any issues get magnified in to angular misalignment and resulting tool runout. Taking 0.005" off the nose in two passes and stoning the nose until the DTI read 0.00005" fixed everything. I now have 0.00015" (or better) 3" from the spindle nose regardless of tool holder orientation.

Moral of the story - plan on skimming your spindle nose if you switch to TTS. Carbide inset lathe tool run at 250RPM and manually jogged across the face at around 4IPM gave a good cut and 30 seconds with a very fine stone got the last few microns down and averaged the surface nicely.

-S

Very interesting. For some reason, yesterday I was thinking about doing just that.

I got the Mach3 2010.set going yesterday, and need to wire in the contact system. The hardest part will be getting my control box out of it's corner and onto a workbench so I can get to the BOB. Shouldn't take too long.

I'm going to get the tooling plate done before I work on tool holding, but these suggestions are really helping me. I sure hope they're useful to the HM community.

The TTS system has a lot going for it. I was thinking that I've got a tool box drawer full of cutters, and I just had to order a new size EM Friday. Most of my cutters are 3/8 shank from my Sherline, but they're still different cutters, some 1/8 shank, one 1/2, plus a few larger ones. The odd one is I have one of these sets which are all a different diameter - they will be harder to live with. If I figure I need 10 holders, as long as there's one dedicated tool holder with a tool assigned to it, even with buying everything from Tormach/LMS, it's not that bad. Even cheaper if I get some of those China.com holders to work.
 
Just for reference, I set up my 'starter kit' as follows:
10/ea ER16 Chinese TTS collet chucks
5/ea ER32 same source

1/ea 1/2" drill chuck + TTS arbor from LMS
2/ea 3/8 drill chuck +TTS arbor
2/ea 1/4" drill chuck + TTS arbor (the cheap package deal they offer)

Plus 1/ea 3/8" set screw holder I bought from Tormach a while ago as a guinea pig while I was building the drawbar. Now the wiggler lives in it.

I will probably wind up with about 5-10 home made set screw holders for frequently used, lower-speed tools like 1/4-20 taps and such.
 
TTS update 2:

My new outboard spider chuck just came out of the mill. The TTS system was stupid fast to change 5 tools (drill-mill to spot, Q drill, #7 drill, drill-mill for chamfer, 3/8-24 tap, 1/4-20 tap), and there was no wobble, run-out, misalignment or other issues with the tool holders.

Running that 3/8 tap almost an inch deep would, I think, have revealed any slip or tool holder problems. I'm sold.

Watching the 4th axis dance during the chamfer op was pretty magical. I'd post a video but it's too big and needs some editing.

IMG_3415.JPG
 
BTW, do you have a G0704 or something else? I've never tapped holes under power on the mill, but allowed my lathe to pull the tap in under power.

A spider chuck is on my list of things to make for some possible gunsmithing projects.
 
I have a Mikini 1610L mill. It's an orphan mill, company is out of business since about 2012. Superb mechanical parts, ferociously crap electronics. SumDood in California set up a company around 2006-7 to import the mill frames and he designed (or paid for design) & sourced all the electronics from backyard Chinese sweatshops rather than proven COTS components. The result was utterly unreliable spindle operation and some incredibly cheap, failure-prone components. The axis motors & drives he bought open-market; oddly enough those work fine and I've kept them.

Bought it last year knowing the reputation and I've spent the past 8 months gutting it and re-doing every eletrical component on the mill. New computer, BOB, spindle motor, VFD, etc. Price was right due to the known electrical issues, and it cut down on the time/effort of a manual to CNC conversion.

It's about the same size as a Tormach 1100, but has linear rails instead of turcite-coated dovetail ways. So mine is probably a touch less rigid, but much, much faster rapids and no gibs to adjust. The basic mill mechanicals are still being manufactured and sold under the brand SkyFireCNC, but with a few updates and far superior electronics.

As to tapping, I bought a big (too big, frankly) spindle motor with an encoder on the shaft and rigged up an index trigger on the spindle. The controller software I'm using is UCCNC and it has the capability of rigid tapping out of the box. Because everything is working well and the software isn't as (potentially) glitchy as Mach3, I can actually peck tap and not wipe out the threads.

Spindle speed goes up to 7400rpm, and I've set the rapids to 200IPM, but it can go a bit faster. Cutting speeds up to 100IPM without losing steps (with low-pressure tool paths). If I ever make some money with it I'll probably switch over to 750W servos just to bump the rapids and cut down on the irritating stepper noise. It's plenty accurate now, but I fantasize about UCCNC upgrading their motion controller & software so I can use servo encoder output to close the loop back to the controller.

And yes, the spider chuck is for my G4016 14x40 lathe for exactly the same reason you want one.
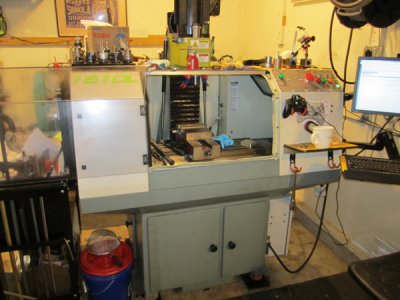
IMG_3354.JPG


The lathe mess. I'm a slob. Tablet is a home-made DRO.
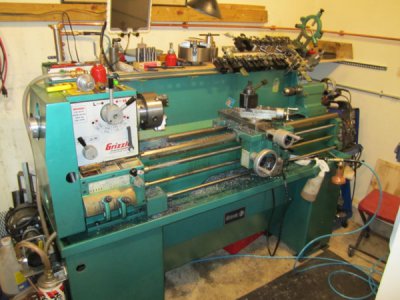
IMG_3416.JPG


The new spider chuck. 0.001" runout after tweaking the screws. Woo!
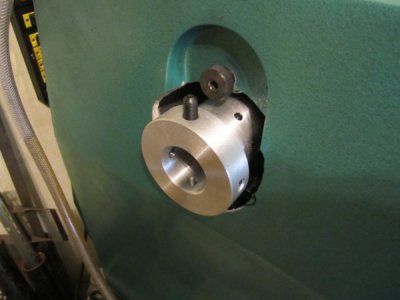
IMG_3417.JPG
 
Back
Top