Quarantine Projects!

I'm kinda takin a day off from the workshop.

I was going to try to make a morse taper but I don't have any appropriately sized steel. I found a good resource of dimensions though...

morse taper info.jpg


Maybe next week I'll find something else to work on. I've got an old toolpost grinder that needs a belt. Anyone know anything about making a drive belt from a strip of leather? It's a flat belt of course.
 
Got a few more small lathe upgrades I'm working on.

First I'm going to replace this flimsy aluminum sheet metal cover on my cross slide with a thicker piece that I can actually mount an indicator on. It only mounts with one screw though, I'll try it out but I may end up having to drill/tap another hole or two.

EM520782.JPG


I've got to figure out how to make the cover in such a way that it does not interfere with the taper attachment. I don't want to have to remove the cover whenever I use the taper thing.


Also I want to make an indicator mount/carriage stop. I bought a Mighty Mag base awhile ago but there's no good place to stick it with how the carriage is shaped.

I want it to clamp to the way like the taper attachment clamp and hold the indicator at an angle so the lights don't glare off of it.

EM520783.JPG

EM520784.JPG


Here's the rough idea. Clamps to the way and provides a flat surface on which I can stick the mag base. Disregard the numbers, they is wrong.

EM520786.JPG


These are some small things but will be useful in lathing.
 
Got a little further on my indicator holder thing.

I'm using my taper clamp as a pattern since I know it works. I ended up wanting the clamp to be a bit smaller in width though.

EM520797.JPG

I sheared off about 3/8" to try and keep the eventual indicator closer to the lathe bed. If it hangs out too far it won't hit the carriage like i need it to.


Giving the old No.38 a workout! This thing is so nice. The more I work in the shop the less I like grinding and cut off wheels. This material is 3/16" which is the max for the bench shear. It takes a lot of force but it shears pretty cleanly.

EM520798.JPG

The main drawback to this shear is the deformation. The drop piece is badly curled so I couldn't use this shear to cut up a long bar into short pieces for use. In fact even the larger piece in this pic is minutely bowed. I flattened it with a hammer before welding them together.


All clamped up.

EM520799.JPG


On the taper clamp I tacked the pieces together and did the drilling through both a once. This time I'm gonna try welding up the clamp then drilling/tapping.

EM520801.JPG

I didn't clean the metal as thoroughly as on the taper clamp and the weld looks a little more messy.


The other side welded.

EM520802.JPG


Next I'll drill and tap the holes for the clamping bolts then figure out where to weld on the leg that'll hold the mighty mag base.
 
Built a grinder rest for my long suffering often abused (survived 15 years on a bench in a carport in S. Florida) Delta 6". Not fancy, but functional and sturdy enough for my needs.

IMG_20200418_163045.jpg

IMG_20200418_163107.jpg

Finally nailed down a design for end mill storage that I like, and got them printed up. Each row has a recess on the bottom that fits into a half round in the top of the row above forming the staggered steps.

IMG_20200420_194021.jpg

IMG_20200420_193935.jpg

Also printed up a couple of peg board holders for hex drivers

IMG_20200420_194055.jpg

Still have one more design to print. Next up, running shop air to the lathe, but that involves getting up in the attic, and it's already getting hot here... ;-(
 
Built a grinder rest for my long suffering often abused (survived 15 years on a bench in a carport in S. Florida) Delta 6". Not fancy, but functional and sturdy enough for my needs.

View attachment 321700

View attachment 321701

Finally nailed down a design for end mill storage that I like, and got them printed up. Each row has a recess on the bottom that fits into a half round in the top of the row above forming the staggered steps.

View attachment 321703

View attachment 321702

Also printed up a couple of peg board holders for hex drivers

View attachment 321704

Still have one more design to print. Next up, running shop air to the lathe, but that involves getting up in the attic, and it's already getting hot here... ;-(

Ooohhh I really like those endmill holders!
 
Not fancy

Not fancy?! I think it's beautiful! Nice job! Looks to be highly adjustable and pretty solid.

And your endmills are standing tall! I like the easy identification. So much better than either rolling around in the drawer or in individual nondescript cases. 3D printing seems so cool to me. Might have to look into a unit someday.
 
Got my indicator holder done!

I couldn't for the life of me get the damn thing to line up properly. The amount that the clamp hangs off the bed and the small profile of the carriage just were not working out. I tried turning the lug on the back of the indicator 90 degrees and it seemed to allow a better alignment.

Here I welded on a piece of scrap which I'll eventually trim down.

EM520803.JPG


Welded up as square as possible.

EM520804.JPG


After a few times of holding the indicator in position and trimming the tab I arrived at this. I just drilled and tapped a 1/4-20 hole for the indicator lug.

EM520806.JPG


I'm not crazy about how the probe hits the carriage, but this was the best I could get with my set up. I might make/buy a disc type probe end. I think it might interface with the carriage in a more secure way.

EM520808.JPG


A few shots of the finished holder. With this design I think I can also thread a bolt into the clamp and use it as a solid carriage stop.

EM520809.JPG


I could also use a slightly longer bolt...

EM520812.JPG


I'd like to pick up a separate indicator for this clamp. Right now I'm robbing the one from my magnetic adjustable arm base. I use the adjustable arm to center up pieces in the 4 jaw, so I use it kind of a lot.
 
Quarantine project No:1 for me was to do some yard work, i bought a bunch of strawberry plants, and chosen a place in between both yards. I have an ugly concrete fence on which the footings are shown, so i decided to use couple of old tires to hide it and in the same time to get rid of a bunch of old tires. I had some help and the weather was beautiful, i used 15" tires in the bottom row and 14" cut in half on the top row, i also use different width tires to cover the ugly part. I filled all the tires with dirt and used couple of screws to hold them in place. Then i made couple of rows and planted the strawberry plants, to be honest i did not do any of the planting, i'm too rough with the plants. I'll leave it alone for couple of weeks, so the tires get washed by rain and bakehed by the sun, i'll come back with some paint to make them more interesting.
IMG_20200420_182654.jpgIMG_20200420_185709.jpg
 
Looks good, man! Your gonna have a lot of strawberries! They make the best jellies and jams!
 
Don't mind the quarantine so much, but the spring snow has me feeling confined. These are desperate times, so:

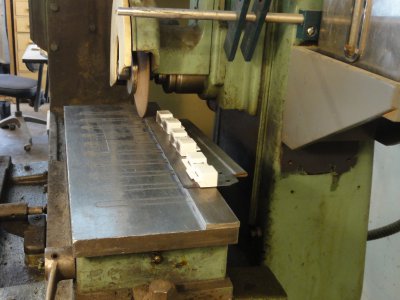
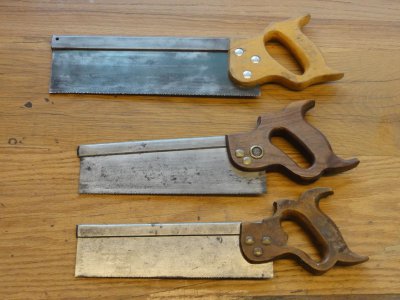
I ground the teeth off some old saw blades.
handsaws c.jpg
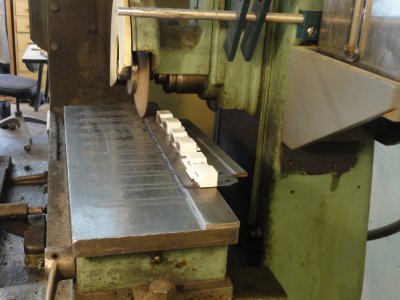
There's a dish wheel mounted backwards so I can watch the progress.

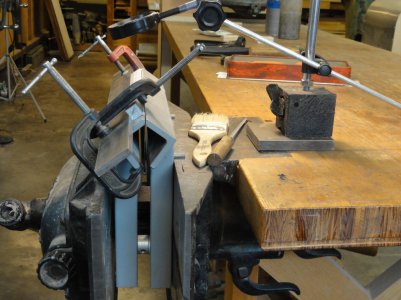
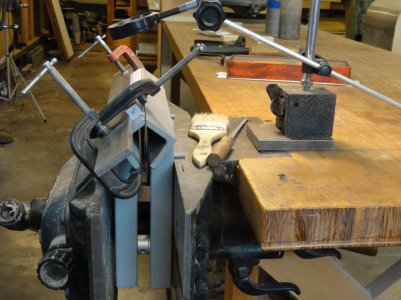
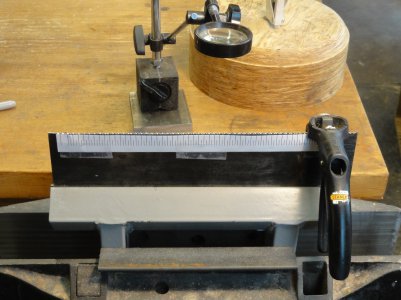
I set up my saw vise, shop made from heavy angle iron with ground jaws, on a low bench.

handsaws d.jpg

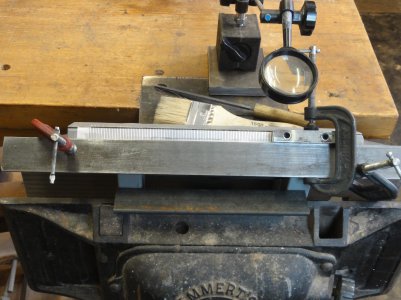
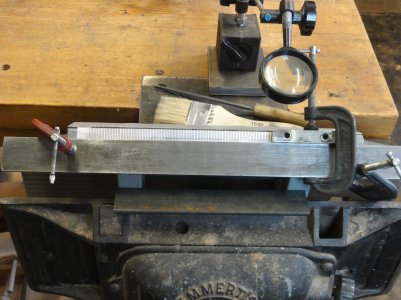
I cut in new teeth using 10, 12, and 16 tpi spacing guides I drew in AutoCad and plotted to scale--that's 128 uniform, very little teeth 16 tpi in an 8" saw.

handsaws e.jpg

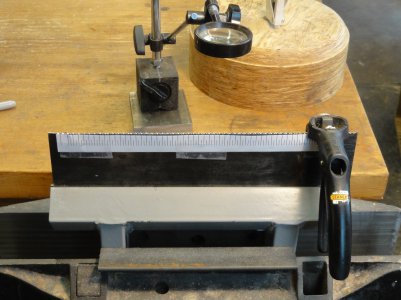
Then I set and sharpened them, every other tooth left and right. The double spaced guide was indispensable.

handsaws f.jpg

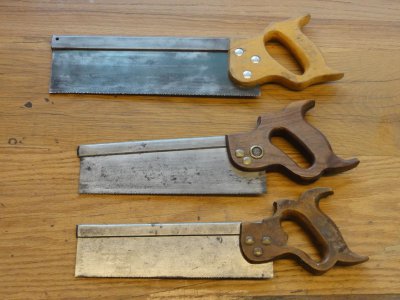
And now I have 3 sharp saws, ready to cut. I made a new walnut handle for the middle saw while I was at it.
handsaws b.jpg

This took me until the snow melted. I'm headed out into my woods to do some pruning and thinning--anything I don't need a magnifying glass for.
 

Attachments

  • handsaws c.jpg
    handsaws c.jpg
    260.4 KB · Views: 20
  • handsaws d.jpg
    handsaws d.jpg
    348.9 KB · Views: 17
  • handsaws e.jpg
    handsaws e.jpg
    362.8 KB · Views: 13
  • handsaws f.jpg
    handsaws f.jpg
    322.9 KB · Views: 14
  • handsaws b.jpg
    handsaws b.jpg
    155 KB · Views: 15
Back
Top