POTD- PROJECT OF THE DAY: What Did You Make In Your Shop Today?

Starting the "How am I going to do this" process.
Removal of the taper pin remnant from the bed.
Nothing wrong with your approach but I don't think you need the degree precision you are using. Even if the threaded hole is off some (maybe off a lot) it will work fine. I am envisioning a washer stack placed around the end of the pin and a fender washer on top of that. Maybe a number 10 screw?
Edit: I see you plan to use a #12. Fine as long as you have clearance.
 
Last edited:
I can't find the post that inspired this, and I've found that some guys have done this using a straight shank, but this is my take on a QCTP drill attachment. By reaming out the large boring bar holder that I don't use anyway to MT3, I end up needing only one MT3 drill chuck at the lathe.

The boring bar holder was 3/4", so I put a reasonably straight 3/4" bar through it so that it went fully through. Then, with the tool post loose, I moved the carriage in to chuck the bar, moving the cross-slide as necessary to vaguely remain in the middle of the backlash, until the block was right up against the chuck jaws. Bolt the toolpost down, lock the holder into place, and adjust the height nut. Don't touch the cross-slide. Lock it down if you have the means. The holder bore should now be locked into alignment.

Chuck the taper reamer. Verify it is straight. Lots of oil, at 80rpm. Took about five minutes. I didn't have to go all the way through, and to keep the sleeve from spinning as I got close to finish, I had to slide the 3/4" bar back in the backside about an inch and tighten the rear sleeve screw. Yes, it is abuse of a reamer, but the sleeves the Chinese put in these holders are fairly soft. I didn't need to go all the way through to get a firm hold, and I still have the locking screws for even more grip.
 

Attachments

  • DSC05276.JPG
    DSC05276.JPG
    426.9 KB · Views: 36
I can't find the post that inspired this, and I've found that some guys have done this using a straight shank, but this is my take on a QCTP drill attachment. By reaming out the large boring bar holder that I don't use anyway to MT3, I end up needing only one MT3 drill chuck at the lathe.

The boring bar holder was 3/4", so I put a reasonably straight 3/4" bar through it so that it went fully through. Then, with the tool post loose, I moved the carriage in to chuck the bar, moving the cross-slide as necessary to vaguely remain in the middle of the backlash, until the block was right up against the chuck jaws. Bolt the toolpost down, lock the holder into place, and adjust the height nut. Don't touch the cross-slide. Lock it down if you have the means. The holder bore should now be locked into alignment.

Chuck the taper reamer. Verify it is straight. Lots of oil, at 80rpm. Took about five minutes. I didn't have to go all the way through, and to keep the sleeve from spinning as I got close to finish, I had to slide the 3/4" bar back in the backside about an inch and tighten the rear sleeve screw. Yes, it is abuse of a reamer, but the sleeves the Chinese put in these holders are fairly soft. I didn't need to go all the way through to get a firm hold, and I still have the locking screws for even more grip.

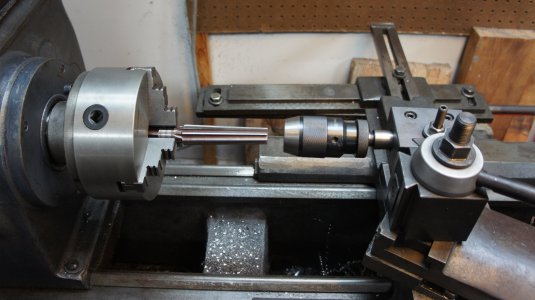
Goes to show me that I need to read the text before looking at the photo.... I looked at the photo first and went "What the heck is he doing!!???"

Another project added to the list :encourage:
 
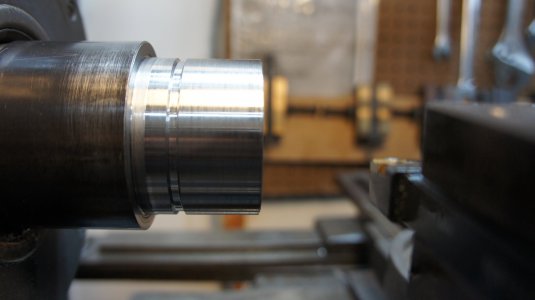
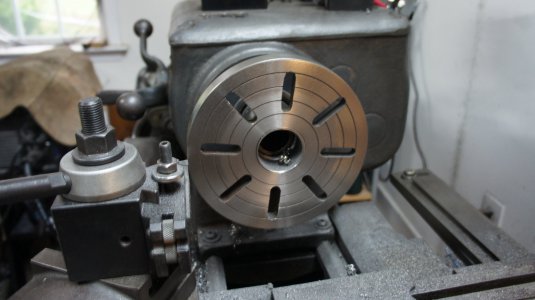
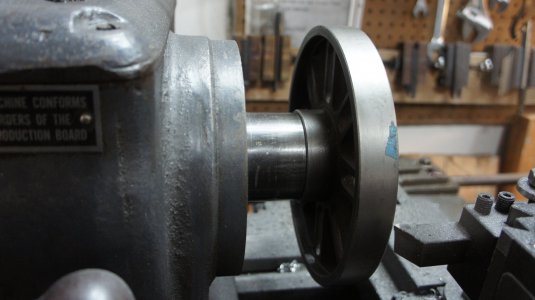
Made this adapter for the faceplate I got out of the pass around a box a few weeks ago. It's thread is 2-1/4"x8tpi. My lathe is 2-1/8"x8tpi. A nice exercise in turning, boring, inside threading and outside threading.
 

Attachments

  • DSC05240.JPG
    DSC05240.JPG
    267.1 KB · Views: 22
  • DSC05247.JPG
    DSC05247.JPG
    363.5 KB · Views: 22
  • DSC05248.JPG
    DSC05248.JPG
    378.4 KB · Views: 22
Nothing wrong with your approach but I don't think you need the degree precision you are using. Even if the treaded hole is off some (maybe off a lot) it will work fine. I am envisioning a washer stack placed around the end of the pin and a fender washer on top of that. Maybe a number 10 screw?
Edit: I see you plan to use a #12. Fine as long as you have clearance.
Have minimal experience with doing things of this nature and am not in any rush, so using the setup to play around and learn a few things.
Keeping with the overly complicated theme, I turned a small piece of steel DOM tube to fit over the pin and stud as the jack support.
 
The mag drill certainly will make it easy. You could also use that to guide your tap and keep it in line. Nice work.
 
Simple piece for the crane, started this morning, waiting for white paint to dry by killing time here.
IMG_5317.JPG
This will hold the bearing at the driven end of the driveshaft across the bridge beam, and be the anchor for the steel cable that suspends the electrical cable for the hoist.

Since the driveshaft will be exposed (out of reach) I may paint it with a spiral pattern just for fun ;)
 
I kinda hate t-handle chuck keys. Especially little ones, as used on my import flex-shaft grinder.

Behold the result of my ire… A quickie cut and paste with the MIG welder and an unneeded nut driver.

IMG_1989.jpeg
 
Back
Top