POTD- PROJECT OF THE DAY: What Did You Make In Your Shop Today?

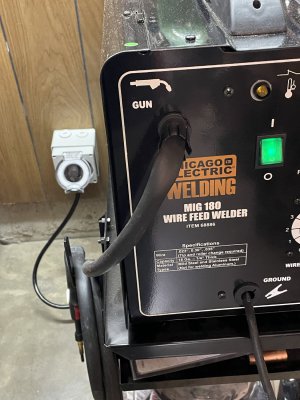
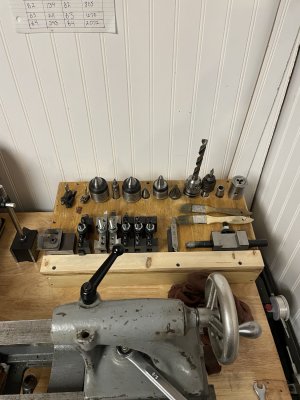
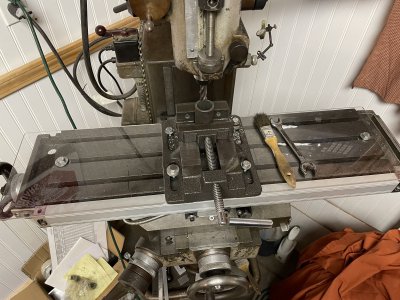
I'm trying to force myself to do the projects I’ve been ummm…avoiding due to their not so exciting nature I guess. So here’s a 50 amp circuit for the welder, a tooling organizer for the lathe, and some plexi guards on the milling table. I’d have liked to had flat head bolts for that, but the important thing is, that plexiglass isn’t leaning against the wall anymore. Ha!
 

Attachments

  • IMG_1859.jpeg
    IMG_1859.jpeg
    279.6 KB · Views: 36
  • IMG_1858.jpeg
    IMG_1858.jpeg
    285 KB · Views: 37
  • IMG_1857.jpeg
    IMG_1857.jpeg
    592.9 KB · Views: 36
Finished the body for the Hemingway Kits rotary broach because I need to make some custom parts for a car. Next I need good broaches.
c374b76d78fdc951dd66d5b01a974ced.jpg
93548b8ac0c7b2ab25e6f8518b03abbe.jpg


Sent from my SM-G970U using Tapatalk
 
I am still confused about how that Hemmingway kit works with radial bearings? I understand there is a eccentric shank. Is there also a build in angle to get the broach tip on center?
 
I'm trying to force myself to do the projects I’ve been ummm…avoiding due to their not so exciting nature I guess. So here’s a 50 amp circuit for the welder, a tooling organizer for the lathe, and some plexi guards on the milling table. I’d have liked to had flat head bolts for that, but the important thing is, that plexiglass isn’t leaning against the wall anymore. Ha!
Looks like you need to find a proper milling vise, even if it's an old style like my bridgeport. That drill press vise will let you down sometime, and would hate to find out it did more than just wreck your part.

Checkout craigslist, and facebook market place, and anywhere else. where you could check one out and pick it up.
 
You know those crazy cheap things where you get it and find out it's about 50% of the size you expected?

This time, it all worked out right! That "cutie" size mag base and arm matched up to the license plate like pb&j!

Now I have a "look down the bore" camera!

Yes, I need to de-swarf too much travelling...
a82e55226dfa2099d635ff6e733929f4.jpg
0c16ff9ac1d9ed5107b1851585516fcb.jpg


Sent from my SM-G715A using Tapatalk
 
I've mostly avoided this thread because it's so active and my project list already has several lifetime's worth of work on it -- too many cool things discussed here to distract me. But finally finishing this project today was just too much fun not to share.

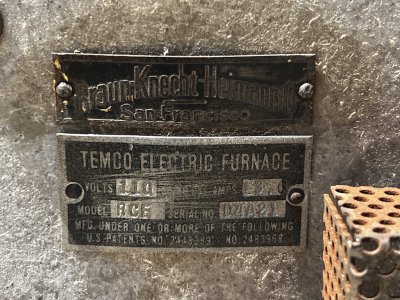
I just finished rebuilding a cool little vintage laboratory oven (I plan to use it to heat treat small parts). I wrote up all the gory details on my blog, but here's what it looked like when I acquired it:

IMG_1382.jpg

I hated to discard the cool front panel, but all the electrical bits were just too corroded and nasty to salvage. I also wanted a useful tool, which meant adding a thermocouple and PID controller.

Based on the company name (Braun Knecht Heismann company, “Assay and Mining Laboratory Supplies and Chemicals”) and the patents referenced, my best guess is the oven was originally built circa 1950.

Here's the final assembly with all the modern bits (all the asbestos is still intact!):

IMG_1491.jpg
 

Attachments

  • IMG_1487.jpg
    IMG_1487.jpg
    434.1 KB · Views: 12
I am still confused about how that Hemmingway kit works with radial bearings? I understand there is a eccentric shank. Is there also a build in angle to get the broach tip on center?
After turning the rear shank and the body, you mill a 1 degree angle on the back of the body where it mates with the shank. Then everything is at the requisite angle, but still concentric.

There is math involved in the design (calculated into the instructions so that you don't even have to worry about it) to keep the point on center with offsets.

Sent from my SM-G970U using Tapatalk
 
I've mostly avoided this thread because it's so active and my project list already has several lifetime's worth of work on it -- too many cool things discussed here to distract me. But finally finishing this project today was just too much fun not to share.

I just finished rebuilding a cool little vintage laboratory oven (I plan to use it to heat treat small parts). I wrote up all the gory details on my blog, but here's what it looked like when I acquired it:

View attachment 458068

I hated to discard the cool front panel, but all the electrical bits were just too corroded and nasty to salvage. I also wanted a useful tool, which meant adding a thermocouple and PID controller.

Based on the company name (Braun Knecht Heismann company, “Assay and Mining Laboratory Supplies and Chemicals”) and the patents referenced, my best guess is the oven was originally built circa 1950.

Here's the final assembly with all the modern bits (all the asbestos is still intact!):

View attachment 458110
Very nice. I have a larger oven I need to do the same with, did you do a write up of the process?

John
 
Looks like you need to find a proper milling vise, even if it's an old style like my bridgeport. That drill press vise will let you down sometime, and would hate to find out it did more than just wreck your part.
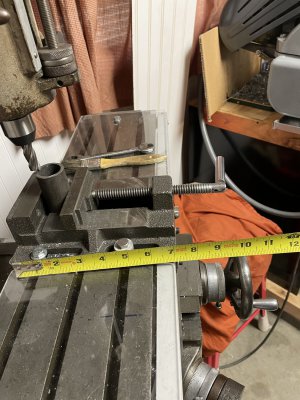
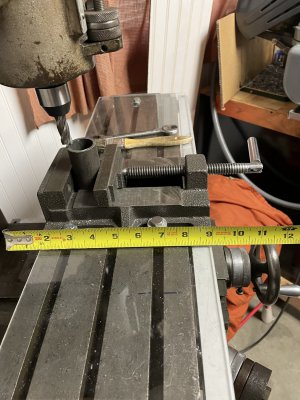
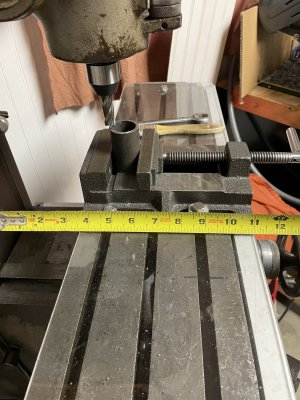
Thanks! My vise has a 1/4” cold rolled dynamic jaw retainer with alloy cap screws. If I could find a milling vise that fit this tiny table, I’d buy it. But even the 4” milling vise is much too long in my opinion. I’m either fowling the vertical dovetails, or fowling my knuckles with it.

Harold Hall has a set of instructions for modifying these drill press vises for milling. I’ve found it suitable (so far).

I can’t believe Delta Rockwell didn’t offer a vise for it. I hope to find a small shaper vise to use. But those are hard to find without a small shaper attached. Ha! image.jpg
 

Attachments

  • IMG_1862.jpeg
    IMG_1862.jpeg
    339.3 KB · Views: 20
  • IMG_1861.jpeg
    IMG_1861.jpeg
    331.5 KB · Views: 21
  • IMG_1860.jpeg
    IMG_1860.jpeg
    328.3 KB · Views: 21
Thanks! My vise has a 1/4” cold rolled dynamic jaw retainer with alloy cap screws. If I could find a milling vise that fit this tiny table, I’d buy it. But even the 4” milling vise is much too long in my opinion. I’m either fowling the vertical dovetails, or fowling my knuckles with it.

Harold Hall has a set of instructions for modifying these drill press vises for milling. I’ve found it suitable (so far).

I can’t believe Delta Rockwell didn’t offer a vise for it. I hope to find a small shaper vise to use. But those are hard to find without a small shaper attached. Ha! View attachment 458126
You can always use a small precision vice, what I like to think of as a grinding vise. Screenshot_20230826-094753.png
 
Back
Top