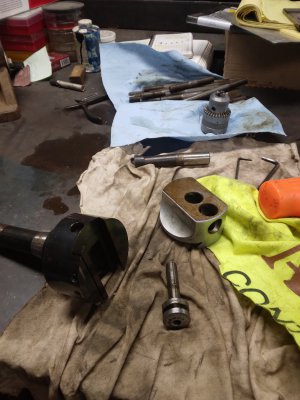
POTD- PROJECT OF THE DAY: What Did You Make In Your Shop Today?

@erikmannie
I've watched for many months as you buy coupons, weld, recycle coupons, etc. so I can't help but ask . . . what's your goal?
Maybe you've explained the 'why' previously, but I haven't seen it.
Don't get me wrong.
I'm not knocking it.
I'm just curious what you intend to do with the welding/coupon prep capability/experience you're developing.
Inquiring minds want to know. :grin:
 

Attachments

  • 16798717758974852036200119730065.jpg
    16798717758974852036200119730065.jpg
    289.4 KB · Views: 24
@erikmannie
I've watched for many months as you buy coupons, weld, recycle coupons, etc. so I can't help but ask . . . what's your goal?
Maybe you've explained the 'why' previously, but I haven't seen it.
Don't get me wrong.
I'm not knocking it.
I'm just curious what you intend to do with the welding/coupon prep capability/experience you're developing.
Inquiring minds want to know. :grin:

In short, I am only interested in developing welding & machining skills.

The long answer is that I will turn 57 pretty soon, & I have to work at my non-metalworking job until my 65th birthday. This day job pretty much takes up all weekdays & many Saturdays.

I don’t have anything else going on except for welding & machining. I prefer to spend most of my time welding coupons because it yields the most arc time.

I am happiest when I am either manipulating a weld puddle or cutting metal on a manual mill or lathe.

Sometimes I make something either for myself or someone else. For all the time I spend practicing welding & machining, I have always been able to execute the task at hand.

The only job in the world that interests me is teaching welding or machining to adults. After I retire, I hope to land work doing this. For all my practicing until then, I hope to be able to possess the skills which I will be being paid to teach.

I have had many metalworking instructors who were absolutely stellar, many who were shockingly underqualified, & a few in between these two extremes. I sure continue to appreciate the great instructors, & this definitely includes many of you knowledgeable guys on the forum.
 
Last edited:
I am using an engine lathe to face mill 5/8” mild steel plate. I had to switch to a 4J independent chuck, as well as use a benchtop mill to make a spacer (so that the plate sets flat in the chuck).

My initial settings are:
(1) “medium-to-fine finishing” carbide insert (probably a 1/32” nose radius),
(2) 250 RPM spindle speed,
(3) .005”/rev feed,
(4) .030” DOC

A lot of pictures:

E7DAA563-FCBE-49AA-84ED-C94E72A04FB5.jpeg

18E75B97-A974-4F13-867C-855A8B8A7050.jpeg

1CEA02D8-0364-4D29-A0DA-1862B1A325EE.jpeg

3BA7AB3D-5D48-44C6-B439-CC6883F23629.jpeg

6B876E45-86E1-4C33-8442-665BDC0D4600.jpeg

E8221A1D-4F35-4B1A-8B8E-5EDC0331C647.jpeg

2E6DEC68-103F-49D1-8FFE-7FAC21F7ACD1.jpeg

The problem that I had on the PM-25MV benchtop mill was the z-axis locking screws would come loose a little while I was using the fly cutter. This would cause the head to drop a bit while I was cutting. The way that I fixed this was just by tightening those screws a lot more.

Updated feeds & speeds:

(1) fresh insert,
(2) 180 RPM spindle,
(3) no change in feed rate.

The surface finish is disappointing:

BBE33352-945D-453C-BBBA-EE1F10A0BA5A.jpeg

I am doing a cleanup pass now, & there are a few more chips coming off. Maybe I should have increased the RPM on this spring pass.
 
Last edited:
I am using an engine lathe to face mill 5/8” mild steel plate. I had to switch to a 4J independent chuck, as well as use a benchtop mill to make a spacer (so that the plate sets flat in the chuck).

My initial settings are:
(1) “medium-to-fine finishing” carbide insert (probably a 1/32” nose radius),
(2) 250 RPM spindle speed,
(3) .005”/rev feed,
(4) .030” DOC

A lot of pictures:

View attachment 442649

View attachment 442650

View attachment 442651

View attachment 442652

View attachment 442653

View attachment 442654

View attachment 442655

The problem that I had on the PM-25MV benchtop mill was the z-axis locking screws would come loose a little while I was using the fly cutter.
That's a nice machine, I'd give certain body parts for that capability.
 
Today's project is in two parts, but I'm starting with the second one:

I spent about a half hour looking for my 1/2" wide Vinyl safety tape. After looking in the box where I should have put it for the third time, I turned over a plastic bag (that was on top of the other stuff in the box) and found it. To my credit, the side of the re-purposed bag that was upwards had a manufacturer's label that concealed the contents.​
Why did I need the tape, you ask? Well, you may have seen some of my photos that show the use of this tape and plain yellow tape in an attempt to keep me from banging into stuff:

Caution Tape.jpg
I keep telling you I have a small shop!


This is what I needed the tape for:

Week before last I commented on a post in Goofs & Blunders, noting that while I had added a Priest Tools Spindle Brake to my Mini-Mill years ago, I hadn't spent the extra money for the one with an interlock. After thinking about it a bit, I decided to make an investment in my mill's (and my own) safety and got the Deluxe Spindle Break Kit (also available in different variations for the LMS Bench Mill and PM mills). The installation is straight forward (you can see the instructions here), and I now have an electrically-interlocked Spindle Brake.​
I did make a couple of modifications to the installation:​
  • I made a slightly larger hole in the bottom of the Control Box so I could use a grommet to protect the cable from the edges of the box:

    Grommet Outside Annotated.jpeg
    This photo also shows where the Nylon set screw goes to secure the cable.

    Grommet Inside Annotated.jpeg

  • I did not remove the Bearing Dust Cover when I installed the plain Spindle Brake; I just removed the stock SHCS's and installed the plate with the longer SHCS's that were included, so after removing the old plate I left the Duct Cover in place and installed the new plate. I also added a dab of Vibra-TITE to the screws to keep them from working loose. Also, instead of using the jacking screws to adjust the height of the original plate, I used a 0.030" plastic sheet between the plate and the head:

    Plain Spindle Brake n Shim.jpeg
    No shim was needed for the Deluxe plate.

Oh, what about the tape? It's here, visible when the brake is engaged:

Safety Tape.jpg


And when the brake is dis-engaged:

Green Means Go.jpg
Green Means Go! I punched 3/8" circles out of a green adhesive label and stuck them over the ends of the magnets (what's the sense of having large-hole punches if you aren't going to use them?).

PM me if you're interested in the non-interlocked spindle brake kit parts; but take a look at the Priest Tools (#Not Sponsored) website and contact Greg Priest with any questions (he mentioned to me that if there was interest he could modify his Power Draw Bar kit to make it suitable for the LMS Hi-Torque Mini-Mills [and probably other SEIG Mini-Mills, I'm guessing]).
 
Last edited:
Another few days of catch up tool projects. Now that my foot (plantar fasciitis) is feeling better after 3 months of pain, it's nice to be comfortable in the shop again.

Today there were some air guns (blowers) that needed fixing. I really like these guns but they have a hose fitting that doesn't stay put or leaks. Bought a package of 3 and had fixed one by brazing a regular male quick connect fitting to it. The others were hanging there just waiting to also be fixed. I had wanted to do some TIG welding anyway just to keep from forgetting everything so decided to TIG braze them with silicon bronze. Had forgotten how much heat that takes to flow nicely.
DSCF5048.JPG

Been wanting to figure out a way to hold very short pieces ( both round and rectangle stock) for cutting with the band saw. As I was looking around and engineering in my head, I came across 2 very large V-blocks that have never been used. They came from a large machine shop that I liquidated for a friends father. They are bigger than what would probably ever be used on the machinery in my shop. Probably weigh over 5 pounds each. Had all the clamps and accessories with them. Taking one over to the band saw it was found that they were long enough to hold in the vise and still be able to use the clamp to secure a round piece up to two inches in diameter and just under two inches long.
DSCF5046.JPG

DSCF5045.JPG

I usually use step blocks to secure short flat bar stock in the band saw but the last time I couldn't find a pair that were small enough. Those small ones were also located near the big V-blocks.
DSCF5047.JPG

Day 2
I had quite some time ago made a brake for the shop press. It gets used pretty often but there was only one top die for it and it has been used to bend some heavy metal (1/4”) and had gotten beat up in the middle of the span since the metal is not hardened. Today the bottom, female, die was built up with weld and ground to be straight and with a nice sharp V in it for bending light sheet to a sharp angle. It can take up to 18” long. Then a new 6” top die was fabricated that will stand up to bending the heavy pieces. All the anvil mounts were cleaned up and new thumbscrew bolts made for each to make assembly and disassembly quick and easy.
DSCF5052.JPG
DSCF5050.JPG
DSCF5051.JPG

Day 3
Another build from several years ago had never had the finishing touches added. The slip roll, although used occasionally was awkward to put on a table and precarious to lift since it weighs about 100 pounds. Also many finger pinch points. :( Today I put lifting rings on it, added a dedicated mounting shaft that fits in a universal floor stand, and wired up the foot pedal with new wire and battery clamps. It uses a 12-volt wheelchair motor for power.
DSCF5053.JPG
DSCF5055.JPG

Day 4
Had 2 tappers that I could not use because they had MT2 arbors. The Tapmatic has some type of drill press taper so a new one was made with a straight shank.
DSCF5058.JPG

The Procunier was modified by turning and welding a 2-piece straight shank to it. Also made 2 collets (¼ & 5/16”) for the Procunier
DSCF5057.JPG
DSCF5056.JPG


All in all, days well spent as these fixes and improvements will make for happier building!

Thanks for looking.
Hope you enjoyed!
Aaron
 
A little progress on the silly foam milling project. Went from mess, to not so messy...
Foam1.jpgFoam2.jpg

To much more messy again...
Foam3.jpgFoam4.jpg


Of course, the weather was just starting to warm up and now we have 4 inches of fresh snow again. So I'll have to leave the heat on low in the garage for a while. The worst thing will be trying to remember where the extra gallon of concrete was dumped outside, if I have to blow snow again!

If anyone is wondering what this is for, it's a concrete base for a pendulum clock. This slab of concrete will get bolted to the poured concrete wall of the basement shop. That wall has a stud wall over it, which isn't actually affixed to the concrete (and would be horrible for the clock). The plan is to cut a hole in the drywall between two studs, then cut 8 small squares in the 1" foam against the concrete for the feet of this base. Spray foam will be used to insulate between the back of this base and the existing XPS foam board. A small gap will be left between the concrete and stud wall (maybe filled with low density seal strip or similar). This way the stud wall won't couple to the concrete/clock or vise versa.

Before that all happens, the concrete needs to cure fully. Probably keep it wrapped up in plastic and wet for the next three weeks or month (rumor has it concrete kept wet will double in strength in 20 days compared to concrete left to dry out after 4 days). It will then need to dry and be sealed with epoxy or similar paint on the back side. Face side will get finished with marine bondo or similar (Although the troweling turned out good). Then probably a good coat of epoxy paint or similar also.

Mounting will probably be with concrete anchors, Using a ring of JB weld putty as a gap filler. The plan will be to leave the JB weld about 1/8" thick, adjust the anchors until it's perfectly plumb. Then let the JB cure, and do a final light torque in the concrete anchors. The idea is to keep the anchors from loading the slab and cracking it.

Probably clean up the form and cast a second one, for a second upcoming pendulum project.

I've heard the phrase, green concrete. And this concrete is literally green. It's still pretty soft. Was able to soften a few sharp corners with a block and sandpaper. That'll probably change in a few days.
 
Last edited:
Just a little sheet metal work today. Bending up an exterior air vent for my new paint booth. It was a good opportunity to learn how to use Fusion 360 for Sheet Metal designs. I had the flat drawing printed at 1:1 scale at the local print shop for $9. Then used spray adhesive to stick it to some 20gauge aluminum sheet I had left over from another project. Then I cut it out with a sabre saw and bent it up on my Baily magnetic brake. You can just sort of see the Brake behind the vise in the picture.


PXL_20230328_202842659.jpgPXL_20230329_202502547.jpgPXL_20230329_202511821.MP.jpg
 
Back
Top