PM940 home made tramming tool

I did something similar on my Tormach 770. The 770 has the head fixed to the vertical carriage and is pinned at the factory using two tapered dowel pins, one at the lower left and the other at the upper right. My machine was slightly out of tram. I checked the vertical ways and corrected the slight misalignment. Fortunately, the head was close enough in the y direction to not require shimming but the the head needed to rotate to correct the tram in the x direction.

I pulled the lower left tapered pin and loosened the bolts holding the head to the vertical carriage, thus permitting a slight amount of rotation limited by the clearance holes for the bolts. In order to permit rotation in a controlled and precise manner, I needed a mechanism similar to your concept. I elected to do this in the vertical direction. A Tee shaped block was mounted on the head and straddled by a pi shaped block mounted on the carriage. Two 3/16"dowel pins and a single bolt were used to fix the Tee block. The pi block was fixed with two countersunk socket head cap screws. The legs of the pi block were tapped for 3/8"-24 bolts which are used to make the adjustment. Once the head was trammed correctly, the bolts were tightened and the lower left tapered pin was inserted to firm contact.

Tis is the original model. In production it was modified to add a second leg on the bottom of the Tee block.
Tram Adjuster.JPG


Here it is mounted on the mill.
Tormach Head  Adjustment.JPG
 
Congrats that looks awesome. Is it as big in person as you thought it would be when you ordered it? did you buy the leveling feet? If you do not mind a little advise, set the base and level it first then set the mill, it is far easier....
Oh yes, I need to move a lot of stuff to get this one through. I don’t know if it came with the milling machine if not will get them.. I am 5’10” and on the palette it was at two finger lower then my shoulder height. It is certainly big for me, then again I did not have one before so I am biased. I will move the base first as I need to verify also the movement I need to make to get it in. So I will do a few dry runs before actually doing it. I am waiting for my brother to help me out and I don’t want to do this one alone. Then it will have to wait till weekend for the cleanup and measurements, and me figuring out what the heck is this equipment doing in the garage ;).
 
Oh yes, I need to move a lot of stuff to get this one through. I don’t know if it came with the milling machine if not will get them.. I am 5’10” and on the palette it was at two finger lower then my shoulder height. It is certainly big for me, then again I did not have one before so I am biased. I will move the base first as I need to verify also the movement I need to make to get it in. So I will do a few dry runs before actually doing it. I am waiting for my brother to help me out and I don’t want to do this one alone. Then it will have to wait till weekend for the cleanup and measurements, and me figuring out what the heck is this equipment doing in the garage ;).
I bought the yellow leveling feet from PM, have them under my lathe as well, they make things much simpler and sit on rubber to dampen vibrations.
Mill Foot.jpg
 
I hope you have something better than a engine hoist to lift the mill up on the base.

I bought the 2k and it was a bit spooky, and had to choke up pretty tight on my strap.

I suggest that you try to lower the head down as far as it can manually first (unlock the Z gibs, lower then lock again), then run the Y axis all the way into the column (max travel). Also snug up the three head rotation bolts (Left, Right, and Bottom) - mine were not. This will balance out the weight better for a level pick from the neck.

Gallon of WD 40, spray bottle, some lint free paper shop towels and have fun.
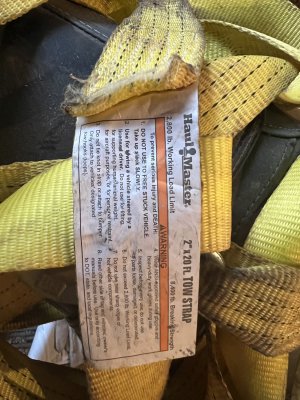
The straps I have are a bit long. What length should I am for?
 
Take one end of the strap about 6" above the head at the throat, wrap it around to make a basket and match up to the other end then measure. You might be able to wrap it around 2x and be short enough.

I can not remember what I used. I have a large variety of slings and rigging in my service truck so I had the option to mix and match.

How long is yours, and what type? Post a pic.
 
You could do this with a ratchet strap of significant rating (3k# minimum) which would be a 1.5" wide nylon webbing, 3/32 -1/8" thick (not the stupid thin ones). AT YOUR OWN RISK! This is not ideal, and the ratchet straps are not designed for lifting. Ergo the 2-3x the weight rating of the strap vs the mill.

Put the hook from the long end of the strap into the hoist chain (with the hoist lowered to where you want to start lifting), then go around the throat 2x. Now hook the ratchet end to another link in the chain on the host, pull the slack through the ratchet; leaving about 3" of slack, then ratchet up the slack until it's tight ish and centered... You will want at least 2.5 wraps of strap around the ratchet drum (6 layers).

----no matter what you use for rigging do this-----

Lift slowly until the mill is just cleared of the pallet - 1/8" daylight - , then give it a shake & wiggle. If the hook slips off or some other failure it won't drop far onto something springy.

When moving the mill, keep it low to the ground without it swinging and hitting the ground until you are where it needs to be lifted to full height and set on the base. Once you get about 1' in the air, you are at the point of no return and it won't matter if it falls from there or 4'. Catastrophic damage.

Keep your self, helper, and fragiles out from underneath, and from between the mill and other stuff that won't move READ - Pinch Point.

Slow and steady wins the race.

NOTE - You will scratch and chip the paint and bondo setting this up. It's gonna happen. These mills are slathered in bondo to cover up the casting flaws, and the darn things were not allowed to dry/cure completely before assembly.
Thank you so much.will go to buy that one now.
 
Back
Top