Hints and Tips

How to weld ABS and Styrene plastics. With MEK gone, the new MEK does not weld ABS like the old stuff did. I had some ABS I was throwing out and decided to use it as a test. I had a can of gumout carb cleaner.. for the test I just sprayed it and bonded the two parts together. It worked real well. Acetone alone was not working.. But the toluene and acetone may be the trick.

My Yakima rocket box cracked again during the trip up to my son's, which is when I use the most these days, as I rarely ski anymore, and don't compete with sailplanes around the country. At first I sprayed some, but it was a mess. So I grabbed an old glue syringe and sprayed some in, then dispensed it along the crack and it welded fine.. I did both sides. The syringe won't hold the gumout, it runs out the needle, it's too thin, not viscous enough, but it still did a good job .
PXL_20240414_185042496.jpg
inside
PXL_20240414_183957713.jpg

Outside sanded.
PXL_20240414_184023926.jpg
 
Needed to make a new saddle for the Bison Chuck.
after roughing it out, I decided that wasn't good enough.
So I attached a small combo square using the cast piece to keep it square, then rotated it and scratched the better red line for band sawing.
Then sanded after..
PXL_20240418_151907364.jpg
 
Needed to make a new saddle for the Bison Chuck.
after roughing it out, I decided that wasn't good enough.
So I attached a small combo square using the cast piece to keep it square, then rotated it and scratched the better red line for band sawing.
Then sanded after..
View attachment 487065
I made a similar cradle for our D-6 camloc chuck at work.

I've actually taken to clamping the tailstock quill with the chuck to ease the transition from it being mounted/unmounted to save my back.

I use a quill condom (Thin cardboard sleeve) to protect the quill and then all I have to do is rotate the spindle by hand and turn the quill handle to mount it.
 
Needed to make a new saddle for the Bison Chuck.
after roughing it out, I decided that wasn't good enough.
So I attached a small combo square using the cast piece to keep it square, then rotated it and scratched the better red line for band sawing.
Then sanded after..
View attachment 487065
A great idea. I tore a tendon in my wrist last January and it is difficult at the moment to jockey my 4 jaw chuck into position. This would definitely help.

I have a 3/4" straight shank on my boring head so I would mount the boring head in either my 5C collet chuck or the 3 jaw and use the lathe to carve the cradle after using the band saw to rough it out. I would use some straps fastened to saddle at the follower holes to fix the block and allow it to feed into the cutter with my power feed.
 
Needed to make a new saddle for the Bison Chuck.
after roughing it out, I decided that wasn't good enough.
So I attached a small combo square using the cast piece to keep it square, then rotated it and scratched the better red line for band sawing.
Then sanded after..
View attachment 487065
Remove the jaws, push the block against the chuck body and use a sharp pencil??
 
Remove the jaws, push the block against the chuck body and use a sharp pencil??
I had tried that. not enough room to get in and under, and the base jaws are still there and space it. Hence the more accurate way. Also much closer being no offset.
 
Finally got around to doing something for myself yesterday in my shop.

I put an oring groove in the cross handle of my tap holder. This way I can push the handle out if needed, otherwise it will hold itself in the center, so it does not fall out by itself when turning on the lathe. I could just keep the small Allen wrench handy, but that’s too much work. I also plan on adding oring grooves to each end, so that way I can easily move it side to side in tight areas.

I also made an adapter plug for this vacuum oil change container I had picked up somewhere. Should make easier some jobs when I need to change the oil, or pump out old gas from gas tanks.

49018cc4b303204063b80babde2f96d2.jpg

c515c59c671305c2a7ffa507870f6ee3.jpg

293b5321ea74be846df6e1641cc73a09.jpg

6c51dd1a85fe1fe31f4f996783d6f5cb.jpg

00b8bcbbb833193cfeb6f467fde12ecd.jpg


Sent from my iPhone using Tapatalk
 
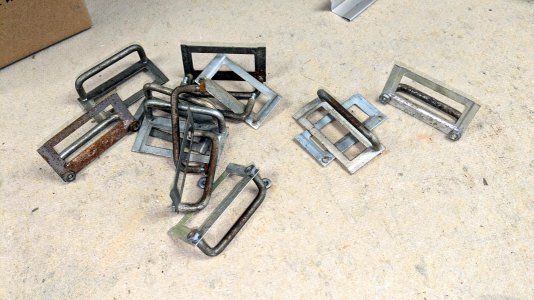
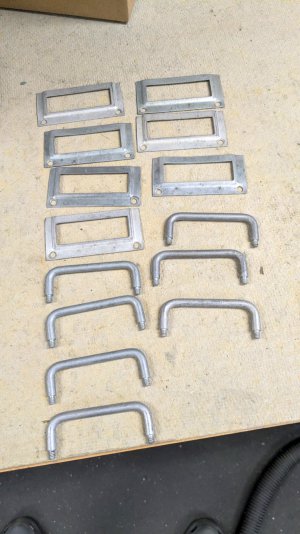
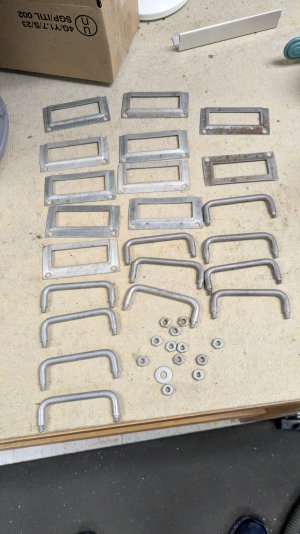
Been using sand in the HF small vibratory tumbler lately.
I had 22 pulls and windows to do. This is a small sampling. I split them in 1/2 . It's just play sand dried out , after 3 uses, the sand is dark, so lots of material is in the sand now.
It has been better at cleaning up parts lately, than my ceramic triangles or balls. It almost looks like bead blasting.
For a small part count it pays to blast, but for a large count, I'll tumble first. Gotta get the blast cabinet working.
 

Attachments

  • PXL_20240728_200359016.jpg
    PXL_20240728_200359016.jpg
    565.1 KB · Views: 21
  • PXL_20240730_151350405.jpg
    PXL_20240730_151350405.jpg
    501.9 KB · Views: 22
  • PXL_20240730_193134354.jpg
    PXL_20240730_193134354.jpg
    498 KB · Views: 22
Ok, not so great, buttttt it's an idea.
I had used the cheapy $3 HF wheels, and overloaded the heck out of them. They lasted a surprising time. One of the wheels lost it's tires so time to replace. But first, I just drilled 4 plates for the cabinet I am rebuilding. And had I had this as a template it would have been nice. So drilled out the kingpin and now I have a template to stick in my caster drawer.
PXL_20240925_003114182.jpg
 
Back
Top