2021 POTD Thread Archive

It's been 40 + years since I built my engine. so I don't remember issues with the cam installation other than getting the 2 dots or marks to line up, nor do I recognize that rod as a tool.
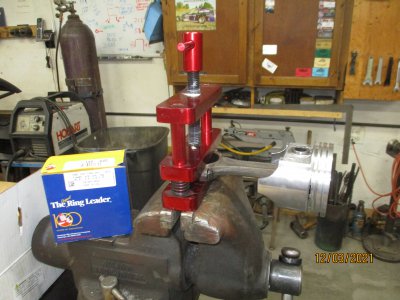
What's it do?
 
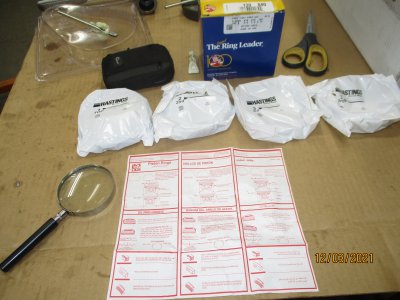
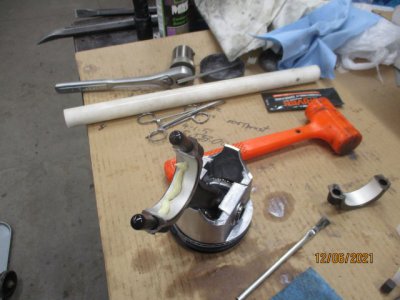
I've been around this stuff since I was a kid helping my big brother (+18 yrs) do a ring and valve job on his pre-war Chrysler, and I've always liked the Hastings Piston Rings man, big square jaw, a smirky smile and friendly wink. The instructions haven't changed much since then, except they're printed in six languages and too small for me to read. A connecting rod vice makes the job a lot easier now, back in the day you held them between your knees when wrapping the rings. I always take one of each ring, put it in the bore. square it up with a piston and check the gap. I don't care how much the gap is, the Hastings guy figured that out for me, I just want to make sure they all have a gap.
 

Attachments

  • IMG_0011 (5).JPG
    IMG_0011 (5).JPG
    5.3 MB · Views: 39
  • IMG_0010 (3).JPG
    IMG_0010 (3).JPG
    4.9 MB · Views: 41
POTD was making a new pulley for my weight machine. Started doing a set and things sounded "funny". The pulley over the weight stack had split.


25+ years of use, finally split the upper pulley of our weight machine.
20211204_102112.jpg20211204_102122.jpg

The machine uses a 3/16" diameter cable which I've replaced multiple times. I could see from the pulley face that the cable had worn the surface to the point that one side split.
20211204_113720.jpg


The bearing was fine, plan was to make a new pulley from aluminum. The OD was a little over 3 1/2". Started by cutting off a chunk from a 4" aluminum round. Faced both sides and drilled a through hole for mounting the blank on an expanding mandrel.

My plan was to turn the 4" round down to the correct OD, then face the right hand side to the correct width. I like this style of mandrel, but I've found cutting forces need to be from right to left or the mandrel will loosen on the tapered arbor. Well, best laid plans as even just working the RH side, the mandrel backed off the arbor a few times during turning. After getting the OD to size and the width cut, I changed to an expanding arbor for the shaping of the pulley groove.


Faced both sides
20211204_121330.jpg

Turning the OD to size using an expanding mandrel
20211204_123421.jpg

Faced the RH side to the proper width. The plan was to mount the finished pulley after the groove was cut in the 3-jaw and bore the center for the bearing. The extra shoulder of material would be removed then.
20211204_131904.jpg

Mounted the pulley on an expanding arbor to cut the groove
20211204_140915.jpg

Used a pippin file to work a groove on the pulley face
20211204_152253.jpg

Bored a pocket for the pulley bearing.
20211204_142648.jpg


Oh, I know how observant guys are on this forum. No, I did not continually flip the jaws of my 3-jaw chuck from inside to outside and back to inside. My Grizzly 14x40 came with a 6" 3-jaw which looks too small. I upgraded with a set-tru 8" 3-jaw a few years ago, leave the inside jaws on the 8", outside jaws on the 6". I find it much quicker to swap chucks than to swap the jaws.

As an aside, I thought my DRO was acting up as the diameter number was fluctuating after making passes to form the "V". New one on me, the insert screw had loosened up so the insert was sliding in the tool holder. I guess I should watch the cut more than staring at the number on the DRO, would have obvious if I was concentrating on the cutting tool. The problem was when I retracted the tool, I didn't move it off the work so it dragged some when backing out of the cut which took the insert with it.
20211204_142522.jpg


The bearing was originally very lightly pressed into the pulley. The original design had a bushing/washer on one side of the pulley to keep the pulley from walking on the bearing. I made this part from a piece of either Delrin or UHMW plastic (don't know which it was). Faced, bored a center hole to clear the center bushing on the inner race of the bearing, cut a shoulder to fit into the pulley. Lastly, parted to a width so the center bearing bushing extended out of the plastic bushing by 0.020". This was so the weight machine bracket clamps on the inner race bushing instead of clamping on the face of the plastic bushing.


Faced, bored, checked fit of the shoulder to the pulley and parted
20211204_155649.jpg


Finished pulley/bushing.
20211204_160208.jpg


All back together!
20211204_164823.jpg


Thanks for looking,

Bruce
 
POTD was making a new pulley for my weight machine. Started doing a set and things sounded "funny". The pulley over the weight stack had split.


25+ years of use, finally split the upper pulley of our weight machine.


The machine uses a 3/16" diameter cable which I've replaced multiple times. I could see from the pulley face that the cable had worn the surface to the point that one side split.


The bearing was fine, plan was to make a new pulley from aluminum. The OD was a little over 3 1/2". Started by cutting off a chunk from a 4" aluminum round. Faced both sides and drilled a through hole for mounting the blank on an expanding mandrel.

My plan was to turn the 4" round down to the correct OD, then face the right hand side to the correct width. I like this style of mandrel, but I've found cutting forces need to be from right to left or the mandrel will loosen on the tapered arbor. Well, best laid plans as even just working the RH side, the mandrel backed off the arbor a few times during turning. After getting the OD to size and the width cut, I changed to an expanding arbor for the shaping of the pulley groove.


Faced both sides


Turning the OD to size using an expanding mandrel


Faced the RH side to the proper width. The plan was to mount the finished pulley after the groove was cut in the 3-jaw and bore the center for the bearing. The extra shoulder of material would be removed then.


Mounted the pulley on an expanding arbor to cut the groove


Used a pippin file to work a groove on the pulley face


Bored a pocket for the pulley bearing.


Oh, I know how observant guys are on this forum. No, I did not continually flip the jaws of my 3-jaw chuck from inside to outside and back to inside. My Grizzly 14x40 came with a 6" 3-jaw which looks too small. I upgraded with a set-tru 8" 3-jaw a few years ago, leave the inside jaws on the 8", outside jaws on the 6". I find it much quicker to swap chucks than to swap the jaws.

As an aside, I thought my DRO was acting up as the diameter number was fluctuating after making passes to form the "V". New one on me, the insert screw had loosened up so the insert was sliding in the tool holder. I guess I should watch the cut more than staring at the number on the DRO, would have obvious if I was concentrating on the cutting tool. The problem was when I retracted the tool, I didn't move it off the work so it dragged some when backing out of the cut which took the insert with it.


The bearing was originally very lightly pressed into the pulley. The original design had a bushing/washer on one side of the pulley to keep the pulley from walking on the bearing. I made this part from a piece of either Delrin or UHMW plastic (don't know which it was). Faced, bored a center hole to clear the center bushing on the inner race of the bearing, cut a shoulder to fit into the pulley. Lastly, parted to a width so the center bearing bushing extended out of the plastic bushing by 0.020". This was so the weight machine bracket clamps on the inner race bushing instead of clamping on the face of the plastic bushing.


Faced, bored, checked fit of the shoulder to the pulley and parted


Finished pulley/bushing.


All back together!


Thanks for looking,

Bruce
Nice save Bruce!!!! :eagerness:
 
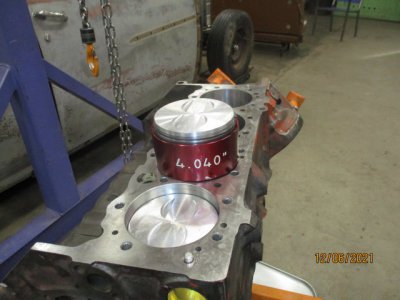
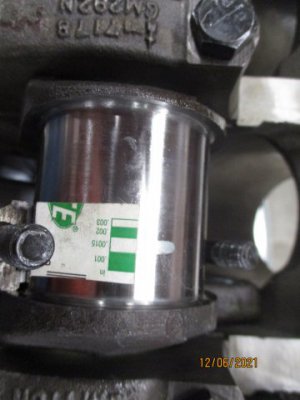
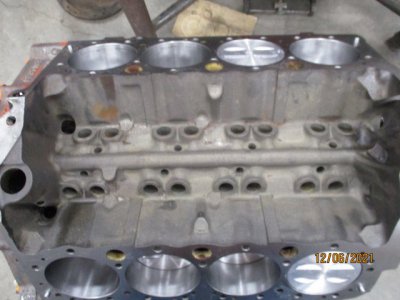
Didn't have a good picture to post yesterday, Handsome feller for 100 years old. I love these tapered ring compressors, I wipe the bore and the piston skirts with 30 wt motor oil and they practially slide themselves in. The pistons are cast and don't expand much, cold they have .002" clearance. A gob of lubriplate 105 and two vacuum caps for shaft protectors and she's ready to go in. I Plasti-gauge all the bearings just to be sure, a few years ago a neighbor put a 302 ford together for his hot rod, when he fired it up and it had about 4 psi oil pressure. The crank had been ground mains -.010 and rods -.020. he had bought -.010 main and rod bearings, no he didn' t use Plasti-guage. All fitted up and waiting on the heads.
 

Attachments

  • IMG_0016 (3).JPG
    IMG_0016 (3).JPG
    90 KB · Views: 37
  • IMG_0012 (2).JPG
    IMG_0012 (2).JPG
    51.8 KB · Views: 33
  • IMG_0014 (2).JPG
    IMG_0014 (2).JPG
    55.3 KB · Views: 32
  • IMG_0013 (2).JPG
    IMG_0013 (2).JPG
    29.5 KB · Views: 29
  • IMG_0015 (1).JPG
    IMG_0015 (1).JPG
    51.8 KB · Views: 39
I Plasti-gauge all the bearings just to be sure
Yup. My Old Man was adamant. Mains are easy to plastigage. Rods are a slight bit more tedious. He did not care. It had to be done. ALL of them.

One mechanic in town sold an engine to a customer that had ONE rod at .020 under, and the other three at .O10. Not a practical business model...
 
A machine shop in Worcester Ma gave me .020 over main bearings for a factory .001 over crank. When I picked everything up I asked for some plastigage, and the guy said, what do you want that for, you don't need that. He said that they never use it. I wanted some anyway.
After torquing the first main bearing the crank was locked up. I didn't need it to find this problem, but I use it to check every time.
 
Back
Top