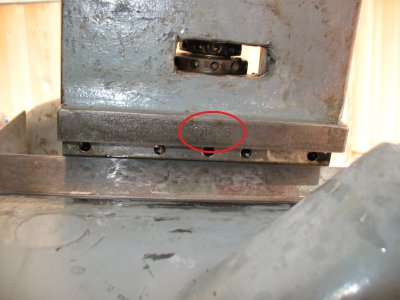
ran the #12 table past the limit!!

Hello Cal,
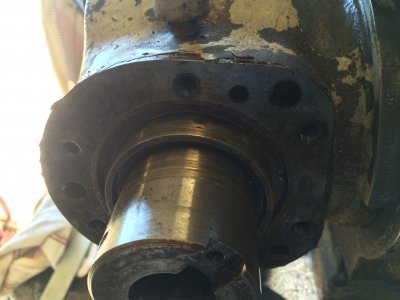
Pulled the rear bearing cleaned and repacked and reassembled. The grease was about the consistency of modeling clay. I pulled the front cover off and can't tell how to unload that bearing. Or does the cover hold it in place while the rear spanner nut loads both bearings? If that's the case removing the set screw shown at the top should let me get that"collar" off and reveal the bearing. Am I on the right track?

Thanks in advance,
Les

Rear bearing dated 10/6/1942- Bearing and race both looked perfect

IMG_1228.JPG
 
Hello Cal,
Pulled the rear bearing cleaned and repacked and reassembled. The grease was about the consistency of modeling clay. I pulled the front cover off and can't tell how to unload that bearing. Or does the cover hold it in place while the rear spanner nut loads both bearings? If that's the case removing the set screw shown at the top should let me get that"collar" off and reveal the bearing. Am I on the right track?
...
Hi Les,

Here's a drawing of your cutter-head:
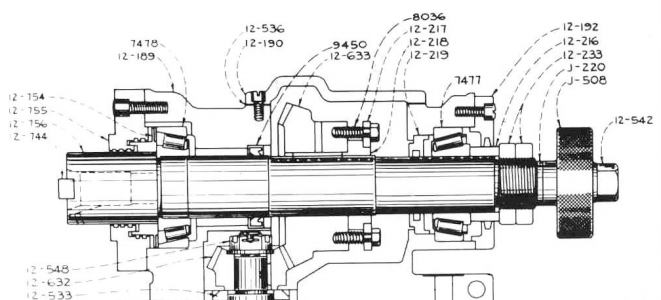
VN12_10 cutter-head.png

The "collar" is 12-754. It and the end cap form a labyrinth seal that was used in lieu of an oil seal. It allows excess grease to escape through the labyrinth. These heads had a reputation for spitting like an angry camel, due mostly to over greasing.

If you don't have the manual with that drawing in it, send me an e-mail and I'll send you a copy.

You should be able to loosen the setscrew and remove 12-754. This will give you access to the bearing. You can flush out the old grease and repack without taking the spindle apart. The only way to get the bearing out of there for thorough cleaning is to disassemble the spindle, which I DO NOT recommend.

Since you had to remove the threaded collars on the back (J-220) to get to the rear bearing, you will have to adjust the pre-load on the bearings: Set the head horizontal. Protect the end of the spindle with block of wood and use a dead blow hammer to tap the spindle to the rear, loading the front bearing. Set an indicator against the face of the spindle and set it to zero. Lift the indicator off of the spindle and tap on the back of the spindle to load the rear bearing. Note the difference in indicator readings. Repeat your readings a few times to make sure that you're getting the same reading each time. You should see between 0.0005 and 0.0008" difference in readings. Adjust the backlash by tightening or loosening the inner threaded collar, then hold it with a spanner and tighten the outer collar to lock it in place. Recheck the backlash after you finish tightening the collars.

Did you take any photos of the rear bearing?

What's the serial number of your machine? (You can find it stamped on the top of the vertical dovetail way for the knee.)

Cal

VN12_10 cutter-head.png
 
Thanks again Cal. I'd love to have a copy of your manual if it's not too much trouble. I'm taking a long weekend trip starting today but am excited to get back to it this next week.
I loaded the bearing like I would do a wheel bearing. I'm glad you shared right method.
I'll get the serial # next week

Les
 
...
I loaded the bearing like I would do a wheel bearing. ...

A lower precision version of the bearing is actually used in some truck axles.

How did you get the cone (the inner race and rollers) off of the spindle for packing?

Cal
 
Cal,Once I got most of the old grease washed away it slid off with no problem.I soaked it for about an hour in some hot parts cleaner then let it rinse for 15 minutes or so in my parts washer. I rolled each individual roller and inspected through a loop. Not a mark on the bearing rollers anywhere. Rinsed out the race and while not able to look at it with the loop it looks perfect as well. Packed the bearing cage in my palm with the grease you recommended till it squeezed out the top ,rolled it through a couple times and wiped off the excess.
 
I'm surprised that the cone would just slide off. I would expect it to be a light press fit.

Note to others: Most models of the VN12 cutter-head don't require that the threaded rings that preloads the spindle bearings be removed to service the back bearing. But in Les's case, he had to remove them to get the rear plate off. You can usually flush the old grease out with kerosene and re-grease using the head's grease fitting to load in new grease.

Cal
 
Cal,
The serial # is 820. The front bearing was clean with very little grease. After greasing buttoned everything up and checked the end play. Looks to be about .0003-.0006. My indicator is .001
so I'll check with a better one and then report.

Les
 
Hi Les,

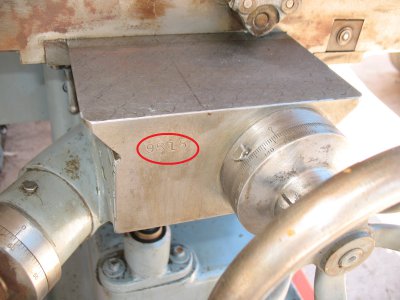
The serial number should be 4 digits long, often prefixed by "12-". Based on your cutter-head, I would expect the first digit to be either a 5 or a 6. It's easy for digits to get lost in decades-old grease and grime. You can also look on the front face of the knee, to the left of the Y-axis hand-wheel dial:

IMG_8821 sn9815.jpg

Cal

IMG_8821 sn9815.jpg
 
Cal,
6582 is the number on the front of the knee. On top of the right vertical way is stamped 320 not 820. Loaded the bearing last night and let it run at 940 for about 35 minutes and only warm to the touch. I think it's good.

Les
 
Cal,
6582 is the number on the front of the knee. On top of the right vertical way is stamped 320 not 820. Loaded the bearing last night and let it run at 940 for about 35 minutes and only warm to the touch. I think it's good.

Les

Hi Les,

Your cutter-head had a reputation for running pretty warm. I have a letter from an engineer at Van Norman about it. However, that was using a very primitive grease, compared to the synthetic grease that you're using.

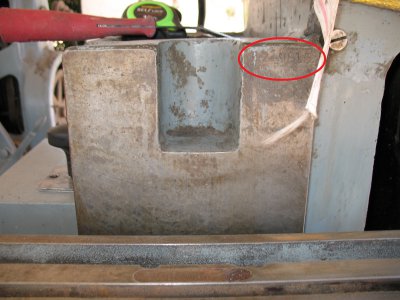
Re: your serial number: I assume that you're looking here for the master serial number:
IMG_8819 column sn loc.jpg

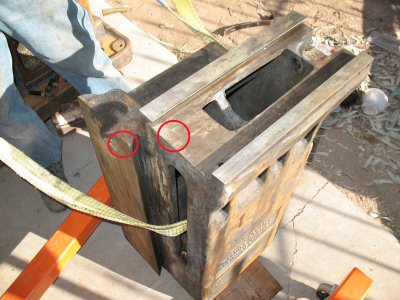
You can also try cranking the ram to the rear and looking in the front of the ram ways, at the top of the column:
IMG_8604 column sn locs.jpg
Here you're looking down the bare column (no ram, knee or base). I've marked both locations where the column serial number may be found.

All of the major castings should have the serial number stamped on them somewhere (although I haven't been able to find the serial number on the ram on #7689). The saddle should have it stamped on the bottom, next to the Y-axis gib:
IMG_9078 saddle sn loc.jpg
Here you are looking straight up at the left side of the knee and the bottom of the left end of the saddle. The Y gib has been removed in the photo; all of the large gibs should also have the serial number stamped on them, but the number can't be seen without removing the gib. The protrusion in the lower-right corner of the picture is the boss for the knee elevating crank. The back-lash adjustment nut and lock-ring can be seen through the rectangular hole in the bottom of the saddle.

Cal

IMG_8819 column sn loc.jpg IMG_8604 column sn locs.jpg IMG_9078 saddle sn loc.jpg
 
Back
Top