Today was mostly just grunt work. I took the motor support and the jackshaft pulleys apart. That was a major cluster eff.
First, the threads where the grease cups go had been mushroomed slightly by a PO. So nothing would slide over them. I didn’t have a die big enough to chase the threads, so that meant lots of file work with the swiss files. Luckily, the threads were the same as the setup nut I use for rebuilding Ford 8.8 rear axle gears, so I at least had a nut that I could use to partially chase the threads and make them somewhat proper.
Once that was fixed (took hours and lots of sore hands/joints and the occasional curse word), I tried sliding the bearing retainers, bearing housings and pulleys off.
No joy.
Someone had crunched down so hard on the grub screws they had made sharp, high burrs. So I ended up having to drive them off over the burrs the grub screws had created. No way to get to the burrs before I drove the parts off, so I just had to deal with it.
As if that wasn’t enough, someone hadn’t lined up the motor pulley grub screw with the divot in the shaft, so that had spun and scored up the shaft leaving more burrs to be forced over.
The final middle finger was that whoever had it apart last had left out (or lost) the woodruff key for the spindle belt pulley. This was another “crush down the grub screw till it holds“ deal. But without the key in place, the pulley had spun on the shaft and massively scored/burred the shaft until the burr became so large the pulley bound up and stopped rotating. With no other choice, I had to pound on the shaft until the pulley can off. that took about an hour because I had to be careful not to damage the Zamak motor pulley and spindle belt pulleys while pounding on the shaft (brass hammer and sacrificial aluminum blocks).
Well, once I got it all apart, to say the shaft was a bloody mess was a bit of an understatement. It was just horribly chewed up all over. Thankfully, at least the bearing portions were still in good shape.
I thought about making up another shaft, but I needed the lathe to make the shaft and I needed the shaft to run the lathe.
A big ol’ catch 22.
I though about chucking the shaft up in the drill press and try to clean it with different grades of sandpaper, but the shaft was juuuust a touch to big to fit in the 16n.
So with no other choice, out came the fine tooth file and another couple hours of fine detailed PITA work.
But, after an hour of two of mind numbingly careful and slow work, the shaft was usable again. All the damage to the shaft was in places where it didn’t really matter if they was a divot or not and the components now slid on and off easily. No play on the pulleys and bearings, despite all the misuse they had been subjected too.
So I painted the motor brackets and the bearing races on the jack shaft to get ready for reassembly.
I didn’t have a woodruff key to fit the shaft and pulley, so I dug out a scrap piece of hss that fit the slot in the shaft and the pulley slot and carefully ground out the proper half moon shape to fit the shaft groove and a snug fot in the pulley slot.
I inspected the roller bearings after a varsol wash and air dry. They checked out good so I repacked them and back on to the jackshaft they went.
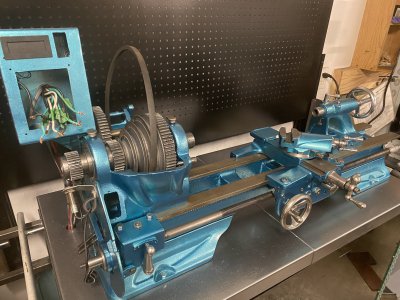
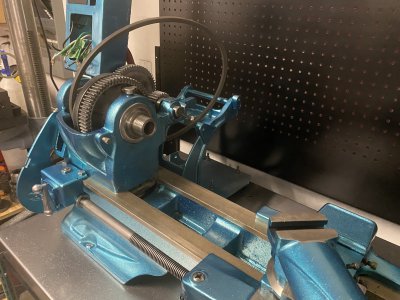
I installed the back gears and the control box and that pretty much used up the rest of the day.
I’m going to take tomorrow off from working on the lathe. I‘m scheduled to get my fourth booster in the afternoon and I don’t want to show up smelling of paint, grease and varsol.
Besides, I’m just tired of getting covered in grease/grime and having to fix one PO “eff up” after another. It doesn’t seem to matter how much I clean and paint it, there’s always another blob somewhere waiting to cover me in filth/grease/oil/grime.
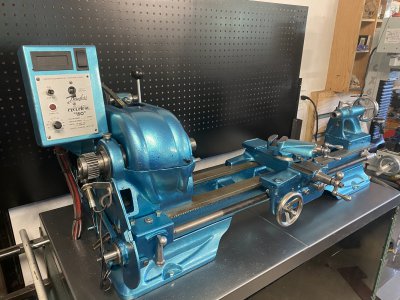
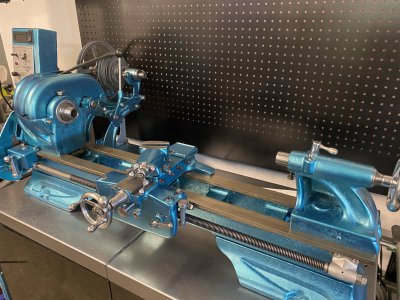
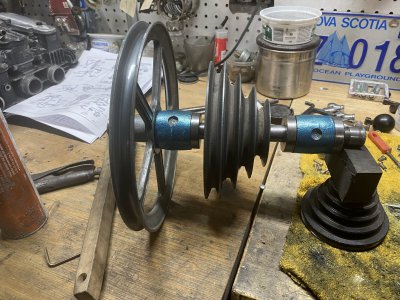
I’ll finish this post with some pics of how it currently sits:


 I’m having the same thoughts about being covered in paint and grease daily as no matter how careful I try to be fixing my lathe up, I always seem to come in the house afterwards covered in the stuff.