-
Welcome back Guest! Did you know you can mentor other members here at H-M? If not, please check out our Relaunch of Hobby Machinist Mentoring Program!
You are using an out of date browser. It may not display this or other websites correctly.
You should upgrade or use an alternative browser.
You should upgrade or use an alternative browser.
My Heavy 10 Rebuild
- Thread starter Codered741
- Start date
- Joined
- Jan 11, 2013
- Messages
- 1,821
I am finally having some success getting your Bull gear off! 
... And yes, I have thread nuts that are pretty good if I remember... Let me look
Bernie
... And yes, I have thread nuts that are pretty good if I remember... Let me look
Bernie
- Joined
- May 4, 2013
- Messages
- 249
Well the apron is completely dis-assembled now, fairly easy. That little snap ring in the clutch was a B****!!! Very little clearance for the ring to expand, even less for the tool, and deep enough to require a special tool!! But its all apart, and clean now. Just need to strip the 4-5 layers of paint, and re-paint. I'm getting a bunch of parts ready for paint, maybe everything, and have a painting day. I have a couple of days off in August that I'm hoping to use to paint everything! (Of course, in between coats I will be working on getting the nursery ready for the little one, whom is due in October. )
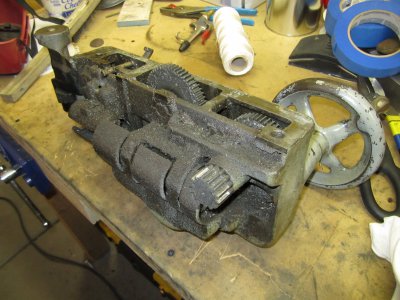
Here are the photos of the Apron as promised.
Apron, fresh off the lathe.
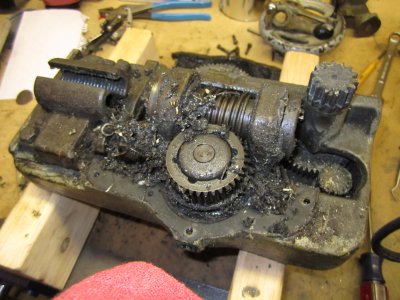
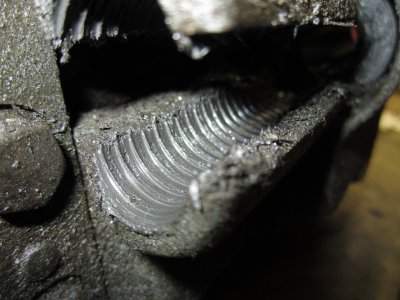
Very, Very worn half nuts...
There was about an inch and a half of crud in the oil reservoir.
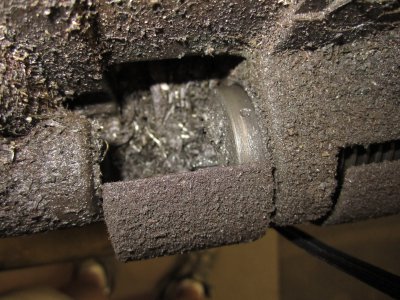
Just a general layer of crud.
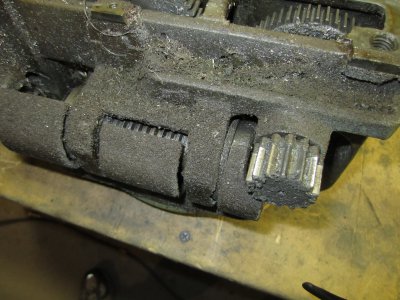
Carriage without an apron.
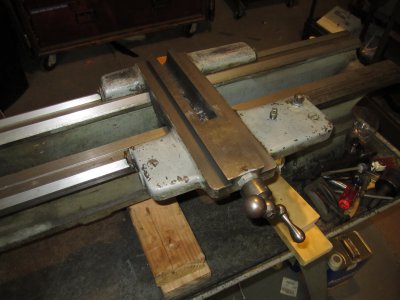
Underside of the carriage.
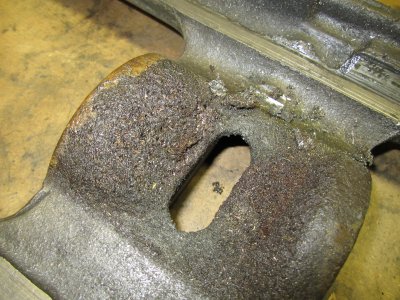
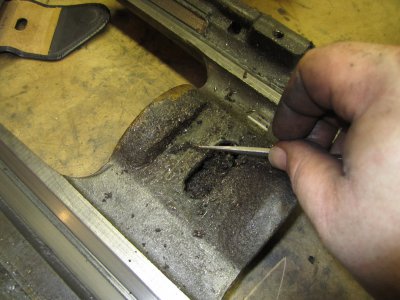
That's not really a part of it!!:LOL:
I thought that was cast!!
Thanks for looking!
-Cody


Here are the photos of the Apron as promised.
Apron, fresh off the lathe.


Very, Very worn half nuts...

There was about an inch and a half of crud in the oil reservoir.

Just a general layer of crud.

Carriage without an apron.

Underside of the carriage.

That's not really a part of it!!:LOL:
I thought that was cast!!

Thanks for looking!
-Cody


- Joined
- May 4, 2013
- Messages
- 249
If you don't mind posting the tool you used, I'd appreciate it. I'm starting on that as soon as I get the headstock back together.
For the Snap ring? What tool DIDN'T I use!!!
But in all seriousness, the snap ring pliers that I have are not long enough to reach into the clutch and effectively grab the ring. If you have a set, or go get one before you start, you will have less trouble than I did. I ended up using a small flat blade screwdriver to push the ring out of the groove, then wedged a small pick under the end of the ring to get it above the groove. I then worked my way around the shaft slowly working it out. The ring does not have holes in the ends, like a newer style snap ring, just two square ends.
I suppose that using flat nosed ring pliers would have been helpful, but I doubt it would have just come right out.
Good luck when you get to yours!
-Cody
- Joined
- Jun 22, 2012
- Messages
- 1,552
That is a seriously grungy apron, not much room for oil was there, good thing you tore it down. Mine was clean compared to that one, you will be so happy that you have gone through it. great pics. I have been enjoying following along with your work.
- Joined
- Dec 14, 2012
- Messages
- 26
I am also enjoying your updates! I finally got inspired to clean up the shop some more and post some excess equipment on CL to make some much needed room in my shop!
Does your headstock take 5C collets?
Keep the updates coming!
Chris
Does your headstock take 5C collets?
Keep the updates coming!
Chris
- Joined
- May 4, 2013
- Messages
- 249
I am also enjoying your updates! I finally got inspired to clean up the shop some more and post some excess equipment on CL to make some much needed room in my shop!
Does your headstock take 5C collets?
Keep the updates coming!
Chris
The headstock will not take 5C collets without an adapter. But WITH the adapter and collet closer, which is going to be the first project that I make when the rebuild is finished, it certainly will. From what I have read, the headstock has a proprietary taper, and I will have to either make or obtain the adapter for 5C collets, and the morse taper adapter for the center. I am slowly getting all the parts and dimensions that I will need to make one, and I will post the drawing once it is complete. (which will not be for a while....)
As a side note, it looks as though I will be moving from Vegas to Pennsylvania for work in the coming months (by the first of the year, but commuting until then). This means that the rest of the rebuild will have to happen fairly quickly, as I do NOT want to move the lathe in pieces...
-Cody
- Joined
- Mar 10, 2012
- Messages
- 1,368
Damn fine job, Cody! Your lathe looks about as dirty as mine was. I couldn't believe all the swarf in the QCGB on my H10. Looks like you're doing all right. I know you're moving but I would still try not to rush a rebuild. All it takes is a little too much "oomph!" and you can break a part/piece and then be in a real hole. Good luck with it and keep us informed how it's going.
- Joined
- May 4, 2013
- Messages
- 249
Thanks Splat!
I am definitely not going to rush anything, but I am going to get as much done as I can, as quickly as I can. I fly to Pennsylvannia on the 26th, and stay there for three weeks, back for a week, PA for three weeks, and back for a month or so, have a baby, then begin the move.
Its gonna be a very busy end to the year.
My plan for the rebuild right now, is to get as much done as I can, leaving enough time to put it back together, in whatever state it is in, so it can be moved in one piece. I just have this fear that if I were to try to move it disassembled, I will lose or break pieces in the move. I'm hoping that I can get the headstock, apron, carriage, and QCGB completed before moving. But we'll see what happens.
Ill keep u posted.
-Cody

