-
Welcome back Guest! Did you know you can mentor other members here at H-M? If not, please check out our Relaunch of Hobby Machinist Mentoring Program!
You are using an out of date browser. It may not display this or other websites correctly.
You should upgrade or use an alternative browser.
You should upgrade or use an alternative browser.
MLA A-11 Cross Slide
- Thread starter akjeff
- Start date
- Joined
- Sep 28, 2013
- Messages
- 4,308
Looks great! I'd love to make something similar for my SB. While you're in there I'd add oiling grooves to the ways and GITs or ball oilers to oil them with. That'll make keeping it oiled alot simpler and easier. If you want to get fancy, you can even get a socket head hold and drill through the center to add a ball oiler and then oil your cross slide nut/ screw ") I always found removing the bolt and oiling the screw on my 618 to be a chore (= didn't do it very often) so fixed that on my SB.
I always found removing the bolt and oiling the screw on my 618 to be a chore (= didn't do it very often) so fixed that on my SB.
I always found removing the bolt and oiling the screw on my 618 to be a chore (= didn't do it very often) so fixed that on my SB.
- Joined
- Sep 28, 2013
- Messages
- 4,308
nice! Looking forward to see what you come up with.
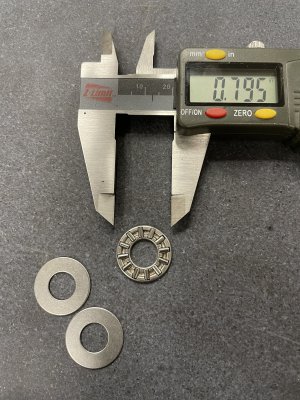
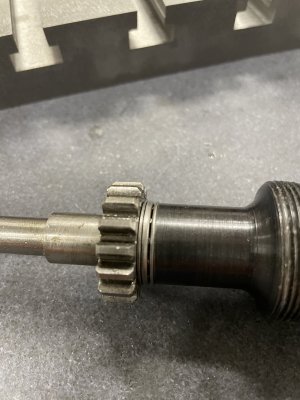
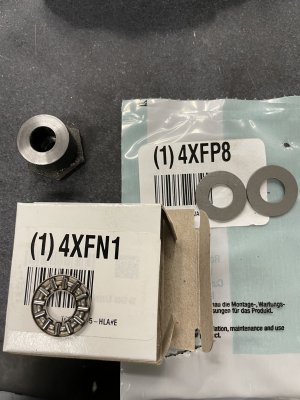
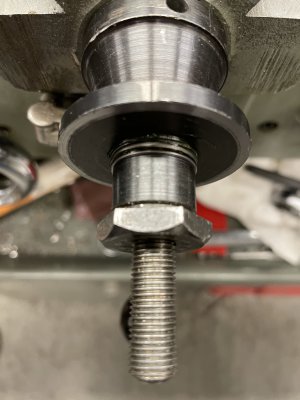
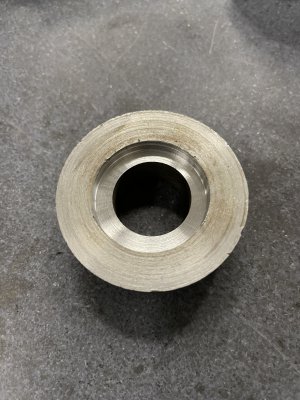
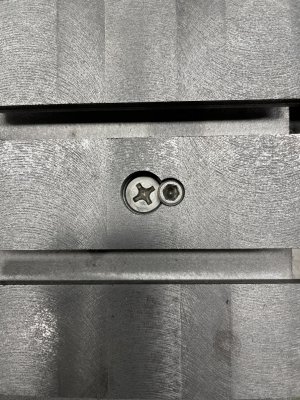
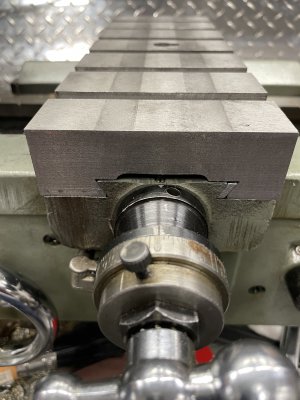
Waiting on some ball oil cups to arrive, so in the meantime decided to address the end play adjustment of the cross feed screw, which I've never been happy with. Added thrust bearing/washers on both ends of the screw support bushing/boss. Shortened the inside end by the .140" stackup of the bearing and two washers, and put them between the bushing and the drive gear. Screwed it back in the carriage, and went to work on the end facing the front. Rather than countersinking a relief in the screw support boss, I chose to shorten the nut/bushing that the dial rotates around. Again, shortening by .140". Then needed to deepen the relief on the face of the dial, so it would swallow the new thrust bearing/washers, and have just enough clearance that it still spins freely when the thumb screw is loosened. Put it all together and wow, what a difference! Smooth as silk, and no end play. Should have done this long ago. Also countersunk a locking screw for the cross feed nut mounting screw, as it's not farmer tight in the nut, and the lock will keep it in it's mostly tight state. I'll eventually counterbore both with a 1" end mill, and make a plug to fill the hole, and cover the screws. The 1/4-20 screw will be drilled through, as will the nut, so oil can be fed to the nut/screw.
Attachments
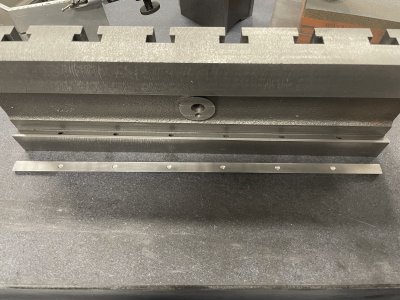
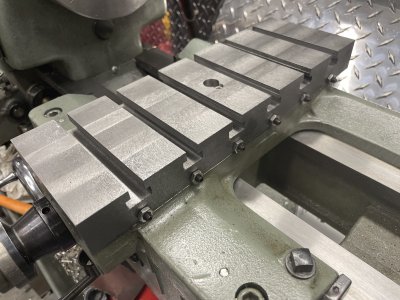
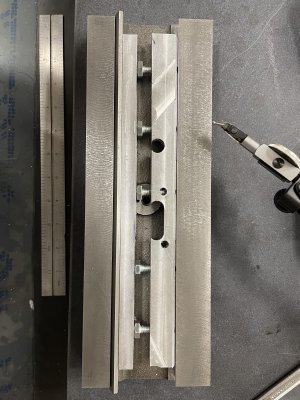
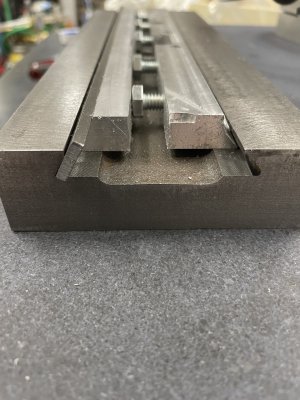
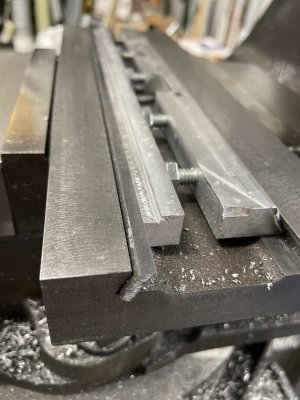
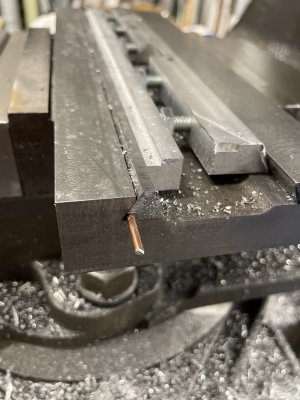
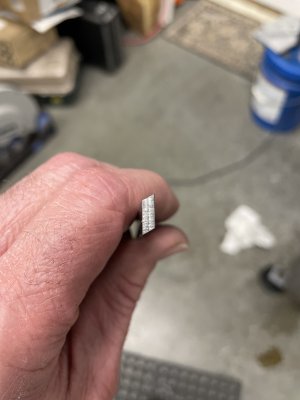
Got the gib fitted to the new slide. First had to make a pair of beveled spreader bars to clamp the gib stock in the cross slide, and use it for a jig to cut the beveled edges. Don't recall where I saw the spreader bar idea, but I certainly thank whoever it was that posted it. Worked great! Beveled the first edge, and left it proud of the cross slide by .050" or so. Then using the factory gib on top of a "shim" of 3/32" TIG filler rod, set the depth stop on the quill, and then clamped the new gib in place for the other bevel. Viola, a new gib! Gave it some attention with stones to thoroughly de-burr and smooth it out. Fit is great, and the new cross slide in extremely solid. Need to drill and tap the gib adjustment screws and dimple the gib to accept the screw tips. Also intend to add a pair of gib locks. Then, it's just a matter of waiting for the oil cups to arrive, as well as a block of steel to make a tool post adapter to replace the compound.
Attachments
Last edited:
- Joined
- Sep 28, 2013
- Messages
- 4,308
nice, that's going to be a dream to use!
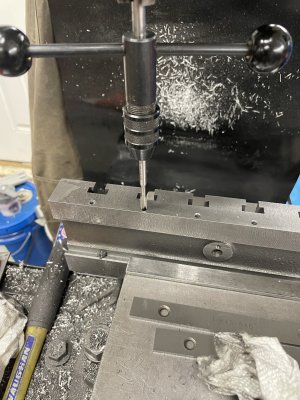
Drilled/tapped the gib adjust set screws. In a holding pattern for oil cups. Hoping a friend will have a steel drop at his fab shop on Monday, so I can get started on the tool post mount. If not, some is on order through ebay.