Clausing 4914

Hi everyone—

I,too, am now cleaning up a recently-acquired 4902 and need some advice. After seeing the photos of the nice cleanup jobs you've all done I was inspired to pop off the headstock for thorough cleaning. OK, so how are you supposed to deal with the taper pin? PurpLev says its supposed to be knocked out from below, but it seems to be in a blind hole. Architard - I can see exactly why you wanted to pull it off with a chain hoist! As I removed all the bolts and clamps and started carefully prying it up, the rounded pin head slid pretty easily halfway through the hole and then jammed. Now I find that it won't lift off and it won't go back down.

Suggestions?

Tim

I personally pried the entire headstock off of the bed, the pin once 'stuck' in the headstock eventually came off with it... may not be the best approach, but that's what I ended up doing and it came back in place fairly well.

Sharon
 
I have a parts washer built from a 55-gallon drum. It has a disc that losely fits the ID, supported by bolts through the side about 1/3 of the way down. There is a notch in that plate for a tube up from the immersible pump. The bottom third of the barrel is water, with kerosene, diesel, fuel or whatever is cheapest atop that.
Works great, I use it nearly every time I'm at the shop.

As for tooling, I have had success in similar situation by buying a clapped out lathe of the same or similar model, robbing the tooling, and parting out the rest. I get my machine tooled for free, and make money besides. I have done this several times. Find out what other lathes have the same chuck mount as yours.
You do have to be patient. Check CL daily.

Oh, and welcome to a fun hobby
 
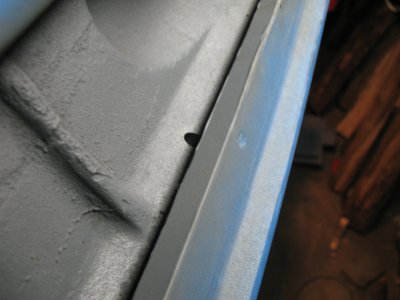
I basically did what Sharon did to remove the headstock. However, the taper pin is not quite in a blind hole. The hole comes through the bed way. The problem is I'm not sure you can get enough clearance under the pin to knock it out. I took a picture of the hole on my bed. It's masked off for painting and hanging in the ceiling of my shed. Look at my picture and you can see the indent in the masking tape where the top of the hole is. Since mines in pieces I'm not sure I can answer if you can actually get underneath the pin. IMG_4704.jpg

If you destroy your pin the way I did, and need a replacement let me know. I just got my order delivered and I have like 5 of them and only need one. I'll send you one if you need it.

Anyways, I'm making slow progress. I'm almost to the point now where all the grease and muck is gone. I've actually started shooting some paint on the larger pieces. Boy those crappy little husky detail spray guns sure waste a lot of paint. I might have to pick up another quart before I'm done. Very satisfying though to see nice glossy paint on the bigger pieces. I can't wait to start putting this thing back together.

Don't ask me how, but I was finally able to remove the spindle. So I was able to remove the chewy feed gear. In the process I bent one of the large washers that go against the bearings. If I can't find a washer with the same specs I might have to pick one up when I place my Clausing order. I think I had made a mistake when I read the quote and I got the thread dial gear mixed up with the feed gear. So in my head I was thinking it wasn't going to be too costly. Then I realized the feed gear is $190! I'm also realizing to put the headstock back together without messing things up I should really do it with a press. So as typical fashion for a tool junky like me I think I'm going to buy a HF 20 ton press this weekend. I think this will be a good investment because I can't tell you how many times a press would have gotten me out of a bind. So yeah, this hobby gets expensive fast.

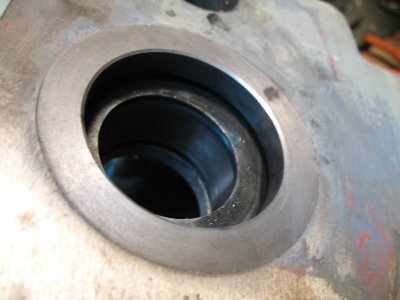
The one thing I haven't figured out yet though is how to get the front bearing out. The front bearing cover is pressed in, and there doesn't seem to be any way to get it out. So the bearing and washer are still in the headstock. Anyone have any ideas?
IMG_4708.jpg
Oh and I was all worried that if I damaged the bearings they would be ridiculously expensive to replace (I did NOT damage them btw). They are Timken 344 tapered bearings. You can pick them up for about $35 a piece.

Anyway, I'll have to update my blog with a bunch more stuff, but I figured I'd give you guys a quick update for now.

IMG_4704.jpg IMG_4708.jpg
 
Thanks for the update Kent, glad to hear your still going at it!
 
good progress. the lessons you are gaining are priceless and cannot be found anywhere else. looking forward to seeing the painted parts already!
 
Good god I should have bought a shop press ages ago. Hours of frustration melt away with the simple satisfaction of being able to press things out in a matter of minutes.

I treated myself to a shopping day at Harbor Freight. I read a bunch of reviews on the 12 ton and 20 ton shop press. I had decided to get the bigger one since everyone seems to agree the 12 ton shimmies all over the place when you are using it. Since they had them set up at the store I was also able to compare the two next to each other. The 20 ton is much more substantial and definitely worth the extra cash. Oh, and they accept the 20% coupon on it as well!

I'll post some pics on my blog later, but man, I could fabricate this thing better with my eyes closed. The welds are absolutely horrible. The top two rails were completely misaligned and I was almost not able to get the spring retaining bolt to go through due to it.

But in the end it works. I have some ideas for upgrades but you can't beat it for $160.

Anyway I was able to press out the remaining pieces of the back gear shaft. I still need to figure out how to press out the front bearing retainer. I have some ideas I got floating around in my head.

I also picked up an HVLP spray gun at HF. Again, read some reviews, and added a few O-rings so it didn't leak. For $35 dollars this thing is totally worth it. I honestly think that some of HF manufacturing must be getting better because the gun I bought didn't seem to have nearly the problems that others that had reviewed it on YouTube had.

I was able to shoot some more paint today and I didn't use nearly as much paint as my detail spray gun.

Next up is going to be purchasing the replacement feed gear and cross slide nut. I think I might have to wait till my next paycheck on that one. :lmao:

My blog posting is a bit behind my forum updates but I have a few posts that will be ready to go soon.
 
nice!

still curious how you got that spindle out. must be a secret handshake thing :thinking:
 
I didn't say because I figured I'd be admonished for the heavy handed technique. It involved a hammer. :nono: I know, I know I shouldn't have done it that way, but I was very careful. I did not hammer directly on any piece of the headstock, I always had wood blocking between the hammer and the parts. In the end everything came apart without any damage. I'm sure someone may tell me that despite any visible damage being done I may have done some damage that isn't evident yet.

I thought woodworking needed patience. I think I need to work on that a bit. If I would have just waited a few days I'd have had my shop press.

Ok, I DID bend one of the washers, but I have already straightened it out with the help of the new press. I love this thing.

ha... that's ok, I was using similar techniques are some points :)whistle: ). sometimes you gotta do what you gotta do - especially if you understand the consequences and can take responsibility for the outcomes. as for patience - woodworking nowadays feels like childs play :rofl:. that's one of the things I like about machining - it's taking the practice of woodworking to a whole new level, making woodworking more feasible and simpler in many ways.
 
Back
Top