9A renovation

The gear box plate was just regular rivets on mine, do not know if original or not. I just drilled them out and used self taping screws. I think I used 1/8" drill bit and they were out quick. My lathe is a 1968 model and seen little use before I got it, hardly any wear on gears ect. so I assume the rivets are from the factory. If you want to get fancy there is a guy that makes repo plates just like new ones if you are going for pretty or just usable like me.
Paul
 
Hi all and thanks for advice. I've decided at this point to clean everything and make it functional vice pretty, so I probably won't paint or need to remove stuff that doesn't need to be removed.

I'm currently looking around the web for more info on GE motors from that period and wiring. My nextdoor neighbor said asbestos was used in wiring installation and he said to be careful about getting it on me.

I haven't yet got to the bronze bushings and I'm hoping that when I do, they are still intact and fitting properly. Cost for next sleeves on eBay (same seller as the book), goes for around $70 which is pretty pricey IMO. I just spent $30 on a 1/8 pin spanner wrench so I'm trying to keep cost down if at all possible.

Measured my leather belt and it's 55 inches and about 1.25" wide. I'm going to the auto store to get a serpentine one. IMO, anything from 53 to 55 would work as the turnbuckle adjustment is out pretty far and a shorter one might even be better. The leather belt I'm using now is definitely too wide.

Been cold in the garage so haven't done anything yet except reading up on lathe stuff.

For instance, I visited 2 websites and discovered my lathe was built on 30Dec1942. On that day, fighting was taking place on Guadalcanal, Alutian islands and I'm Dreaming of a white christmas was popular. So the lathe is becoming something of a heirloom. It must have had quite a history!

Serial # South Bend

131187, 12/30/1942, 9" x 3-1/2', Workshop Model A, Catalog No. 644-Z, 12-speed, HMD bench lathe, 1/2 HP; 1725 RPM, 115V/1PH/60CY,
From: http://www.wswells.com/serial_number.html

Catalog
644 9" Model A, 12-Speed, HMD bench lathe NAR

From: http://www.southbendlathe.com/products/catalognumbers/catalognum-09sncode


NAR means
N - 9”
A - Quick Change Gear (QCG), Friction Feed Apron,
Overhead Countershaft Drive (CS)
R - Regular Spindle Hole,
Standard Swing
 
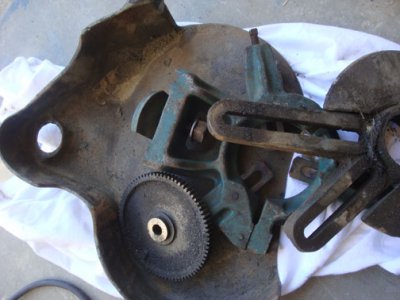
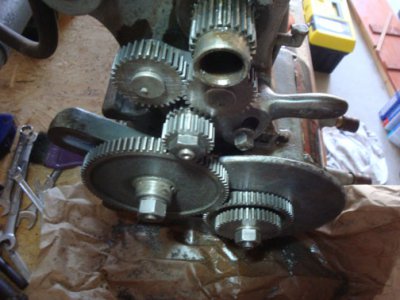
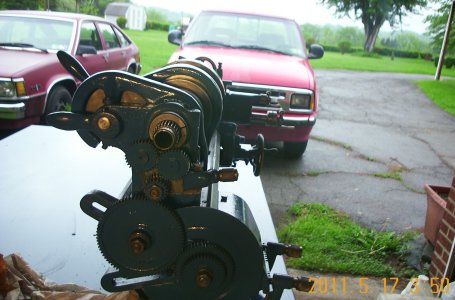
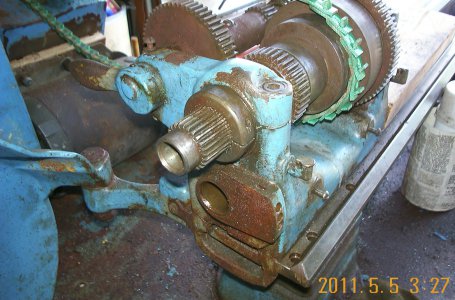
Busy cleaning dirty gears (first photo) all weekend and replacing felts. Notice reassembled (last photo), very clean but not squeaky clean. I discovered it helps to have a lot of Q-tips during cleaning. Pipe cleaner would come in handy as well. I went to walmart and picked up a rifle cleaning kit (bore brush, different cleaning tips and stuff). Reminded me of my time in Marine Corps back in 70s. LOL The rifle cleaning kit definitely helped me get into passageways of the lathe.

Question on wicks. Do they operate by osmosis? IOW, if there are 2 felts perpendicular to each other, do they need to touch each other to cause the oil to flow? Just curious.

So, the gear train is completed!

Stupid question time.

The square retaining bolt on the reversing gear assembly. If I want to put the lathe in reverse, it looks like I need to loosen that bolt in order to move the handle on that assembly and then tighten it. Correct? (I've turned the lathe on but never actually used it)

2nd question.

I was going to do the second part of the dissassembly, which is to remove the gearbox and feed screws. However, I ran into a similar problem I had earlier. This time, the 3 screws holding the gearbox to the bed won't turn. As you recall, I was able to get other screws to turn using my propane torch. This time it didn't work. I put brake fluid on the heads but that didn't work either. So, it's off to the store to buy PB Blaster and also try the technique of hammer and screwdriver. The problem with an impact wrench (which I don't have) is that clearance to that area is limited by the headstock cover. So I'm thinking I might have to remove some stuff from the headstock to get at that area if other methods of screw removal fail.

3rd question.

The book I have divides the lathe into 4 parts 1 Gear train & gearbox; 2 Apron, saddle & compound; 3 headstock and back gear; 4 horizontal drive unit

When I'm done with #1 (geartrain and gearbox), can I reassemble it or will I need to remove it later when I get to the headstock and backgear?

BTW, this project will take a lot longer than I anticipated. I found that when I get frustrated for example with the screws, it helps to take a few days off and do something else and come back with a clear head.

Thanks, btw, for all assistance.

Dave

DSC02015.jpg DSC02035.jpg DSC02036.jpg DSC02041.jpg DSC02062.jpg
 
Dave,
On your reverse gear that nut might be for tightening direction selection, but not sure since mine has a similar setup like the gear box tumbler with 3 holes to pick from (see pic). I would try it once the lathe is together and running to figure it out. The wicks and felts act like a sponge and transfer oil to where it is needed, if there are 2 piece felts there should be 2 oilers to supply them, if not they should touch. Put the required oil on dry felts as you put the parts together so the lathe is not running dry at start up. I hope this helps.
Paul

DCP_0467.JPG DCP_0455.JPG
 
Yes, the square headed bolt is for locking the tumbler in position. I used mine for years that way then made a spring plunger type for it, drilled three holes in the headstock casting ( like the 10K ), so I can move it into neutral without fooling with the bolt.
 
thanks, guys, big help; learning something every day!

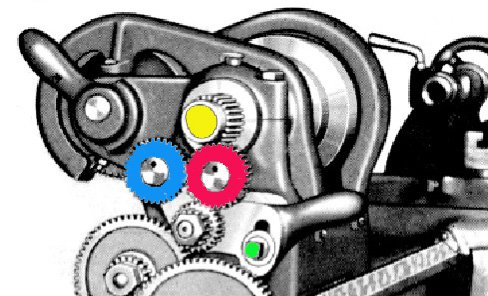
Here's a diagram I spun up. When the green square nut is loosened, the handle to the right can move, thereby engaging the blue or red gear with the yellow gear. I think the blue and red are called twin gears. Unsure what the yellow one is called.

Anyway, the question is, during normal operation, should the blue and red gears be in neutral (not engaged with the yellow)? What operation takes place when red engages yellow? Blue to yellow?

Thanks!!!

btw, I'm still trying to work the screws loose holding the gearbox. This time I used a tool you hit with a hammer to turn the screws. No joy. I think they're beginning to strip. So, I purchased a craftsmen set of screw outs to use with a drill in reverse, slow speed. I may try these tonight but I'm sort of worried about damaging the ways or bed around the screw hole. Also, I don't know how easy it is to replace those screws; if they sell that size at Home Depot. It's a bit frustrating I can't proceed any further with those pesky screws in the way (pun intended)

colors.jpg
 
Thanks. Big help. I should have used the drag link socket to begin with (didn't even know about these). I already broke a normal flat screw socket on that screw. I think the term getting screwed came from trying to unfasten these.

Appreciate the explanation on that selector!
 
EDIT: I just ordered the set, hopefully I didn't damage the slot too much and it will work


Just called Autozone, tru value, HD and Lowes and none of them carry these, much less know what they are. So...

http://www.sears.com/shc/s/p_10153_...921x00003a&ci_src=14110944&ci_sku=00934299000

I'm not sure which size I need b/c my lathe is at home and I'm at work, but if I get a set like this, I might be able to use them if I run into more of these type screws in the lathe.

Does this look like what I need?

Thanks!
 
Last edited:
Ready for an operational twist? All the directions that 1200 outlined are reversed when you are using the power crossfeed. Your leadscrew lever in the 'Up" position will back the tool away from the work, while the down position will feed the tool toward the work.

I used to wonder why they made it backwards, but if you think about it, it's a great idea. If you happen to set the lever on the carriage to the wrong position (carriage instead of crossfeed, or vice versa), the tool will move away from your work instead of destroying it.

This is how it works on my Hercus AR. I assume Southbend did it that way first. There are a few changes Hercus made in the design that are better, but I think the basic pieces are the same.
 
thanks all. About 2 more days and the drag link sockets will arrive. Guys at the auto store never heard of them and scratching their heads. LOL

I ought to get the bit i need with these and using a long 1/2" socket wrench will give me some torque

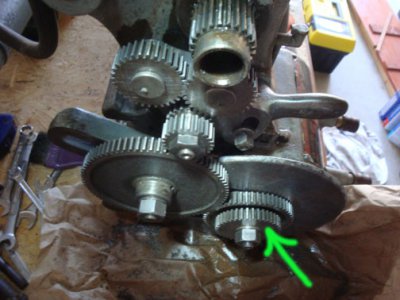
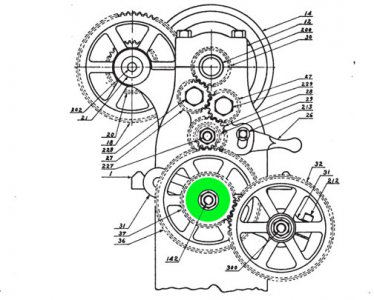
BTW, hate to ask all these niggling questions but in the attached photo I use a green arrow to a gear that seems to be getting a free ride and not doing anything. What is its function? In the How to Run a lathe drawing, that little gear is riding on the gear to the left of where mine is like it switched places.

DSC02062.jpg Screen-shot-2012-03-14-at-7.01.20-AM.jpg
 
Back
Top