9A renovation

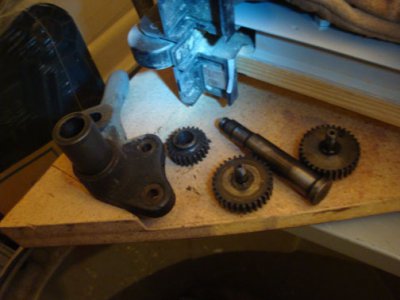
Now, I need to remove the main shaft and the other two shafts to remove the 3 gears remaining on the assembly.

Hi David,
Good to see you bit the bullet and were'nt put off by the perceived complexities.
When I disassembled my tumbler I just used a soft hammer and smacked the studs out. Loosened the nuts and then tapped away on them. I only cradled the assy in my hand so there was no real force required. Took a few hits but they came out easy enough. I didnt remove the main shaft from the assy as I figured there was no need.

Cheers Phil
 
The book recommends tightening the square carriage locking bolt lightly by hand until it just touches the underside of the bed.

Dave,
a better way is to bring the carriage up to near the chuck, (where most wear occurs), and tighten the carriage lock until it has some heavy drag whilst cranking the traverse. Now leaving the bolt where is is, run the carriage towards the tailstock. As you move away from the usually worn section of bed the carriage should become more difficult to move. This will give a better indication of the amount of wear.

Cheers Phil
 
I would imagine that the book doesn't mention the electrical system because there may be many different configurations, which may also have changed several times during the life of the machine.

You're right in recognizing the need to replace that wiring. It's at end-of-life. Since the lathe runs properly, identify and document both ends of each wire before you disconnect any of them. If you do it in table form, you can put in an extra column where you can write in the wire colour for the new cable as you go. Then you'll have a record to refer to. The new cables may not have the same colours available as in the old ones. Just make sure you reserve the green or yellow/green wire for the ground.
 
thanks for the tips and encouragement!!! I'm using Adobe After Effects at work so when I'm finally done with the rebuild I'll try and hook you guys up with a video tutorial, not for you but for beginners.

It's back to work today, haven't done anything yet as I'm involved in some honey-do projects, if you know what I mean.

The main shaft on the reverse assembly is supposed to house a long keyway into which a strip of Type 3 felt is supposed to be inserted so I'll try and pop them out today.

I'll reserve electrical for last. The wiring is so old you can smell the decay from the insulation.

Anyway, I'm very glad so far that I'm doing the rebuild. At the worst, I break something and get a replacement. After all it's for hobby use anyway, not livelihood, so why rush it. I'm gaining a better appreciation and understanding for the workings and craftsmanship and after removing some parts and seeing the caked on crude and seeing no oil coming out of the carriage underside plug, I guess the rebuild was past due.

For instance, look at the worn washer on this screw gear.

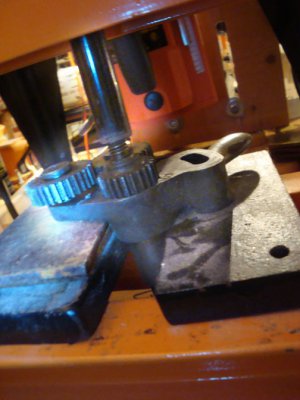
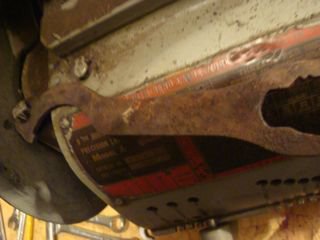
Lastly, do you guys remove the threading chart before painting and then replace it? Mine looks pretty worn (see photo)? Looks like some work involved in removing it, but that's for later. Oh, sorry, there's some sort of gun tool over the plate I was using to turn the square bolt that holds the gear bracket in place during the documentation phase.

Also, another question. Should the motor be dissassembled for cleaning? I understand there are parts that might need cleaning and perhaps repacking? The book didn't get into this, maybe b/c there's so many types of motors. Mine's 1/2HP, 1,750 RPM, the original GE
DSC01966.jpg DSC01980.jpg
 
Last edited:
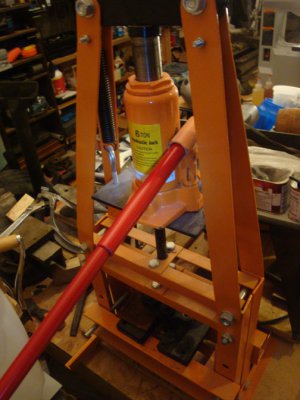
Success. I pressed off all 3 shafts on the reverse gear assembly. The largest shaft definitely needed the 6-ton press as it seemed comfortable where it was and wasn't in any hurry to move.

Wife doesn't want me to paint the unit,so instead, I'm thoroughly degreasing every part with brakleen and some other solvents that are not supposed to harm enamel. I'm still going to purchase a serpentine belt and when that goes bad in 5-10 years, I'll do another rebuild and then consider paint, as by then I'll be in my mid-60s and if I go bad, the family will have something nice to sell, although I'm in pretty good shape right now, doing 20 pullups.

I'm going to also do some hunting online to get tips for wiring and motor maintenance.
 
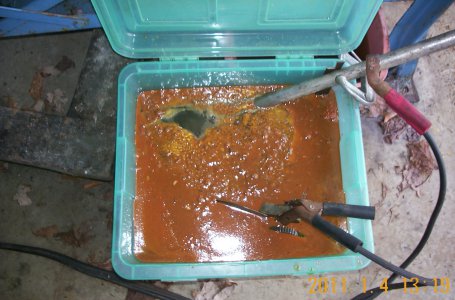
I would remove the thread chart just in case you get some degreaser on it and eats away the paint. I used electrolysis with a battery charger and some washing soda and that ate the paint and rust off my gear box.
Paul

DCP_0430.JPG
 
Good idea to remove the printed plate.
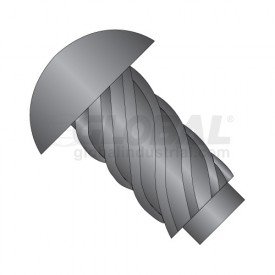
You may be able to remove those retaining pins by gripping the head and unscrewing them as you pull on them. If not, file/grind the heads and after removing the plate you can drill them out. New drive pins are easily sourced. http://www.spirol.com/company/products/prod_d.php?ID=53

Cheers Phil
 
thanks fellows for the tips!

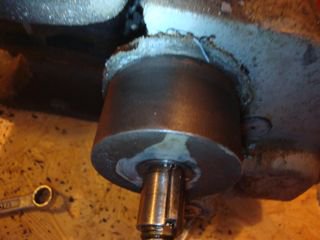
Here's photos from yesterday of the press in operation. The press rod is positioned over the main shaft and is in the preparatory stage of being pressed. Steel plates were added on the left side so the press can be made in a vertical direction (so as to avoid skewing it at a diagonal direction). Next photo shows the main shaft and 2 smaller gears out. The shafts in the 2 smaller gears come out by hand.

I sprayed the assembly with brakeclean and am scrubbing with a brass wire brush. Once the gunk comes free how do you remove it? Do you perhaps have 2 baths, one for degreasing and another bath for rinsing?

DSC01991.jpg DSC01992.jpg DSC01994.jpg
 
Dave,
That main shaft really shouldnt be that tight in there as to need the press. The gear is a neat fit on the end of the shaft and the key makes it nice and firm. The shaft itself should be free to revolve in the tumbler assembly. I would be looking for burrs and nicks on the shaft, or maybe a bent/damaged key.
When cleaning mine I mostly just use turps and elbow grease. Little screwdrivers and sharpened bits of wire to poke down holes and scrape gunk out. Wet and dry emery to polish things. Soak overnight to soften hard grunge.

Cheers Phil
 
Those plates are usually held in place by what are called "drive rivets" or U-drive screws(or rivets). Hard to get out if they are installed properly. Some come out if you cut a slot and back them out like a normal screw. Some can be driven out from the back of that they are installed in. They are hardened, so are tough to drill. Slow speed, oil....and time might get them to collapse, or you could probably buy the next size up if needed.

98463.jpg

98463.jpg

98463.jpg
 
Back
Top