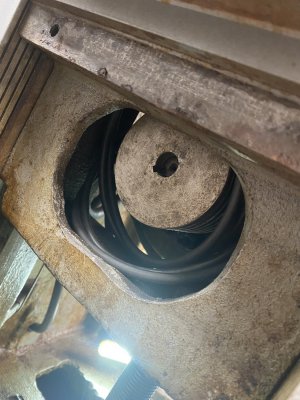
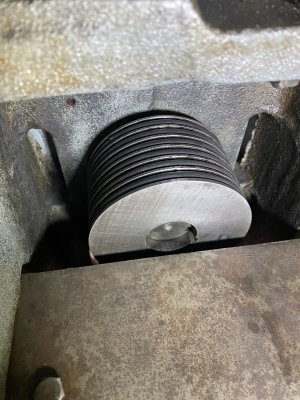
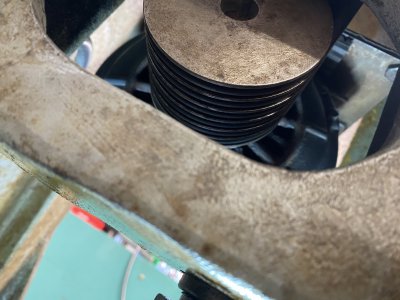
1966 Brown & Sharpe 618 Micromaster spindle repair (pic heavy)

How much were the bearings? Grease ?

Many people are afraid to do it yourself - Like I have said for years "machine Rebuilding and scraping is easy IF you have a pro help you"
You learned to scrape in a week, now you know how to rebuild a precision spindle.
Next time someone in here wants to repair / rebuild a spindle pass on what we taught you.

If you don't have an infrared thermometer to check the temp run it until it gets hot to touch, shut if off and let it cool down to warm, run it again, repeat until it doesn't get hot. 140 F is the max it should not reach. Once you get the headstock back in the column then mount the mag base on the outside of the spindle housing and put the indicator on the end of the spindle and push or pry with a 2 x 4 to check the thrust.

Good Job!! Be sure to call or write Craig and thanks him. I told him the other day when I retire to the scraping school in the sky, he can teach the classes. Rich
Harbor Freight, about two miles from here, has an Ames infrared thermometer in stock for $24. Guess what I’m buying this morning :)
 
I've been playing around with the preload. I have .001" end play and the bearings feel great.
I can't find a spec. anywhere.
I'll talk to Craig to see what he suggested.
He did say that if he were to rebuild my spindle he wanted me to ship both pulleys, the spindle and the motor so he could run it in and adjust as needed.
Lacking any know how I'm kind of flying by the seat of my pants here.

EDIT EDIT EDIT

Whew,
I'm sure glad I spoke to Richard's guy. He said in an application where you have two opposing nuts to adjust your preload, you want to make sure the threads are pristine and free moving.
This way you know when you make contact. You don't want to be fighting your threads.
Also, I mentioned the measurements I was getting. He said you should have no end play and the runout should be zero to .0001" which is what I have now.
I'm going to go back and clean up the threads then reassemble. He said once you bottom out the adjusting nuts by hand, take your spanner and give it a bit of a whack then measure again.

Stay tuned if you give a hoot.
 
Last edited:
That's why I always always say to screw on the nuts before assembly to make sure the treads are not damaged. A dry run with out the bearings. I would also stone the surface where the inside race set's on. Better safe then sorry. I would also make a collar to put against the inner race and tap on that if you don't have a bearing heater. Don't tap on the outer race or the bearing will fall apart.
 
Look at minute 6:27 of the Good, Bad and Ugly maintenance men.. No need to buy the kit, but make a tube on a lathe that sets evenly on the bearing.
 
That's why I always always say to screw on the nuts before assembly to make sure the treads are not damaged. A dry run with out the bearings. I would also stone the surface where the inside race set's on. Better safe then sorry. I would also make a collar to put against the inner race and tap on that if you don't have a bearing heater. Don't tap on the outer race or the bearing will fall apart.
Well, it all went together great. The accordian panels were my biggest nightmare but we got them installed.
Next up, the Oriflex orings. How the heck do those go on.
It's so tight in there
 
Page G 2 - tells how....http://vintagemachinery.org/pubs/2185/23934.pdf
 
Page G 2 - tells how....http://vintagemachinery.org/pubs/2185/23934.pdf
I have this manual but missed this.
I spoke to John and the fellow who helped him with his orings.
I’ll give it a shot. My meaty hands may not be capable of this. I may have to lure my skinny 34 year old son to give the old man an assist.
Thank you Richard.
 
While it is down have you checked the machine lube system? There is a good chapter in the book about it.
 
While it is down have you checked the machine lube system? There is a good chapter in the book about it.
Yes, I recently checked all the manifolds, Bijur emmitters etc. to make sure I had a good operating system.
I changed the fluid in 2019. As little as it is used, I assume I'm ok there. The filters were also changed.
 
Got it!
I made sure the pulleys were lined up, tightened the set screw and lock screw.
One by one fed the o-rings to the spindle pulley.
It wasn’t as bad as I was assuming. Once I got the o-ring started I just fed it to the next groove turned 180 degrees, and Bob’s your uncle.
Thank you Richard.
The manual you referenced helped. As I said, I have the same one but they did not add the few lines about how to go about installing the orings.

Oh, I should add, the SG is much quieter which is a real joy to listen to.
Makes it all worth while.
 

Attachments

  • D12A14DD-774C-4995-A29E-271CAB267F77.jpeg
    D12A14DD-774C-4995-A29E-271CAB267F77.jpeg
    326.5 KB · Views: 52
  • 663F5D30-73A7-41A5-A4BC-440AF40D0F30.jpeg
    663F5D30-73A7-41A5-A4BC-440AF40D0F30.jpeg
    408.2 KB · Views: 52
  • AE0927C1-8DCE-4C07-9865-DE4252FCE43A.jpeg
    AE0927C1-8DCE-4C07-9865-DE4252FCE43A.jpeg
    386.8 KB · Views: 52
Back
Top