Turning a taper, which is the prefered method?

Thanks Ray. I'm still not getting how you could travers cut through the cathead area (or maybe that's just not possible & I'm still not getting it). I figured if an open frame steady had tangent contact points like sketch of cross section, you might get away with it. Although you would still have to reset the fingers with every cut.


There's a steady rest and a follower-rest which are 2 different things. Your picture is showing what a follower rest does. Those attach to the carriage and support the spinning shaft and follow along as you cut. That works fine for a non-tapered shaft. When the shaft is tapered the diameter is constantly changing and the follower will not self-adjust itself to remain in proper contact.

You cannot traverse the cut on either side of a steady rest. You can work on the left or right side and to switch sides, you have to break the setup and re-establish it.

On a tapered shaft, if you're going to use a stead rest, you need to use a cathead to proved a flat surface for the bearings or contact pads to ride on. There are problems with this too... you have to grind flats where the cathead bolts will touch otherwise, the grip won't hold (for long).

Either way, yes, you're left with an unfinished spot that has to be smoothed over. That is where that tapered-bore shaft comes into play.

Ray C.
 
Ah, duh! Topside tunnel vision syndrome :)
The steady rest is occupying lathe bed real estate, the carriage cant traverse through that, hence the travel steady. But that's only parallel turning.
 
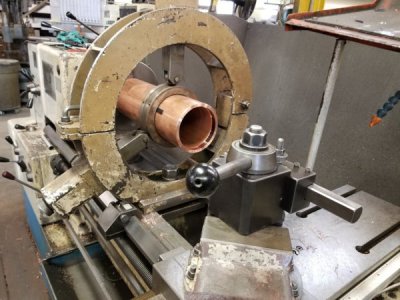
A cats head holding a copper tube in a steady. I place steel banding strips under the set screws so as not to mark the parts, for those without experience using a steady rest be aware that if misaligned it will walk the part right out of the chuck jaws, this will end in tears at best.

coppertube.jpg
 
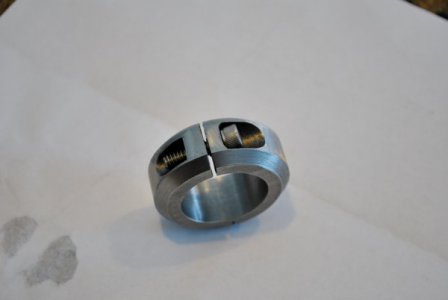
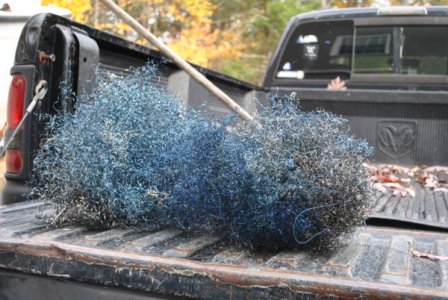
My first attempt at tapering a barrel was between centers and I just couldn't stop the chatering. It looked like I cut it with a hatchet. I made a small cathead to fit the blank and just kept sliding it down the barrel machining the first 6 inches at the 4 jaw end. I had to blend it with file and emery but it came out good. It's a PIA as I had to keep resetting the tailstock to keep the taper constant as the length of stickout changed. I ended up with a stainless afro! Lotsa chips!

BARREL COLLAR TOTALLY COMPLETED.JPGMACHINING BARREL BLANK CONTOUR 1.JPGzDSC_0875.JPGzDSC_0361.JPG
 
epanzella, interesting, would you please explain how and where the collar (spider?) was used?
If I am imagining right, the 4 jaw holds on the collar and the barrel would start far into the spindle bore and at an angle for the first section.
Then as stick out from the 4 jaw increases for each subsequent section the TS offset is reduced to pick up the taper from the previous section.
The angle of taper wrt to the bore axis would change slightly from one section to the next.
Bet you can clean a lot of pots with that SS wool!
 
Part II of reply.

Next time you get the chance, take a 24" long shaft at least 1" in diameter and try to take a skim cut. Don't even try it with less than 1" diameter -too dangerous. No matter how light you go (even with sharp HSS), it will look terrible and it will bow in the middle. If you try to dig in, it will catch and jump up on top of the cutter -I can practically guarantee this. If you're lucky, when it jumps on top of the cutter, the TS end won't pull out of the tailstock tip and the shaft go flying around and beat your machine up. (ask me how I know this).

Ray C.

Ray, thanks for driving the point home, it would simply be very poor practice to attempt to turn a long slow taper like that using a conventional tool without some sort of extra rest to support the work. However, this style of tool might be a hedge against the work jumping on top of the cutter.
http://gadgetbuilder.com/VerticalShearBit.html
Do you have any experience with this particular approach?

Matter of fact, yes I have. If I'm not mistaken, about 10 years ago, those pre-ground bits were being sold individually by someone. I have not tried them however. I'd say, give it a shot but, my instincts call out for a steady rest whenever I see something whose length is 20x greater than it's diameter.

If you've been following my other thread about the bullnose live center, you can probably tell that I'm a carbide guy. I use HSS when it's called for and many folks are wizards at grinding it and using it to cut metal. It really is a special talent (in my opinion) but the guys who are good at it, seem to take it for granted. If you want to give that a whirl, I'd suggest lots of practice with HSS using the same material as the bbl (SS, if I'm not mistaken). SS gives carbide a run for it's money and it must be tough on stainless too. In my pre-teens and teenage years, I used nothing but HSS but only on soft carbon steel. I've never cut SS with HSS bits.

When the current lathe setup is finished, I'll toss-in a piece of 316 (I've got boat shafts coming out my ears) and try cutting with HSS. We'll see what happens.

Nothing ventured, nothing gained....

Ray C.
 
Ray, thanks again for your thoughts. I have been cutting this barrel steel (416SS) for a few years now using carbide tools and HSS reamers.
It machines well enough and that might make all the difference in results compared to 316SS. Looking forward to reading about your tests.
https://www.crucible.com/eselector/prodbyapp/stainless/cru416rs.html

I love that website. Thanks for passing that along!

FYI: It might be a couple days before I try turning the 316 so hang in there.

BTW: If you enjoy metallurgy track down this book: "Heat Treater's Guide, Practices and Procedures for Irons and Steels" ASM International. This book mainly covers carbon steels but has some stainless info. There's a companion book covering stainless in detail. It's hard to find this book at a reasonable cost but sometimes, a used copy turns-up.

Ray C.
 
epanzella, interesting, would you please explain how and where the collar (spider?) was used?
If I am imagining right, the 4 jaw holds on the collar and the barrel would start far into the spindle bore and at an angle for the first section.
Then as stick out from the 4 jaw increases for each subsequent section the TS offset is reduced to pick up the taper from the previous section.
The angle of taper wrt to the bore axis would change slightly from one section to the next.
Bet you can clean a lot of pots with that SS wool!

TOZ,
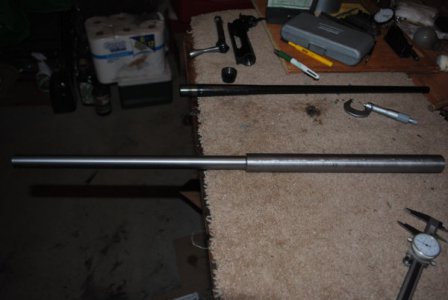
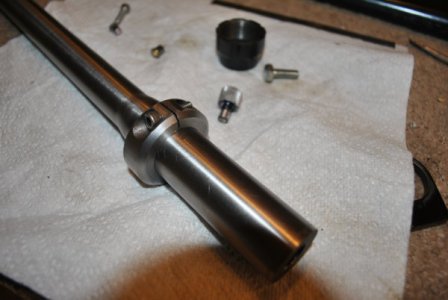
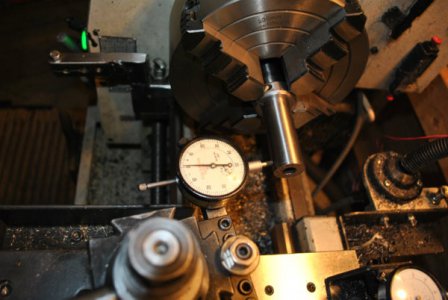
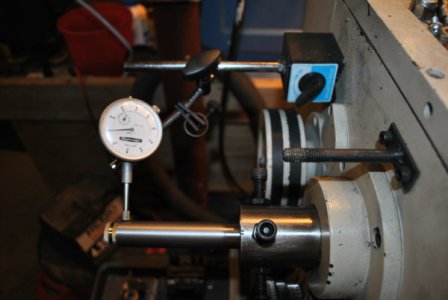
You've got it exactly right. Start with the collar a foot from the (temp) muzzle and cut that taper. Then move the collar 6 inches at a time while extending the stickout. The setup is only rigid near the chuck. At each move I stick a DI in the QCTP to dial in the taper, machine, then move on to the next 6 inches. As you probably gathered, you should cut the taper to full depth as you go. Going back to a part you tapered already would be a hassle. In the second pic you can see the center drilled brass muzzle protector for turning on centers. It has a 1" long stem that's .001 over land diameter and is driven into the bore.
PS. I almost forgot. The bore has to be concentric with the OD before you start tapering. The first thing I do is I take light truing cuts (no taper) on centers using a following rest to get the whole barrel true to the bore. (I'm just a weekend warrior so I don't have rods and bushings)

TRUING UP BARREL FOR MACHINING 1.JPGTRUING UP BARREL FOR MACHINING 2.JPG
 
Last edited:
Back
Top