The Voron kit build thread

Sounds like a reasonable plan. I wonder if those times are long enough to do much drying, diffusion is a really slow process, especially deep in the reel. The water near the surface on the outer layers will dry but moisture deep in the filament and especially deep in the reel is much harder to affect.

I keep pretty much all filament dry with silica gel and use a similar dryer (PrintDry Pro). I mostly dry silica gel in it rather than filament these days. I have dried PLA in it, but that didn't really seem to help much. I haven't tried Nylon but have heard it needs drying more than most. I suspect that if most filaments are stored with active silica that they won't need active drying, but nylon may be an exception. In the past the open feed reel on the printer was not protected against humidity here, but now most of the time it feeds from the Repbox so it is protected. One exception is a reel of PETG that I'm working with which has a broken flange, so it can't feed from the Repbox (without a special setup inside). I don't leave it out long, the PrintDry kit included a single reel sealed plastic box that I've been using with silica gel to keep it dry. These single reel boxes are quite nice but probably not inexpensive enough to have many of.

How do folks decide when their PETG needs drying?
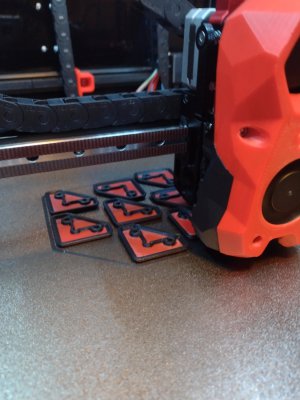
 
Another PETG print that I should have made earlier is very helpful with the Voron build and other project work with Metric bolts.

1671648052298.png


from https://www.printables.com/model/208880-rapid-metric-screw-measuring-tool-m2-m5-up-to-50mm

A manual filament change produces the contrasting color on the raised lettering. I printed with PETG but most any filament would do.

There are also hex and round holes on the back to judge nut sizes and to install brass heat-sets in for thread checking.

My Voron kits have had labelled bolt bags, but occasionally there is a wrong size in the bag, or when working on the printer the removed bolts may need to be checked or sorted and this is a convenient tool. Some of the smaller kits have no labelling on the bolts.

Looks like Adafruit had another batch of Raspberry Pi 4's this morning at about 8am Pacific time. These were the 2 GB models, perfect for Klipper. BerryBase in Germany has some of the 1GB models still available. I'm putting a Pi4 2GB model that I got from Adafruit into the Trident here. Checking Adafruit daily a few minutes after 8am Pacific time may be worthwhile.
 
A manual filament change produces the contrasting color on the raised lettering. I printed with PETG but most any filament would do.

I used that technique to add a little splash of color to my panel clips and door hinges.
 

Attachments

  • IMG_20221222_182034335.jpg
    IMG_20221222_182034335.jpg
    200.3 KB · Views: 82
  • IMG_20221222_182102668.jpg
    IMG_20221222_182102668.jpg
    161 KB · Views: 86
I like that Ken!

It's so much easier with the Voron than with my Flashforge.

With the Flashforge I had to pause it, set the unload cycle and wait for it to retract, the set the load cycle and wait for it to feed. And carefully straiten the filament end, so it didn't jam going in.


With the Voron, just pop the lever up, pull out the filament, push the new filament in till it starts oozing out the nozzle, then pop the lever back down.

I'm not sure how much better the CW2 extruder can be, because my CW1 extruder is great.


I spotted this "Iron Red" ABS on Amazon the other day. It's a better match for my anodized parts, so I ordered a roll. I'm gonna use it to reprint bright red parts like the Stealthburner, chain anchors, exterior pulley colors, etc.

Paramount 3D ABS (Iron Red) 1.75mm 1kg Filament [IRRL30111815A] https://a.co/d/aQw2WC1
 
Last edited:
For the "manual filament change" I use the slicer to insert gcode into the sliced file to trigger the change(s) at the appropriate layer, the printer pauses and leads the operator through the change, and then resumes the print. At least with the Prusa Slicer and the MK3 this is easy to set up and works quite nicely.

Now printing some "tennis tossing coins". They have U and D for up and down and are used instead of spinning a racket for determining who chooses first when we play league matches. I designed these coins to fit into a large "O" Ring so they don't damage the court or receive dings on the edges when they are tossed. Two color changes make contrasting colors for the letters viewed from either side. The holes can be used to clip them onto the tennis bag.

1671770880565.png


1671813483954.png
 
Last edited:
I had some trouble with a cardboard spool having too much friction in the Repbox, specifically with the clear PETG from Polymaker. I noticed that Modbot (on utub) mentioned printing a pair of rings to add to the cardboard spools to reduce friction. I printed one from printables.com for 1kg spools, a 200mm diameter ring. It was slightly loose on the Polymaker spool so I made a parametric ring design in OpenSCAD and tried 198mm which was the measured diameter, but it was too small, then 199mm which seems to be a good fit. I'm printing the second ring now. These just barely fit on the MK3 printbed. When I get a pair I can test it in the Repbox and see if this solves the problem with cardboard spools in the Repbox.

I did a quick manual test and it may work. Probably will. Friction seems similar to plastic spool and the rings stayed on during a quick test. Will have to use it awhile to see if friction is low enough and if the rings stay on the flanges.

I noticed that the polymaker spools take a little more force to rotate them on my spool holders, though not nearly as pronounced since the friction is in the middle. polymaker and Overture are stilly favorites though. I haven't had a roll yet that gave poor results.

I ordered a roll of clear PETG for the logo LED diffuser that's going iny Iron Red Stealthburner. I got burned on a roll of "clear" ABS that turned out to actually be a very opaque "natural". I don't guess ABS comes in actual clear.

That is, if the post office ever starts delivering again. Since the snow and ice that landed a few days ago, they've got about 10 packages of mine waiting in their local office.

Their motto: "Neither snow nor rain nor heat nor gloom of night stays these couriers from the swift completion of their appointed rounds." :rolleyes:

I guess expecting to find employees who can drive in snow would be pretty absurd with a generation who can't even operate a manual transmission.

Anyway, I'm sure the PETG diffuser will hold up fine. I have a clear PLA diffuser in my Stealthburner now, and it's holding up fine with about 200 hours on it.


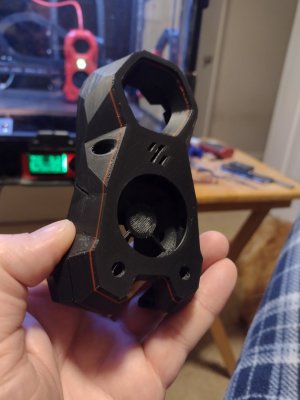
I printed a black stealthburner yesterday, just to see what it would look like. I decided I don't like it.
 

Attachments

  • IMG_20221225_154651462.jpg
    IMG_20221225_154651462.jpg
    141.3 KB · Views: 86
The clear PETG is fairly clear, and depending on print settings can be whitish translucent, or fairly clear. I saw a utub video recently on printing PETG clear but I haven't tried any of the tricks. For the stealthburner lens it should be translucent enough anyway.

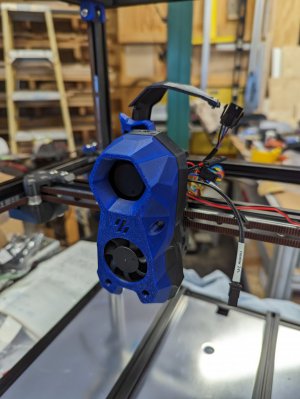
Nice blue on the SB there. Agree the black isn't the best choice. :)
 
Back
Top