The Journey Begins, PM Research #5.

Thanks for the posts. I am finishing up a Stuart 10v. Have to complete the connecting rods for the piston and valve gear and I should be done. Used my Dad's 1940's vintage Atlas 618 lathe and a LMS mini mill. Of course I made a lot of the components numerous times to correct my mistakes. Have a PM 1127 lathe and 932 mill showing up soon for my next projects.

I'll probably do the connecting rod last. I've enjoyed this build until today anyway.

Still working on the frame, drilled the holes for the valve slide bearings.
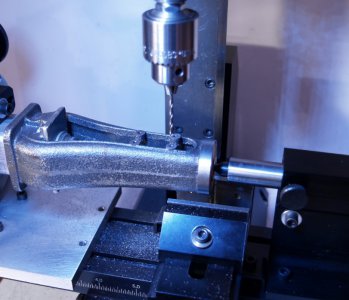
frame 2.jpg

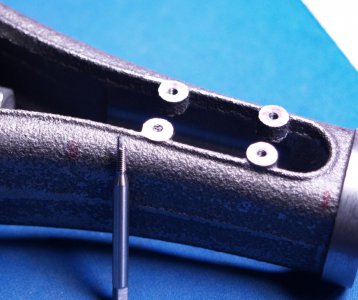
Then disaster struck!
disaster.jpg

It was going the same as the other three holes then SNAP! I should have seen this coming. It trashed the drill making that hole too.
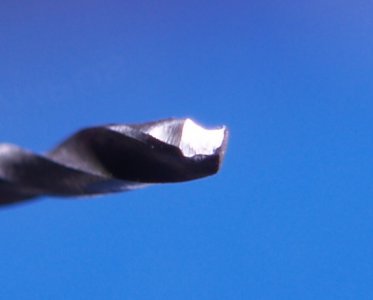
disaster2.jpg
I obviously did something wrong. I was using cutting oil and constantly backing out to clear the chips. Do I need a new tap for every hole?

Now what? Fire? Explosives? Acid?

Note: After doing some research on casting, I believe these mounting bosses were all "hot spots" or areas that cooled too fast making them harder than the surrounding metal. When I was trying to tap these holes I needed a tap handle and considerable torque to do the work. That's probably why the tap broke. When I tapped the holes for mounting the cylinder at the top of the same casting I was able to use a pin vise, so that area was obviously softer.

Eric
 
Last edited:
I just posted about it, but try a Walton tap extractor (if it is #4 or bigger I think). Smaller than that and you'll likely have to cut it out with an endmill, then overside it and fill it with a plug (with the right size hole in the middle of course).
 
I just posted about it, but try a Walton tap extractor (if it is #4 or bigger I think). Smaller than that and you'll likely have to cut it out with an endmill, then overside it and fill it with a plug (with the right size hole in the middle of course).

Cool tool! But the hole was #50. Way too small I think.

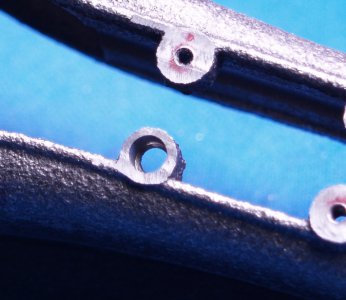
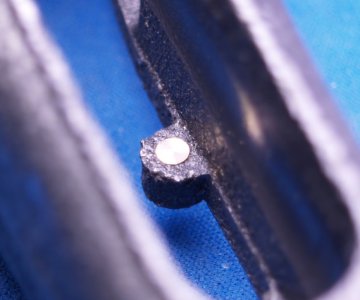
Anyway Tungsten Carbide beats High Speed Steel. I used two 1/8" carbide end mills to grind it out. I figured the worst I could do to the part was break off the boss. The carbide mill flexed so much (I didn't know they did that) it left a .161" counter bore when it finally broke thru but it made it.
disaster3.jpg

I'll make a brass plug to fill the hole and try again once I get some new tools.

I've got 8 more holes to drill and tap in this part. I'm getting a little nervous.

Eric
 
Cool tool! But the hole was #50. Way too small I think.

Anyway Tungsten Carbide beats High Speed Steel. I used two 1/8" carbide end mills to grind it out. I figured the worst I could do to the part was break off the boss. The carbide mill flexed so much (I didn't know they did that) it left a .161" counter bore when it finally broke thru but it made it.
View attachment 331197

I'll make a brass plug to fill the hole and try again once I get some new tools.

I've got 8 more holes to drill and tap in this part. I'm getting a little nervous.

Eric
Make a bushing for the oversized hole or a heli-coil? I feel your pain. I made an RG&G Gatling gun, the breach plate is screwed to the box cam with six 2-56 screws. Box cam is mild steel, 1/2" deep holes. I didn't snap any taps but used 2 new ones for the work and did 1/4 turns and fully backed out the tap to clean the chips once each hole was 1/4" deep. Took forever to tap the holes, but I'd already put 10 hours in the parts, so. . .

Bruce
 
Cool tool! But the hole was #50. Way too small I think.

Anyway Tungsten Carbide beats High Speed Steel. I used two 1/8" carbide end mills to grind it out. I figured the worst I could do to the part was break off the boss. The carbide mill flexed so much (I didn't know they did that) it left a .161" counter bore when it finally broke thru but it made it.
View attachment 331197

I'll make a brass plug to fill the hole and try again once I get some new tools.

I've got 8 more holes to drill and tap in this part. I'm getting a little nervous.

Eric
Ah, the tap is #4 machine screw size, like 4-40 I think, so not the drill-bit size :/ Sorry for the confusion.
 
Ah, the tap is #4 machine screw size, like 4-40 I think, so not the drill-bit size :/ Sorry for the confusion.

I figured that's what you meant. The screw size in question here is 2-56. The plans call for a #50 pilot hole for the tap. It works good in the bronze parts but when using a tap that small in cast iron should I be using a larger drill?

Eric
 
Make a bushing for the oversized hole or a heli-coil? I feel your pain. I made an RG&G Gatling gun, the breach plate is screwed to the box cam with six 2-56 screws. Box cam is mild steel, 1/2" deep holes. I didn't snap any taps but used 2 new ones for the work and did 1/4 turns and fully backed out the tap to clean the chips once each hole was 1/4" deep. Took forever to tap the holes, but I'd already put 10 hours in the parts, so. . .

Bruce

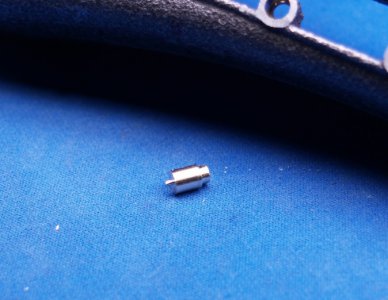
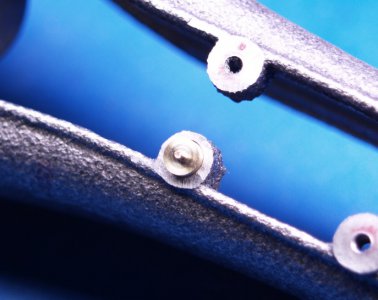
I made a plug to match the hole. I'll fix it in place with some Locktite and then try again.
plug1.jpg
plug2.jpg
plug3.jpg

I've got a lot of time on this part too and the worst is yet to come.
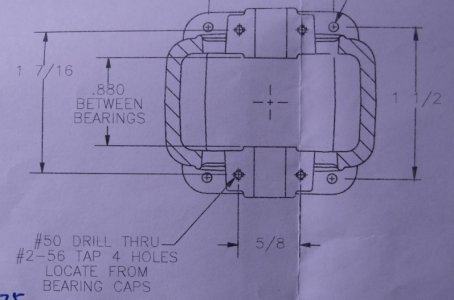
crank bearing diagram.jpg
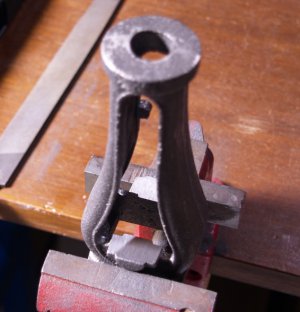
frame 3.jpg
There isn't much space to fit tools next to the frame to make the holes for the crank bearing caps.

I'm thinking about making some studs I can press into some over sized holes rather than trying to tap in this location.

Any thoughts or suggestions?

Eric
 
Last edited:
Eric,
I bet you are proud of what you have accomplished.
It's looking really good.
Also, look at how much you have learned in the process.
I'm really looking forward to starting one of these kits in a few years. (when I'm retired)
 
I should probably get me a center finder of some sort. Any suggestions?

Eric

Bit late to the reply here, but a dial test indicator is absolutely the right tool for the job here. I have two, one that is a 0.0005" resolution and one that is a 0.0001" resolution. These are without a doubt my most used tools and they are small enough to be clamped in the sherline spindle. You can also use them for edge finding in an extremely accurate manner.

I have a fowler X-test 0.0005" and a Interapid (used) 0.0001" indicator. They are both multiturn swiss type indicators with swivel stems. the extra travel is incredibly useful. Get the 0.0005" first - it is more broadly useful.

Great work on all of this. Enjoying following along,
 
I made a plug to match the hole. I'll fix it in place with some Locktite and then try again.
View attachment 331219
View attachment 331220
View attachment 331221

I've got a lot of time on this part too and the worst is yet to come.
View attachment 331222
View attachment 331223
There isn't much space to fit tools next to the frame to make these holes.

I'm thinking about making some studs I can press into some over sized holes rather than trying to tap in this location.

Any thoughts or suggestions?

Eric
Do you have access to a Bridgeport with a quillmaster and qrd? Or, they sell aircraft drills that are 6" long. I've got some 1/16" ones. You may find #50s. Can't come up from the bottom?

Bruce
 
Back
Top