Rhodes Shaper Rebuild

Your resto looks real good. One thing I did notice though, I think your using way to much blue when scraping. When applying blue you should still be able to see your surface plate clearly, and the layer should be theoretically 20 millionths thick. More blue makes the work go faster but you really want to get that blue thin for final finishing.
 
Karl
Sorry to take so long to reply.
I don't have any information on the vertical slotter and wander if you have a regular shaper with the vertical slotting attachment installed.
A picture would be great!
I did find a lot of information on the 8" shaper with the vertical attachment ....

Metal shaper column 46
Kay fishers metal shaper columns
Metal shaper literature

There might be another but gotta find it.
A lot can be found with a search.

I'll bet its just an attachment. I'll get a pic.
 
Andre
Some of these surfaces are so far out that a very heavy coat of blue only shows in two or three small spots.
As I get closer to flat, the blue has to be thinned till the plate is clearly seen through it but each check uses blue and helps to thin the film of blue on the plate.
I start the bad surfaces and work multiple parts till they are closer to flat which thins the blue each check.
If the blue and plate are still clean I will continue to use it, thinning as needed.
Getting a fresh coat of blue thin enough for final finish work is difficult.
I've found that a few drops of light weight oil can help to thin and spread it and a roller is great, but when right for those final checks it's so thin that a paper towel rubbed
across it will hardly show any blue yet the scrapped surfaces will still pick it up.
It's a learning process for me and the information and suggestions that others have posted have been a great help.
Thanks for looking and your suggestion.
 
Been trying to do a bit of scraping of late but the joints just aren't up to it. Perhaps soon!

Did find a machine on craigs list that I couldn't pass up.
Had already pulled the Sabina electronic drive speed before remembering to take a pic.
The clamp handle fell off on the last part of my trip but landed in the truck bed.
IMG_9592 - P.jpgIMG_9595 - P.jpg
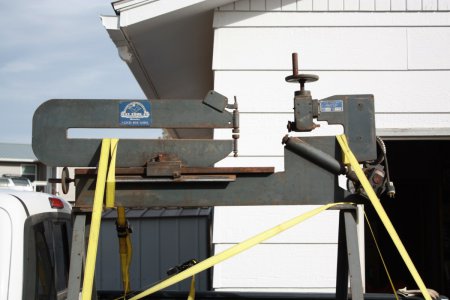
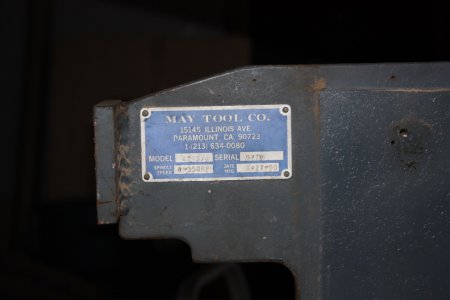
It's a May Tool CO. 42v 3/4 circle cutter from the late 70s or perhaps 80s.
Will cut 16 gauge mild steel circles up to 48" and has a 3/4 HP motor.
It's been stored outside and unused/unloved for some time.
The motor and speed drive work.
The seller plugged it in to show me but with all the dust n grit that had to be in it I didn't want it run much.
Will have to sharpen or replace the cutter and clean it up before I know what bearings need replacement.
There's the standard rust problems to deal with.
May also have to add some minor upgrades.
The legs aren't factory and though the machine base was drilled for bolting them on the person who added them welded em in place.

The Sabina adjustable speed drive has a schematic for 1/4 to 1 1/2 HP drives if anyone would like it posted.
I've not checked the motor tag but it looks like it's a DC motor.
Can't even work on my current long list of projects so of course I needed another.....

IMG_9592 - P.jpg IMG_9595 - P.jpg
 
Been watching Craigs list for goodies.
This came up and was just a bit over 110 miles away. Most anything is that far from where I live so I jumped on it.
IMG_9639 - P.jpg
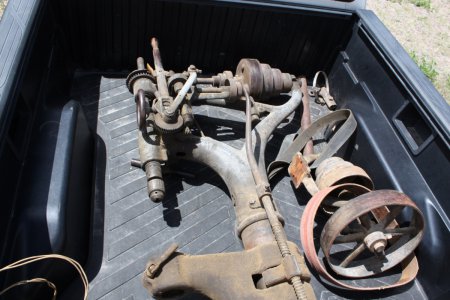
Looks as though it might be in the original color, Light Blue-Grey.
It fit in the 6 foot truck bed with just a few inches to spare and that was with the spindal lowered.
The four step sheave on the right mounts to the base. Belt is three inches wide.
Was intrigued that it has power feed. This feature has been disconnected and no belt is with it but all parts are still mounted and it should be easy to get it working.
The spindal is raised/lowered with a small hand wheel which is geared fairly low. Nice for infeed but slow when setting up.
The table is raised/lowered with the screw running down the side of the casting. It's missing the handle.
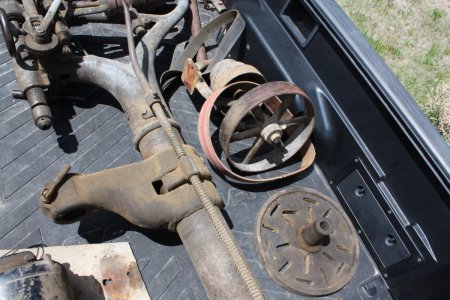
IMG_9640 - P.jpg
Didn't think to turn the table over for this pic but its in fair condition.
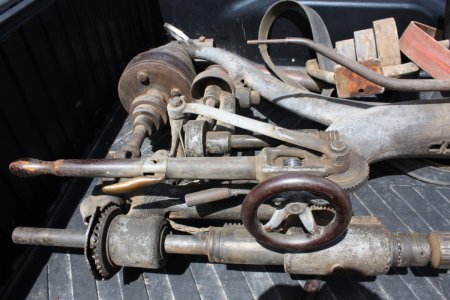
IMG_9642 - P.jpg
Will have to go through the spindal and replace some or perhaps all the bushings. Still, its fairly tight with little movement on any of the shafts. It could be cleaned up and used without any major work and still out-preform most China machines.
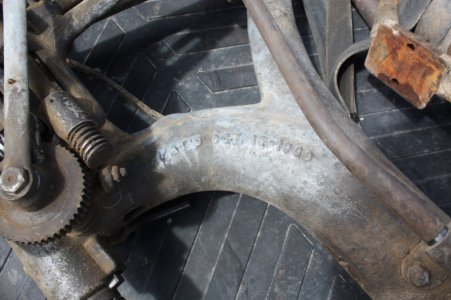
IMG_9643 - P.jpg
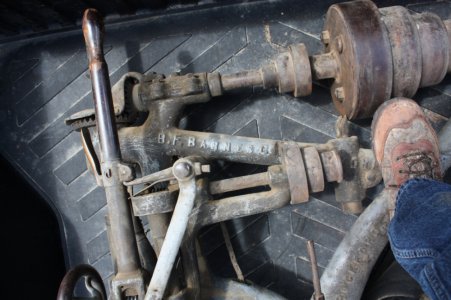
PAT'D OCT 16 1900
IMG_9644 - P.jpg
B. F. BARNES CO
Haven't gotten this beast unloaded yet and will have to research it's its history.
I suspect the fork , beside my boot, was to operate a clutch so the machine could sit idle while the overhead belt line was turning.
Most of those components have been removed and it was converted to motor drive.
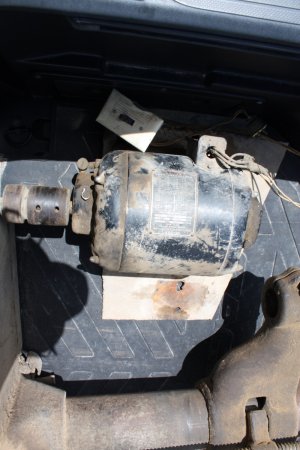
IMG_9641 - P.jpg
This ONE HP motor is several times the size of a modern motor. It has bronze bushings and felt wicks.
It drives the 3" wide belt and mounts side by side with the sheave set on the base of the stand.

This is project number 5 on my list so it might be a couple of years before I start the rebuild.
Was really happy to find such a nice piece of Americana iron.
 
I love the old Camel Back drill presses. My father has one.
 
I love the old Camel Back drill presses. My father has one.
I'm real happy to have this one. Been looking for more than a year and all I've seen were at least 350 miles away and very expensive.

Pulled the top drive shaft and found babbitt was sweated in for bearings. I had expected bronze bushings.
Lots of play in the bearing under the belt load. Will have to check that the shaft is square to the spindle or if there's enough adjustment that I can scrape it in. Also need to scrape the bearing surface to get out the high silica sand inbeded into it.
The babbitt layer seems pretty thick.
Have handled a lot of babbitt bearings. Mostly on turbines and pumps.
But, have never sweated it into a bearing and these strong backs are cast with the frame.
There were thick gaskets under the caps and they have the largest oil holes ever seen. Perhaps oil drip tubes were once installed there.
 
Back
Top