Rhodes Shaper Rebuild

tertiaryjim

Active User
H-M Supporter Gold Member
Joined
Mar 3, 2014
Messages
634
Have been making some progress so it seemed time for a few pictures.
This is a excellent learning project for me and I hope it's of aid to others.
There's bound to be things I leave out which others might be interested in so please speak up.

Have tried electrolysis to retain as much metal as possible and it also removes the paint so a great deal of effort was saved instead of scraping paint.
There's information on other sites that explain the process far better than I could but will post some pics of my setup if your interested.
Here's a before and after of the V side of the table.
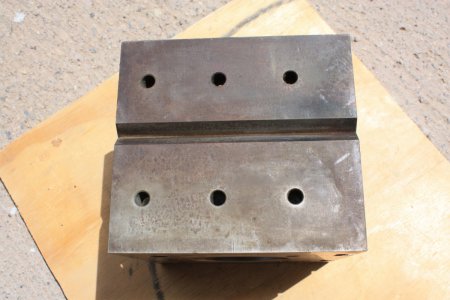
IMG_9343 - Copy.JPGIMG_9351 - Copy.JPG

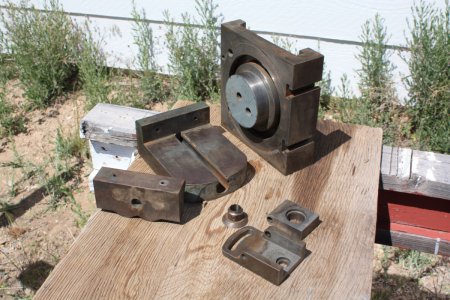
Same here showing the cross slide, vice, and clapper.
IMG_9359 - Copy.JPGIMG_9432 - Copy.JPG
The vice has serious problems.
The screw was bent in multiple places and someone in the past filed on it trying to help but only made it worse.
I plan to remake it but have corrected the original enough to serve in the mean time.
May have to make a new nut as well.
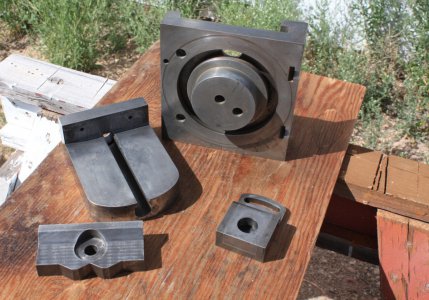
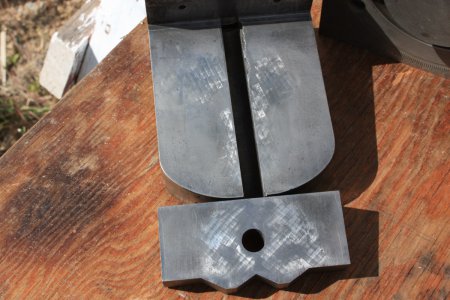
The moveable jaw was only contacting the vice body in the center which put unwanted pressure on the guide for the chip guard.
This area isn't meant to take load and part of it has broken away.
Nothing I can do about the lost metal for now but I have blued the high spots on each part and scraped them to move the pressure area away from center.
IMG_9434 - Copy.JPG
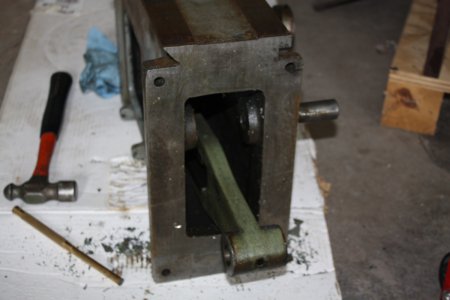
This is a shot of the rocker arm. Note the set screw in the bottom of the arm.
IMG_9326 - Copy.JPG
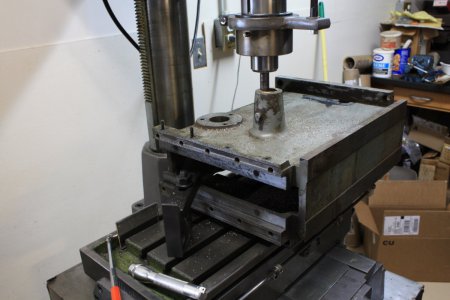
The bronze bearing is worn beyond reasonable limits. Tried tapping it out without success so I cut a couple of reliefs to ease it's grip.
IMG_9329 - Copy.JPGIMG_9337 - Copy.JPG
It drove out with a bit of pressure relieved.
There were two gib adjustment screws broken off in the main casting.
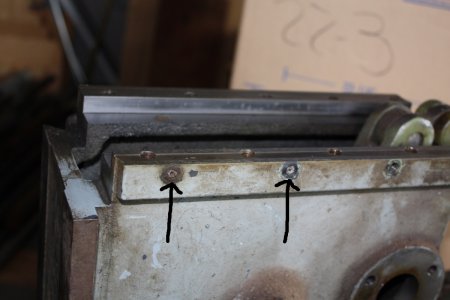
IMG_9299 - Copy.JPGFortunately, they turned rite out.
The gib that mounts above them sticks out just a bit and when the lock nuts are tightened they catch the edge of the gib which bends the ends of the set screws.
The fix is simple. Just turn some shouldered lock nuts.
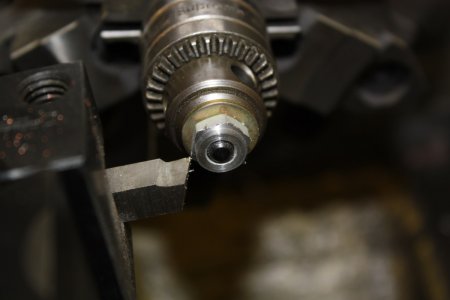
IMG_9360 - Copy.JPG

Have been working on the motor.
The motor lubrication and bearing setup has taken some research. I'll have to cover it in detail at a later time.
Got to catch up with my pics and will try to answer any questions that come up before moving on.

IMG_9343 - Copy.JPG IMG_9351 - Copy.JPG IMG_9359 - Copy.JPG IMG_9432 - Copy.JPG IMG_9434 - Copy.JPG IMG_9326 - Copy.JPG IMG_9329 - Copy.JPG IMG_9337 - Copy.JPG IMG_9299 - Copy.JPG IMG_9360 - Copy.JPG
 
Last edited by a moderator:
Re: Rhodes Shaper

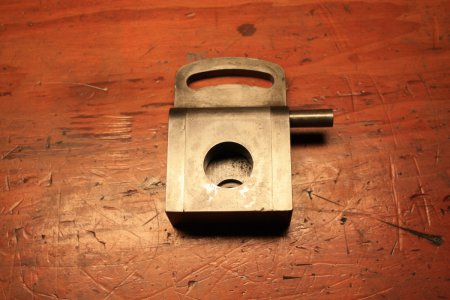
The pin that holds the clapper box together is very lightly tapered.
When I assembled it I tapped it in just a bit deep and the clapper wouldn't function easly till I knocked it back out some.
This is simply to show the direction its removed/inserted on the Rhodes shaper.
IMG_9438 - Copy.JPG

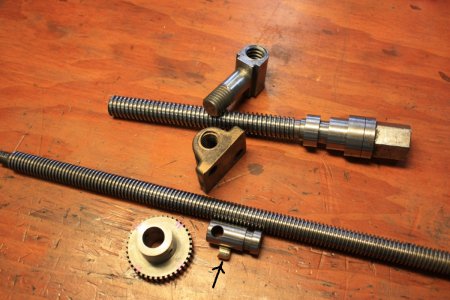
Here's a collection of parts.
At the top are the bolt and nut for the vice. I have to make new ones.
Will use 4140 but don't have a setup to harden or normalize large parts yet.
The center screw is the cross feed screw and the brass nut goes with it.
Will have to make a new brass nut as it's worn sloppy.
Will also make a test nut of aluminum just to spin down the screw to test that its good it's full length.
The arrow points out a small brass part I made today.
It simply grips the feed rod and the old one was trashed over time.
The cross feed screw has a 10 pitch and the feed gear has 40 teeth so minimum feed is 0.0025"/stroke.
The ratchet spring was broken and will have to be replaced ( not pictured ).
IMG_9440 - Copy.JPG

IMG_9438 - Copy.JPG IMG_9440 - Copy.JPG
 
Re: Rhodes Shaper

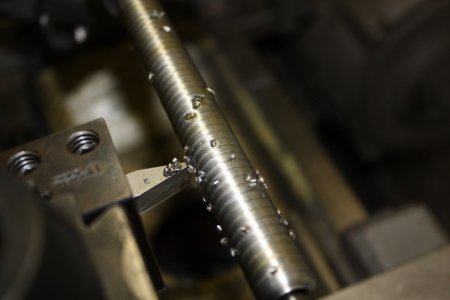
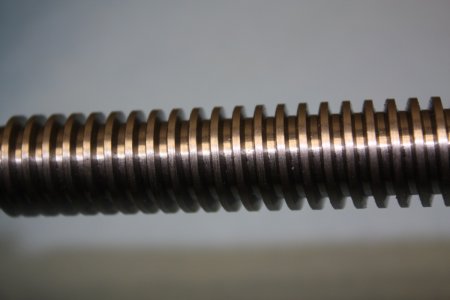
Got a good start on the new vise bolt.
Found I had a tool for OD 8-tpi RH Acme so didn't have to worry about that.
Don't have one for the ID so I'll soon be doing the math on clearance angles and grinding bits.
Well, got a couple ground for ID Acme 10-tpi but don't like to rob them and need to grind a bunch of tools just to keep ready in my tool library which is rather skimpy now.
IMG_9450 - Copy.JPG

Then a little closer.IMG_9454 - Copy.JPG

Was very happy with my work until I looked closely at the pictures.
Found the back side or working side of the thread is rough ( gauld ) on the outer half of it's diameter.
OH NO Ruining such an easy thread and piece of 4140 is something that could send one to #$!!
My only excuse is that I had laser eye surgery tuesday and have trouble seeing up close.

Well I've made enough mess for one day. Better just stop and worry about it next day.
IMG_9459 - Copy.JPG

Today:

I lightly polished the thread and though it's not great I think it will be usable.
Don't have another piece of 4140 of the correct Dia. anyway.

Decided to walk away from my disappointment and take a look at other parts.
IMG_9465 - Copy.JPG
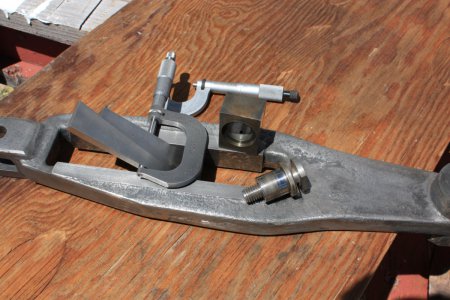
As you can see, the stud fits in a sleeve- which fits in the block- which rides in the slot of the arm.
Each has to have clearance and it's all gotta add up.
Surprisingly, the clearance between the block and arm is the tightest with 1.5 mills near each end and 2 mils in the center of the slot.
It.s probably been saved a lot of wear as it's enclosed and not as much dirt could get to it.

The mic isn't tight to the adjustable parallel. It's just laid there so others can see my preferred method to measure slots and keyways.
I remember someone recently asked what adjustable parallels were used for.

The other parts probably have more wear because of small surface areas and poor lubrication.
This train of parts seems to be able to move around a bit as total included clearance on the outer side is 8 mills and the inside is 7 mills.

Don't think I'll worry about these until I've seen what kind of finish can be produced.
Spent an hour or so lapping some acme threading bits. Not going to mess up another thread if I can help it.
Gotta go finish my poor vise bolt and then grind some lathe and threading tools.
Right and left hand as well as internal and external.
That should keep me busy for several days at least.

IMG_9450 - Copy.JPG IMG_9454 - Copy.JPG IMG_9459 - Copy.JPG IMG_9465 - Copy.JPG
 
Re: Rhodes Shaper

Hi Jim, as a newby shaper owner I'm enjoying your rebuild, thanks for sharing it.

After a few hours tracking down the cause of an annoying loud clank from my Alba A1 shaper at longer length of strokes, I turned down the quite worn bull gear shaft and made new bushes thinking that would cure it.... no change!

I then thought that the clearance between the block and the rocking arm at around 7-10 thou had to be the cause, I shimmed it by wrapping a strip of beer can around it with grease applied and damn it the clank was still there.

There is no apparent adjustment for the backlash in the gears but by careful tapping the bull gear support casting with a soft hammer while the bolts where just pinched up I got the gears to mesh better and have got rid of the clank altogether. Your bull gear bearing is fixed but it looks like you may be able to use the same trick but on the other gear shaft if necessary.

What I'm trying to say is that the clearance of the sliding block does not seem to have much effect on the smooth running of the shaper except on the very longest stroke, and if it's noisy at that, a thicker oil (or grease) will most likely take up the slack, so you may be able to save a lot of time by assembling it and trying it out before attending to the apparent slack in the block, that part can easily removed and done later if needed.

Just my thoughts,

Bernard
 
Re: Rhodes Shaper

You are doing al right son one step at a time. trust me
 
Re: Rhodes Shaper

Danreb
Interesting that you had such a difficult to find clank.
I'll be putting in all new bushings so that won't be a problem.

The rhodes shaper has beveled gears.
The pinion or 13 tooth gear which drives the bull has it's teeth angled to push the bull onto its drive shaft.
It has a thrust bearing on the other end of the shaft and the clearance is set by the width of the belt cone and and handwheel hub.

Since the bull gear is thrust towards its shaft it helps to keep it from working off the shaft ( the bull just mounts to the shaft with a light interference fit) and has a thrust bearing behind the bull to carry the load.

I must wander if there is too much clearance for one of your thrust bearings and the shaft is slapping back n forth.
This could cause the bull to work loose if your machine is set up the same.

GK1918
Seems the days when I could do three things at the same time are over.
Will just take it a step at a time and not be too upset if it seems there's not much done at days end.
 
Re: Rhodes Shaper

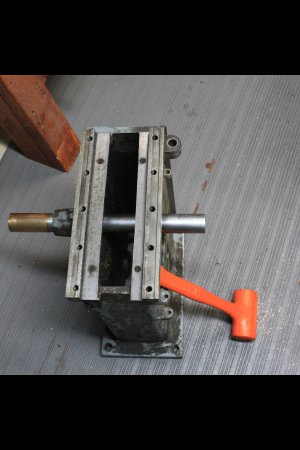
Out of curiosity I decided to check a couple things out, just for future planing.
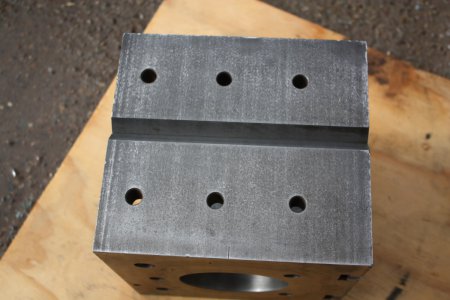
Have already done a little flat scraping on the vice to take pressure off the top center area which shouldn't bear load. More to do there to get it flat and will also have to scrape the bottom a bit.
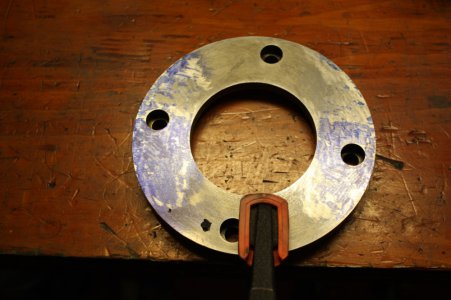
IMG_9476-01 - Copy.JPG
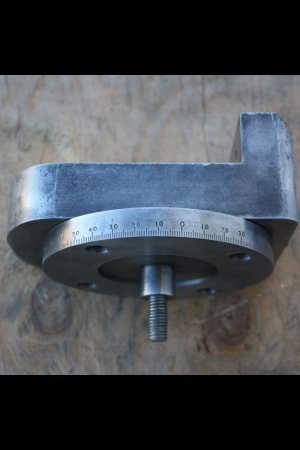
Took the round graduated base and set it on the surface plate and it rocked!
Didn't bother checking the other side as it's gotta be worked on anyway and I can only do one side at a time.
IMG_9484 - Copy.JPG
The table has yet to be blue checked but it seems to me that all surfaces should be flat. Will deal with the table later.

Was also curious about the condition of the main body of the shaper.
What wear is present on the ways for the ram?
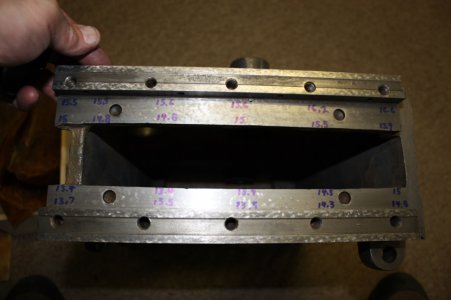
I measured down from the rails to the ways using a depth mic.
Only wrote the last few digits and behind the decimal are tenths.
IMG_9479 - Copy - Copy.JPG
There's several thousanths variance on each side and one way is several thousanths lower than the other way??????
I remember that the top gibs were shim'd and only three shims came out of the two sides.
Seems one side ran with 0.009" and the other 0.012". How very strange!
Judging by the wear pattern, it's been run this way since it was last scraped which possibly was done by MR. Rhodes himself. Well, who knows?
Will have to determine if the ways are cocked or if its the rails.

The rails ( as I call them ) are the raised, hand scraped areas either side of the ways.
The top gibs are shimmed so the ram has oil clearance or at least so there's no interference and bolted down on the rails. That's why the rails have to be flat and true.

At any rate I'll have to remove at least 0.003" on one way to true things up and probably a lot more.

The rails are part of my reference and I'll not need to touch them. That could be a disaster.


Next question on my mind is how square are the rails to the front vertical ways. You can flip that question around if ya like as it works both ways.

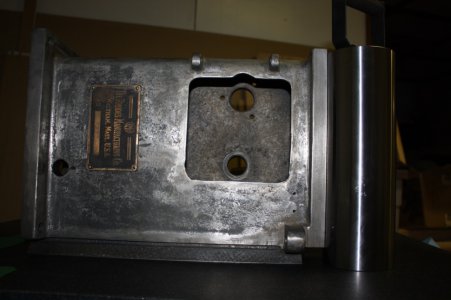
IMG_9481 - Copy.JPG
I set the body on the rock with the vertical ways down.
Had a hard time keeping things clean as the wind keeps gusting up dust n grit out here. Not certain if this dust is from Utah or Arizona.

When I moved the straight edge into contact of one rail, it touched at the top and left a slim line of light which looked to be a thousanth or less at the bottom.
The rails are two raised areas for each side where the top gibs mount and they remind me of RR tracks, hence the name.
So I checked each one to the straight edge and all of them were open at the bottom.
Now that would aim the ram down, but only a little bit. A 0.0015" feeler wouldn't fit the bottom gap on any of them.

Had to think on it for a few but it soon made sense.
The ram can't run metal to metal. It has to have room to move and for oil to coat each surface.
That clearance will let the ram rise up as it extends because the pressure from the cut tries to push the ram up. If you've not used too much back rake in the tool.
So they gave it just a touch of cant or angle down. But how do I measure the cant or gap?

I placed a 0.001 shim at the bottom of the gap and eased the straightedge up till it captured the shim. AHA!
The straight edge now seemed to touch at the top and bottom.
Well, that's with the shim captured and just eyeballing the top with a flashlight behind the straightedge.
Three of the raised rail areas captured the shim but one must be a couple tenths out. Not a big concern at this time.

Next check'd how thick the ram ways are.
They've worn a bit funny and tapered because it was shimmed wrong or the ways in the body were scraped wrong, but the ram ways are, were, basically the same thickness.

The top ways and the ram seem to be a bit of a mess!
Why would they have constructed it with one way 0.003" lower than the other way and shorted a shim?
Now it's all worn kinda strange and I'm certain that some crap for brains, 85 year old apprentice is laughing.

Won't understand it better until I can blue the components but that's gonna be awhile.
Plenty of other things to do first.

IMG_9476-01 - Copy.JPG IMG_9479 - Copy - Copy.JPG IMG_9481 - Copy.JPG IMG_9484 - Copy.JPG
 
Re: Rhodes Shaper

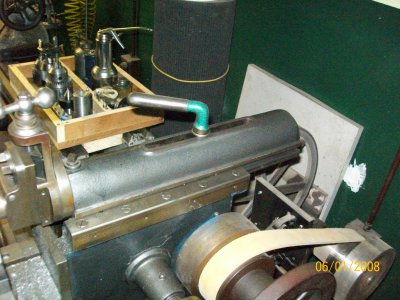
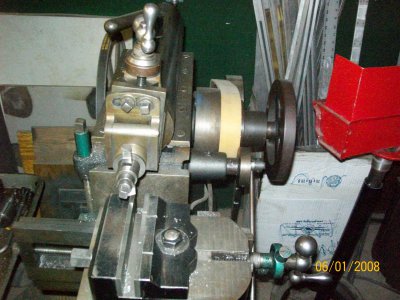
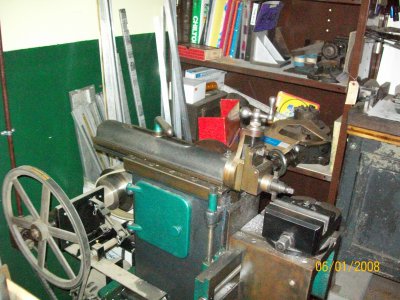
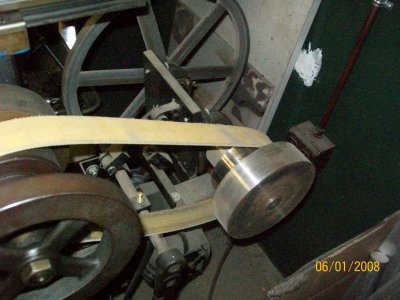
Here are some pics of my Rhoades shaper. Nothing rebuilt. The electric motor came from a worn out Atlas drill press, made a new shaft for it. The large v belt pulley was free from a scrap pile. I made the flat belt drive pulley from scrap, and I was a belt fabricator in another life so the belt was made from a drop. Bought the shaper for $100 and have only paint as additional cost. Would like a vertical shaping head.Rhoades 1.JPGRhoades 2.JPGRhoades 3.JPGRhoades 4.JPG

Rhoades 1.JPG Rhoades 2.JPG Rhoades 3.JPG Rhoades 4.JPG
 
Last edited:
Re: Rhodes Shaper

thats good, that will work= lets make chips now= or we will have a shaper chip contest like adam is doing ....samuel

oh lets take a .500 cut? I can good job son...............

samuel
 
Re: Rhodes Shaper

mcostello
That's a sweet looking machine and it's sweeter still that you have it working with so little invested.
Nice way to scrounge and that's good work on the secondary shaft and flat sheaves. Did you use bronze or roller bearings for the shaft?
Does it cut well and leave a good finish?


samuel
My idea of a contest to see who can produce the flattest most mirror like finish or the truest dovetail, or best setup.
I'm not the guy who says " Watch this " as they head into uncalculated disaster.
My biggest disaster lately is buying a shaper that needs a complete rebuild. Think I can limp on home with that one. :roflmao:
 
Back
Top