POTD- PROJECT OF THE DAY: What Did You Make In Your Shop Today?

Literally 12lbs of crap :D

My job yesterday and this morning was to rewire the fluorescent fixtures in the garage to use some direct wire LED tubes I won at an auction recently. They’re 4000k instead of 6500K :foot in mouth:, a fair bit brighter and use a bit over 2/5 of the power. I’m very happy with the results

First fixture done at the back left for comparison
View attachment 485463View attachment 485464View attachment 485465
View attachment 485471
View attachment 485472
That’s looks so nice.
 
Remember these are working shops and not a house or museum.
Yeah right Randy, I've seen pictures of your shop! "Museum-quality" comes to mind when seeing your tool chest organization and general shop cleanliness! Food hitting the floor gets a "5-second rule", probably 5 days in your shop! ;)

Bruce
 
Another POTD that'll end up being a multi-year endeavor. My wife and I have a nice place in MI on 64 acres. She's wanted a pond for years; we finally got it started. I'm not making too much fun of her, but she originally thought that I'd dig the pond with our Case 580 backhoe and it's whopping 3/4-yard bucket. Her pond plan was for a 1-acre pond which I calculated out at roughly 15,000 yards of dirt or ~20,000 scoops with the Case. I'm 64 and wouldn't live long enough for that to happen. So, go to someone who does this for a living. We went with Schlicht Ponds (https://www.pondperfection.com/). They did a nice job for us.


Our place in Central lower MI
1712349142951.png

Pond planned location; ~150' x 300' x 15' deep. Incline is 1 to 3 for (hopefully) minimal erosion
1712349447666.png

This is the guy who did the heavy lifting; CAT 336 excavator with 3-yard bucket. Seven days of digging.
1712349576347.png

Looking back at the house
1712349649465.png

1712349685706.png

12' tall dirt piles currently obstructing most of the view. Should be leveled out by the end of the summer.
1712349713695.png

The pond is about 4' from being filled which shouldn't (fingers crossed) be a problem. I dug a test hole 9' deep with the Case adjacent to the pond around 20 years ago and it stays filled year round. Our South border is the Thornapple River; the pond level matches the river. The level is currently going up about 6" per day as the "spoils" (new one on me, that's what they call the dirt dug out of the hole) are still draining (he was digging in water). Plus, the water is seeping in through the ground. I didn't hit any clay with my test hole at 9', just sand & gravel. They hit clay at about 10' though most of the footprint is still sand & gravel.

Next step is to wait about a month or more for the spoils to dry out, then get it moved. My part of the project (photos to follow) will be moving around 300 yards with the Case and F600 dump truck to level out the front area of our yard as our house was built on a hill. Then it'll be some landscaping, followed by more landscaping, followed by . . .

Bruce
 
Literally 12lbs of crap :D

My job yesterday and this morning was to rewire the fluorescent fixtures in the garage to use some direct wire LED tubes I won at an auction recently. They’re 4000k instead of 6500K :foot in mouth:, a fair bit brighter and use a bit over 2/5 of the power. I’m very happy with the results

First fixture done at the back left for comparison
View attachment 485463View attachment 485464View attachment 485465
View attachment 485471
View attachment 485472
when your done there want to come do my garage? lol looks awesome!
 
@BGHansen

BIG project there. You wrote "Should be leveled out by the end of the summer" and "then get it moved" but you didn't say who/how/where regarding the leveling/moving (except for the 300 yards for the front yard). What is to be done with the remaining 14,700 yards?
 
We have 3 guys quoting the job. We have an active gravel pit north of us (just the other side of our north property line). They'll probably get the job and will use a 5 yard front loader, 20 yard truck and a dozer. It'll be mostly dozer work. The one given is that it won't be me!
 
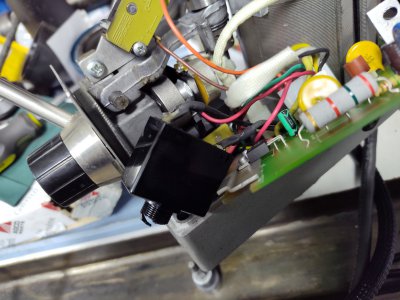
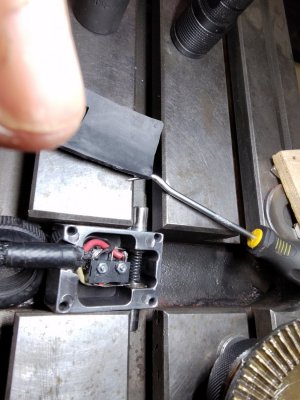
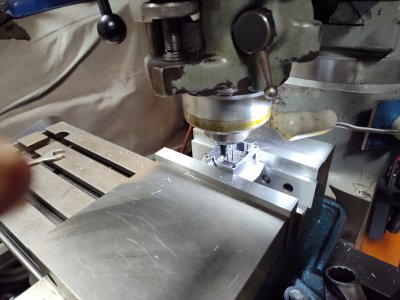
Have been back to work on the 11x54 Acra mill which has been patiently waiting for the final steps to get it up and running. Cleaned up and re-blued the way wiper holders, and power feed stops. The Servo 140 power feed was dead, so dug into it and replaced the main power switch, and got both directions working, then adjusted the rapid switch to get it back on line. Next up was the limit switch which required replacement, and getting rid of three feet of excess cord. Could have put in a plastic Chinese replacement, but wanted to retain the aluminum one that was on the machine. Ordered a bag of ten 5 amp switches from amazon for 7$ https://www.amazon.com/dp/B07X142VGC?psc=1&ref=product_details that required removing the rollers and trimming the switch levers along with milling out some additional room in the switch box to allow them to function properly. Next up is installing the Vevor power feed on the Z axis, and hooking up the VFD along with a 120V four gang box for the power feeds, and a three axis DRO. You'll have to forgive the sloppy work on my first real attempt at video on my phone (last pic). Mike
 

Attachments

  • IMG_20240325_180216820.jpg
    IMG_20240325_180216820.jpg
    401.1 KB · Views: 19
  • IMG_20240401_180010632.jpg
    IMG_20240401_180010632.jpg
    281.5 KB · Views: 19
  • IMG_20240404_130324301.jpg
    IMG_20240404_130324301.jpg
    370.7 KB · Views: 18
  • VID_20240405_181516067.mp4
    57.7 MB
Last edited:
Yeah right Randy, I've seen pictures of your shop! "Museum-quality" comes to mind when seeing your tool chest organization and general shop cleanliness! Food hitting the floor gets a "5-second rule", probably 5 days in your shop! ;)

Bruce

True Bruce, I try keep a tidy and organized shop. But, it is by no means a house or museum. It is all about working conditions, functionality, and efficiency. My point is that sometimes people get carried away with hiding electrical and plumbing just to house their hoard. And yes, I suppose I can be classified as a neat freak by some. :encourage:
 
Back
Top