-
Welcome back Guest! Did you know you can mentor other members here at H-M? If not, please check out our Relaunch of Hobby Machinist Mentoring Program!
You are using an out of date browser. It may not display this or other websites correctly.
You should upgrade or use an alternative browser.
You should upgrade or use an alternative browser.
B
BRIAN
Forum Guest
Register Today
After taping the cam box fixing holes a cam follower was fitted for the exhaust and the cam box fitted, the valve was then inserted with the cam on the base circle and the amount to be removed from the stem noted and the valve stem trimmed so it was just to long, Light pressure on the head of the valve will make the cam hard to turn. so the stem was trimmed a little at a time until the cam will just turn with light pressure on the valve head. final setting will be when the engine is being assembled.
With the cam box removed the position of the hole for the valve retaining pin could be measured and a 1 mm
hole drilled in the 3 mm stem.
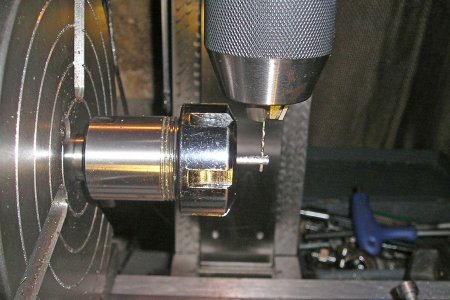
I now had all the parts to assemble the exhaust.
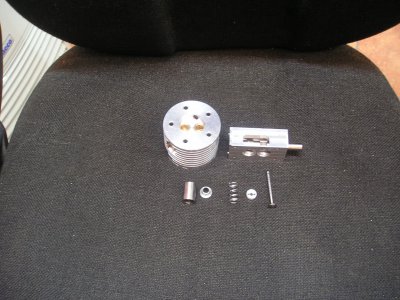
The lower spring plate--spring-- valve retainer-- pin--and valve are assembled.
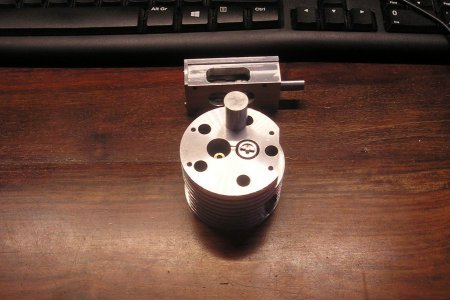
Then the follower.
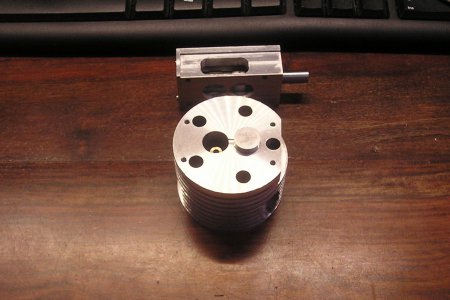
And the cam box.
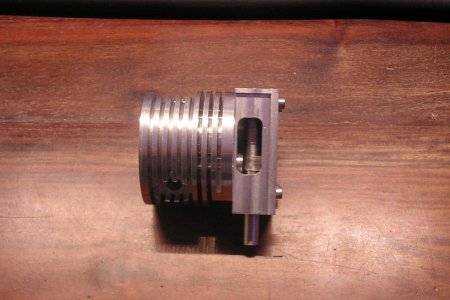
You can just see in this photo that the cam is off centre of the follower towards the middle of the head this is to encourage the follower to turn slightly during valve opening to even out the wear and distribute the lubricant.
Still waiting for the end mill to recess the holes for the cam box screws, and the timing pulley.
Next job the inlet.
Brian.
With the cam box removed the position of the hole for the valve retaining pin could be measured and a 1 mm
hole drilled in the 3 mm stem.

I now had all the parts to assemble the exhaust.

The lower spring plate--spring-- valve retainer-- pin--and valve are assembled.

Then the follower.

And the cam box.

You can just see in this photo that the cam is off centre of the follower towards the middle of the head this is to encourage the follower to turn slightly during valve opening to even out the wear and distribute the lubricant.
Still waiting for the end mill to recess the holes for the cam box screws, and the timing pulley.
Next job the inlet.
Brian.

- Joined
- Jan 20, 2013
- Messages
- 285
Very nice Brian. Looking good!
B
BRIAN
Forum Guest
Register Today
After fitting the second valve. The assembly was mounted on the RT with two indicators to show when the valves lifted and the valve periods checked, the overlap is a little less than specified. but still ok. all other angles are to spec .
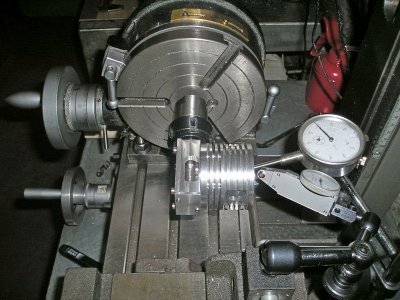
the head was the mounted on the lathe and given a good test run then striped for examination.
the polish marks show good contact and the followers are turning as required.
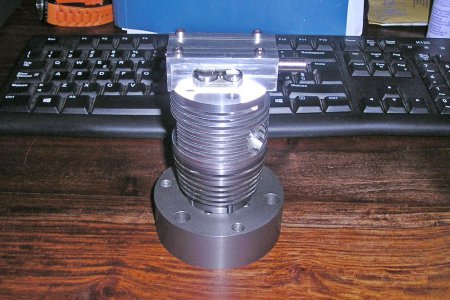
The long screws for the cylinder assembly have arrived so the whole cylinder can now be mounted on the jig.
Brian

the head was the mounted on the lathe and given a good test run then striped for examination.
the polish marks show good contact and the followers are turning as required.

The long screws for the cylinder assembly have arrived so the whole cylinder can now be mounted on the jig.

Brian
B
BRIAN
Forum Guest
Register Today
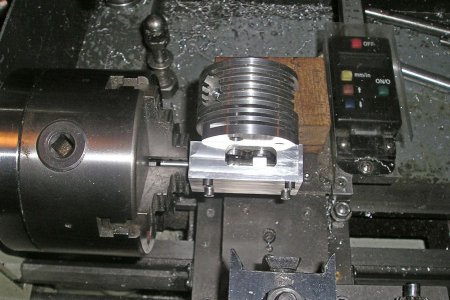
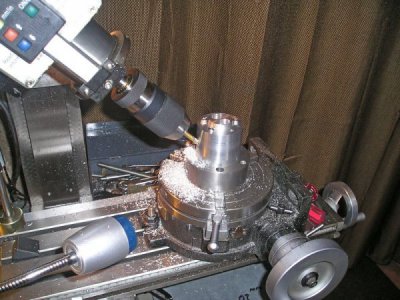
At last the end mill arrived ,the fixing holes counter bored, the cam box was then set up on the mill the fins cut and edges bevelled.
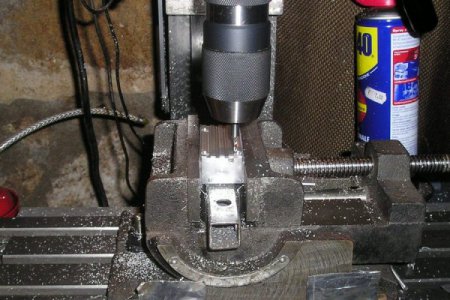
With the box fitted to the head, it was aligned on the mill, then the box removed and the head centred, so the fins could be cut in the head.
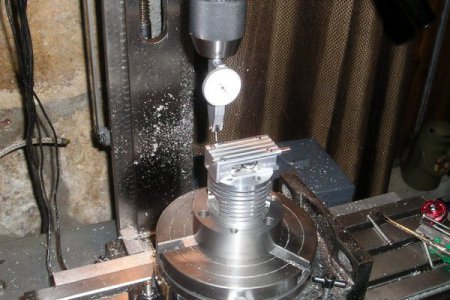
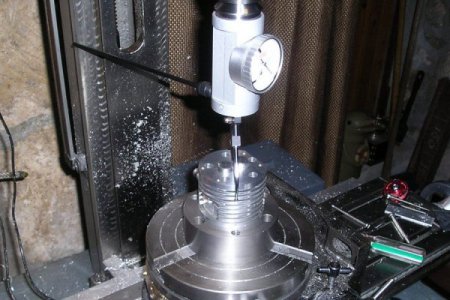
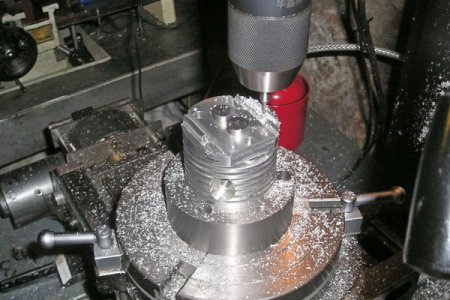
The pulley for the belt arrived and it went straight into the shop and the side flange removed to take the
impulse disc for the ignition trigger, only then did I discover they had sent me the wrong pulley. I am awaiting there reply.
However I think that I have the bugs worked out now so I can continue with the other four cylinders.
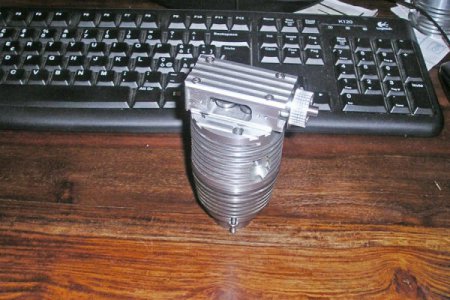
Brian.

With the box fitted to the head, it was aligned on the mill, then the box removed and the head centred, so the fins could be cut in the head.


The pulley for the belt arrived and it went straight into the shop and the side flange removed to take the
impulse disc for the ignition trigger, only then did I discover they had sent me the wrong pulley. I am awaiting there reply.
However I think that I have the bugs worked out now so I can continue with the other four cylinders.

Brian.
B
BRIAN
Forum Guest
Register Today
Having got No1 cylinder up to spec I have returned to the replacement for the head that I damaged earlier .
At this point I decided that this will be No3 head, This head is different from No1 in that it has a screw that enters the combustion chamber opposite the spark plug when removed this allows oil that accumulates in the lower two heads when the engine is stationary to drain away. No 4 head has a similar arrangement but the Plug and drain are swapped over so the plug is on the high side of the head. On normal radial engines it is usual to remove the plugs to allow the oil to drain, but I think this puts a lot of wear and tear on the small ignition leads that are difficult to keep in place at the best of times.
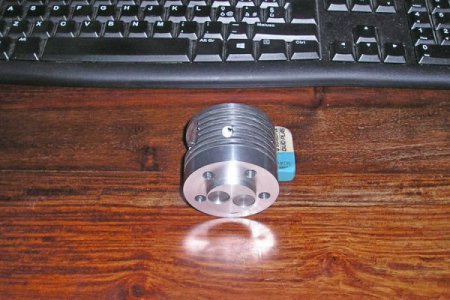
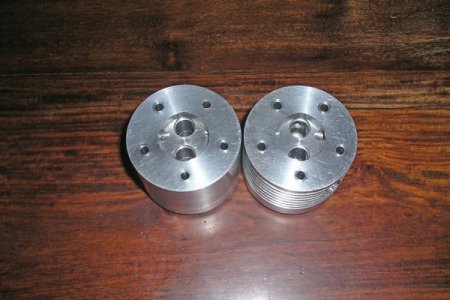
Heads 3&4
Brian.
At this point I decided that this will be No3 head, This head is different from No1 in that it has a screw that enters the combustion chamber opposite the spark plug when removed this allows oil that accumulates in the lower two heads when the engine is stationary to drain away. No 4 head has a similar arrangement but the Plug and drain are swapped over so the plug is on the high side of the head. On normal radial engines it is usual to remove the plugs to allow the oil to drain, but I think this puts a lot of wear and tear on the small ignition leads that are difficult to keep in place at the best of times.


Heads 3&4
Brian.
G
Grumpy Gator
Forum Guest
Register Today
Looking Good Brian.
*G*
*G*
B
BRIAN
Forum Guest
Register Today
I have been cracking on getting the missing head finished, now the four remaining heads are ready to continue fitting the valve cages, the point that I was at when I made the big c--- up and ruined a head.
But now I have the No 1 cylinder complete so I know where I am going,
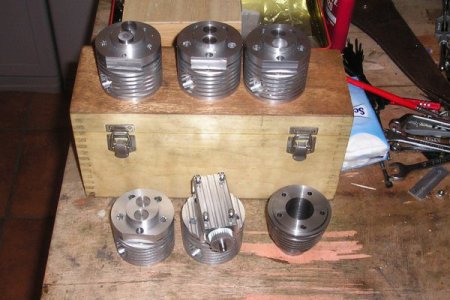
At least that is what I thought.
You see it's that cylinder it's just a tad on the heavy side, I know it's a fault of mine that I make things
just too robust, so after a good look I decide that the top deck has been made over strong to take the loads of the head and I can recut the top fin deeper by 3mm. so on to the mill it goes,
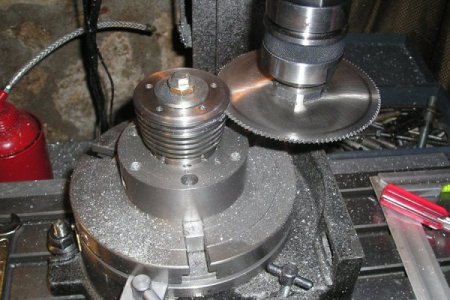
Half an hour later all five are done, and my hands are itching. Just look at that base flange no way must it be that thick and the cylinder walls are 3.5 mm I could take them down by .5 easily while I have the slitting saw set up.
DING??? am I approaching this from the wrong end? where is the piston ring catalogue.
Now the bore is 25mm OOOh look I can get a 26mm ring, And for a bonus it's .5 smaller in section (lighter) and the piston skirt can be thinner saving weight as well.
How about the Cubes!! I an told there is no substitute for Cubes, a mighty increase from 64 cc all the way to 69cc. Hot Roding with a vengeance
Oh well back to the CAD and alter all the drawings
Brian..
But now I have the No 1 cylinder complete so I know where I am going,

At least that is what I thought.
You see it's that cylinder it's just a tad on the heavy side, I know it's a fault of mine that I make things
just too robust, so after a good look I decide that the top deck has been made over strong to take the loads of the head and I can recut the top fin deeper by 3mm. so on to the mill it goes,

Half an hour later all five are done, and my hands are itching. Just look at that base flange no way must it be that thick and the cylinder walls are 3.5 mm I could take them down by .5 easily while I have the slitting saw set up.
DING??? am I approaching this from the wrong end? where is the piston ring catalogue.
Now the bore is 25mm OOOh look I can get a 26mm ring, And for a bonus it's .5 smaller in section (lighter) and the piston skirt can be thinner saving weight as well.
How about the Cubes!! I an told there is no substitute for Cubes, a mighty increase from 64 cc all the way to 69cc. Hot Roding with a vengeance
Oh well back to the CAD and alter all the drawings
Brian..
G
Grumpy Gator
Forum Guest
Register Today
Looking Good Brian,
Better to over build than be caught short.... Keep it coming.
At this rate you will get yours done before Billy G does... LOL
**G**
Better to over build than be caught short.... Keep it coming.
At this rate you will get yours done before Billy G does... LOL
**G**
