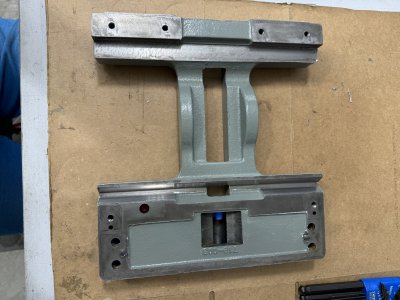
Clausing 4904 refresh

Gear box positioned on the press.
Gears are a slip fit but over time burrs build up and slip requires a little help.

IMG_7238.jpeg
Some time later
IMG_7243.jpeg
IMG_7248.jpeg
IMG_7269.jpeg
Bearings
Found 9/16" ID x 1 3/8" x 7/16" bearings for the cone gear shaft from bearings direct.
1622 zzc3, .0025 or so under sized on the OD which is not a problem.IMG_7577.jpeg

Bushings
Made new tumbler shaft bushings and dog gear bushing.
Clausing had the tumbler shaft in stock so went that route as opposed to reworking the chewed up end of original.
IMG_7561.jpeg
Almost back together
IMG_7597.jpeg
 
Last of the QCGB assembly going together.
IMG_7635.jpeg
Down to pressing in the bearing caps and deciding what to do with the index plate
IMG_7648.jpeg
ABC knob needs to be indexed when installed, you can play around with positioning without taking things apart.
IMG_7640.jpeg
 
need to get caught up on the the project, been kind of stalled due to life happening.
On to the headstock.
Headstock is retained by two cross bars that span the underside of the bed plus a #6 taper pin.

IMG_7366.jpeg
Taper pin is unreachable from below.
Wanted to see if some light prying could get it to budge. Not the best approach, but in this case there was clearance in headstock bore for the pin was and was able to get the headstock to rise an 1/8" inch.
Plenty of room to get a hacksaw on stick and cut it.
IMG_7376.jpeg

Taped the tip of the saw to prevent scratching the ways.
Not enough of a nub to get ahold of so more to do to extract.
IMG_7483.jpeg
Had the light prying approach failed plan "B" would have been drill and tap. Not very easily done due to the lack of clearance.
 
Had some fun with extracting the taper pin. But it's also one of those tasks you don't want to screw up.
Ordered up a 3/8 8 x 12 steel plat that was clamped on top of ways. Made a nice base for the mag drill
IMG_7622.jpeg
Used a 5/16 end mill to clean up the top
IMG_7676.jpeg
Made a puller out of some scrap.
Drilled and taped for #12 24 screw

IMG_7694.jpeg
Remaining stub came out with a couple turns of the nut.
IMG_7697.jpeg
Glad to get it out without any additional drama.
 
With the headstock removed some minor disassembly and cleaning to be done. Bigger issue is the forward reverse lever is in need of repair. Button sized, lockout needs adjustment and access from above is almost nonexistent
Not going to mess with the spindle. Run out is only a couple tenths, backgear and tumbler bushings are tight also so no need to go through everything.
IMG_7383.jpeg
Years of old grease, swarf and other miscellaneous crud.
At some point in time someone thought it would be a good idea to use as a wood turning lathe.
IMG_7399.jpeg
Found wood chips under the headstock. Explans why the apron oil passages and lines were so clogged. Sticky oil and sawdust turned into a thick paste over time. Could be worse, does not appear anyone used a tool post mounted grinding fixture on it.IMG_7463.jpegIMG_7390.jpeg

IMG_7465.jpeg

Cleaned up nicely, guessing that it's been repaired at some time (post crash) based on the mis-aligned punch marks and bubba pipe wrench marks on the spindle shaft.
IMG_7468.jpeg
 
Last edited:
Getting ready for painting.
Clausing placard drive pin holes are not drilled through so can't punch out from behind. No good way to remove these that I have been able to find. Attempted to slot and unscrew but failed and not enough meat to get a grip on with screw pliers. hope is they can be raised enough to get ahold of by prying on the badge.
Was able to drive the pins out for the Rev. Off For. placard.
IMG_7618.jpeg
Clausing had the " Clausing" badge available for $11 so ordered a new one.
Also got new leadscrew shear pins while I was at it.
Rev. Off For. badge is discontinued so will need a plan B for it. Thinking about printing one

IMG_7629.jpeg
 
Last edited:
I use cheap woodworking chisels to lift them out. I try to get the chisel to drive under the head. It mostly works.
 
Some slow progress but progress nonetheless.
Closing in on the last of the painting.
Saddle is done

IMG_8453.jpeg

Head is taped up, and ready to prep.
IMG_7965.jpeg
Intention is to spend more time on the overall project and start reassembling things soon.
 

Attachments

  • IMG_8441.jpeg
    IMG_8441.jpeg
    582.2 KB · Views: 5
Finished up the head, just needed cleaning up. Bushings were tight and spindle runout is .0002
IMG_8680.jpeg

IMG_8684.jpeg
Faced off the back gear driver pin to remove prior abuse markings.
Should have taken more pictures of the driver pin (part #562-075) but don't have any after removing.
Some hints for those who may follow along at a later date.
The smaller of the two holes in the hub showing right side of the photo below has a 3/32x1/4 roll pin that rides in the slot showing in the driver pin. The roll pin retains the driver pin and keeps it aligned.
The driver pin has a through hole drilled on the far end of the slot (opposite end from the grip knob) past the detent groove. So if pull the driver pin out beyond the detent stop until the roll pin hits the end of the slot, the roll pin will be over the hole in the driver pin and can be driven out
IMG_8682.jpeg


IMG_5317.jpeg
Another item worth mentioning.
Note the orientation of the cam block that lifts the lockout arm, corner notch engages with the fork roll pin when the forward/reverse shaft is in the off position.
Removal of the spring is kind of a PIA, but it has sufficient length to lift the fork off the shaft.

IMG_7405.jpeg

Collective shot internal parts removed.
IMG_7413.jpeg

IMG_7477.jpeg

Tumbler knob parts and miscellaneous bits.
IMG_7475.jpeg
 
Back
Top