Bull Nose Live Center

Ray
I one of your many posts you mentioned the inset that you use to achieve the fine finishes.
I know that I saved it somewhere , but can't find it in my smarter than me filing system
Tks for your patience
ed
 
Ray
I one of your many posts you mentioned the inset that you use to achieve the fine finishes.
I know that I saved it somewhere , but can't find it in my smarter than me filing system
Tks for your patience
ed

My pleasure...

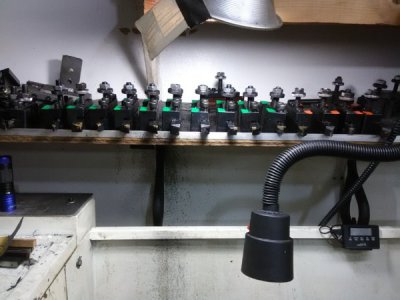
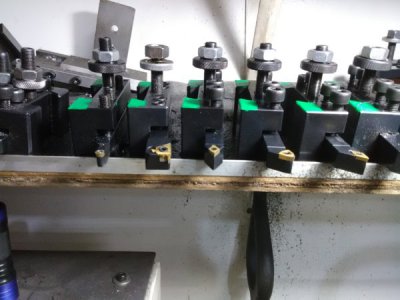
Meet the immediate family... They're color coded to designate which ones are for the left side of the wedge post vs. right side.
IMG_20180107_113717.jpg

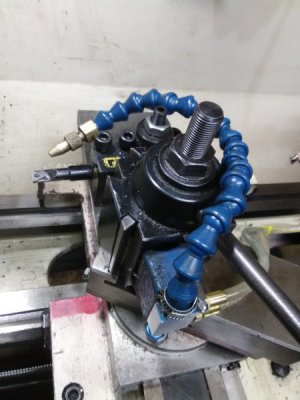
I try to keep the alignment of the wedge post pretty-much in the squared-up position as shown.
IMG_20180107_133515.jpg

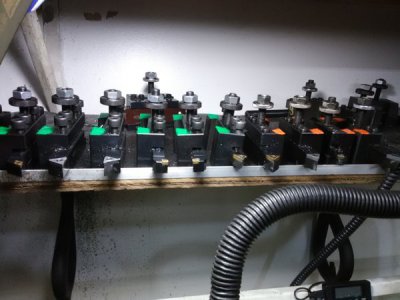
The 5 or so holders on the far left are less frequently used but, invaluable when needed.
IMG_20180107_113731.jpg

All the others are Left, Right and Center tools with CCMT 21.51 and TCMT 32.51 inserts. On another shelf nearby is the store of inserts. I also keep 21.52 and 32.52 variants of those inserts and have them all in both TiN coated and naked carbide. I always get C5 or C6 base carbide. By far, the xx.x1 versions are used more than the xx.x2 versions. In the TCMT inserts, I also have the CERMET versions in the 32.51 format. CERMET is for very hard materials and I used it for the first skim passes on this project. Once the hardeness drops below 50 RC, they are useless and will dull fast. They need extreme heat to run properly... they're ceramic.

The tools are a hodge podge of 3/8, 1/2 and 5/8" shanks. The color coded ones are BXA and a smaller set of AXA holders are nearby.

So, there you have it... These are about all I need and in my opinion, are fine for 12 and 14" lathes with motors in the 1-3HP range. All those inserts have positive relief of 5 or 7% (or somewhere around there). With higher HP machines and heavier removal rates, these inserts would get eaten alive. The 21.5x and 32.5x inserts are appropriately sized for medium-duty work on 12 and 14" machines.

Regards

Ray C.

IMG_20180107_113752.jpg
 
I'd like to know Ray. I'm sure others would too.

First things first, lets talk about turning a shaft. Boring a hole is pretty much the same thing (but in reverse).

Metals: With carbon steels (including/especially stainless steel), you need to know it's condition: Is it hot or cold rolled, hardened, normalized, annealed... etc. If it's unknown or known to be either hot or cold rolled, the outer portion to about 1/8" deep from the surface, is unpredictable and will not behave "linearly". It may have hard spots in unpredictable places. You need to chew-off that outer layer for this technique to yield results. Normalized, fully annealed and known hardness metals are OK. The exception being really hard metal near the RC 50 or above range.

Having said the above, you probably know why I like working on conditioned metals.

BTW: Brass, bronze, aluminum etc don't have these problems and are pretty homogeneous so, the technique should work.

Tooling: I use this technique with carbide only but I see no reason why it won’t work with HSS. Often times, older (aka, slightly dull or chipped) inserts are used for hogging-off scale and to reach the final diameter. When making final passes, it’s best to use fairly fresh or new inserts for this to work properly.

Cutting angle: Every insert style has a preferred “angle of attack” to work properly. For now, it’s assumed the tool is positioned appropriately for the insert and is setup for finish passes. (BTW: This is a whole different topic).


So…. Let's say you have a known clean shaft that's 1.310" dia and it needs to be 1.1250" -0, +0.0010.

You need to know your machine, your tooling and what DoCs you can take with confidence. In the case of my PM 1236, when I'm approaching the final passes, I aim to dial-in 0.030".

1.310 - 1.1250 = 0.1850 (EDIT: I had a typo here and changed 1.1255 to 1.1250).

On my machine, when I dial-in 30 thou, it reduces the diameter by 60 thou (some lathes are calibrated for diameter reduction and not tool position). Since .1850 / 0.60 is 3.0833 we know I must take 3 passes at 30 thou and an oddball pass at 2.5 thou (.0833 x .06 / 2 is 0.0025).

Here’s the rub… What you dial in and how much comes off are two different things most of the time. Unless there is a gross F&S error or tool alignment issue, it will almost always take off less than what you desire. First, just go ahead, dial in the 2.5 and remove it. An amount that small should come off with no problem.

So, take the first cut at 30 thou then measure your diameter. Lets say the diameter was reduced by 56 thou instead of the desired 60 thou. This means you are getting 56/60 of what you ask for. Take the next cut at 30 thou. This time, lets say you get 57 thou reduction. Now, your part needs the remaining 30 thou cut plus one at 1.5 and another at 2 thou (to account for shortage of the other two passes).

You now aspire to have an effective dial in of 33.5 but you know that if you dial that amount in, you will come up short and be left with a skim pass that will ruin the finish. What to do: Linear projection:

In the first two cuts, you got on average 56.5 out of 60 which is 0.9417. Take 33.5 and divide by .9417 and get 35.58 which we’ll round to 35.6. So, if the past history predicts the future, dialing in 35.6 thou should get you the 33.5 you hope for. If you’re afraid of blowing the mark, pull your dial in by about a quarter thou. I do all this with dials (not DRO) and it gives me very successful results.

When doing this, you want to remove stock until you get within 2 or 3 passes of your final size at your desired DoC. 4 final passes is too many. If use too many averaged results, things become non-linear as removal rates are influenced by part diameter.

The remaining questions are how you ready the tool for the cut. Do you scratch-off and reset or, do you keep track of where your last cut and increase your numbers from there… That’s up to you and your particular style. Whatever you use, be consistent the entire time.

Give it a whirl…

If this works for you, I'd suggest creating a spreadsheet that automatically does the calculations. I've created this and other spreadsheets that work in-conjunction with each other. It tells me ongoing effective dialed-in amounts and determines the final dial-in amount for a finish pass within a range of acceptable DoCs. Also, they tell me if I should take those odd-ball passes right up-front or, if they should be averaged in with the final passes etc... That's the magic that works for me and my lathe -and probably won't work well for someone else and their equipment...

Ray C.
 
Last edited:
Quick additional thought... In the last step, when you are calculating your final pass, if the suggested final number is more than 15% of what your control dial-in values were, you need to take a light skim pass to get that final dial-in value closer to your control values.

EX:

Above, we had 33.5 / 0.9417 which gave us 35.58. The control dial-in values were set at 30 thou. 30/35.58 = 85.71 The percentage is then 100 - 85.71 = 14.29%

Technically speaking, in this example, I should have taken a skim pass of about 2-3 thou to reduce the OD just a little. That would have brought the final value down enough to bring it further inside 15%. The closer you setup your final cut so that the final value has a very small percentage difference from the control value, the more your chances of nailing it dead on, increase.

The spreadsheets I have do all these calculations automatically. I just enter my target diameter, dialed-in control value and the amount actually reduced. When it gets to the last cut, it tells me what to dial in.

Hope that made sense...

Ray C.
 
Last edited:
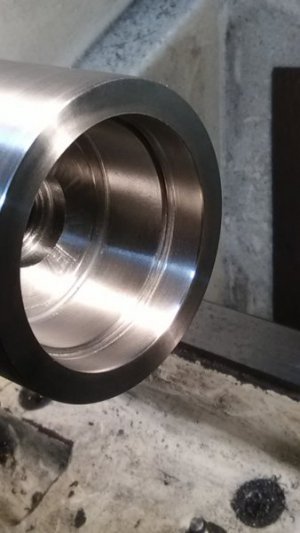
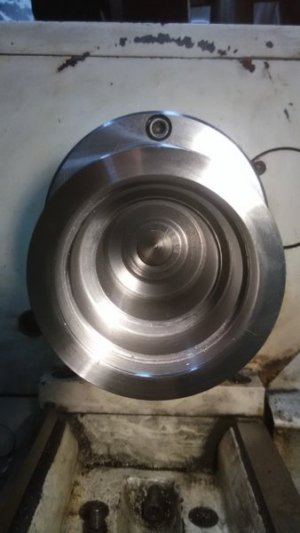
Just a tiny bit of progress today. Here's the step for the bearing cone which measures 1.5710" dia and 0.6356" deep. The target dia was 1.5708" and using the technique described earlier, I hit 1.5701 so I'll need to go in there with emery cloth and a popsicle stick and take a little off.

I must admit that even though the technique works pretty well, I always check, double-check then triple-check the measurements, calculations and setup for that last pass.

Next, the slightly more challenging parts happen. Boring deeper inside then, creating a precision bore about 2.75" deep inside the part.
IMG_20180108_183137.jpg

Next steps: Bore a passageway then a precision radius for the rear bearing. After that, flip the part, indicate it and cut the MT3 taper.

Until next time...

Ray C.
 
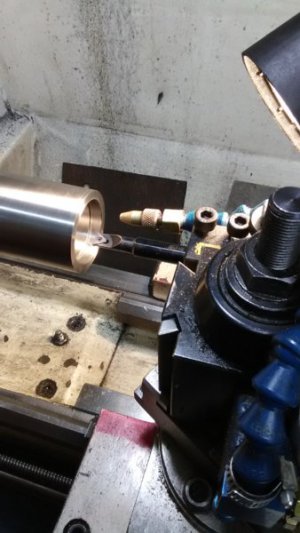
Here's the setup to reach the last pocket to hold the rear bearing. I've turned up the air pressure just a little on the Koolmist to blow the crud out. It works very well. It's not an excessive amount of air pressure by any means. Notice I'm using an insert that does not have a chip breaker. This is by design. When zillions of chips end-up in the bore, it's a real pain to flush them out to take measurements. With no breaker, material comes off in long strings. It's sharp stuff but not really dangerous because the cuts are slow, not very deep and cuts like this don't send metal in the direction of your face or hands. Actually, most of it wrapped in a nice 1.5" coil around the boring bar. -How convenient...
IMG_20180109_204539.jpg

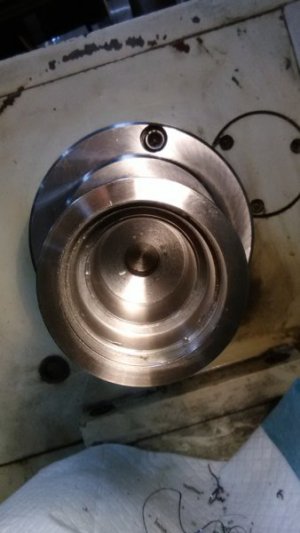
It's a long reach back in there but all that's left now is to make the pocket for the bearing. The work done tonight had only one critical dimension which was the depth (2.052" deep). I specified a diameter just enough so the front bearing cup had a lip to rest against. I don't recall the diameter but, I made a half hearted attempt to hit it. The pass fell 2 thou short and we can call it a day! Close enough.
IMG_20180109_204113.jpg IMG_20180109_204243.jpg

I've been very busy with my real job these days so, I can only do these little bits & pieces when I have an hour before turning in for the day...

Hang in there, we're almost done.

Ray C.
 
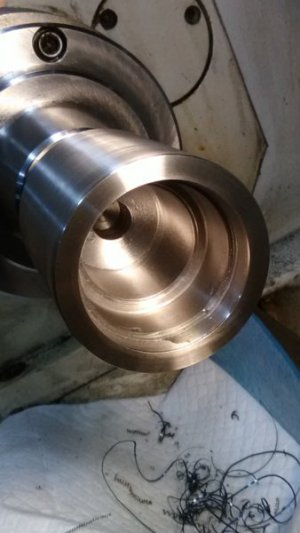
The last feature (way back there) is now done. The bearing OD is 0.875 and I aimed for 0.8745 with the intention of touching it with emery cloth and sand paper. The final pass came out at 0.8741 as near as I could measure in there with telescoping gages. After touching it with emery cloth it opened-up a few more tenths and I'm call it quits before I monkey it up. It will get sweated and pressed in with no trouble.
IMG_20180110_184135.jpg

Now, I'm in a quandary... I'm wondering if I should drill oil or grease passageways to reach the bearings. Thoughts? I'm only planning to have an oil seal in the front but, this whole thing is not really serviceable because the bearings and shafts are very slight interference fits. I don't plan to do heavy work with this. Occasionally, I get a job with aluminum tubes that need to be turned down and that's all I have plans to use this for.

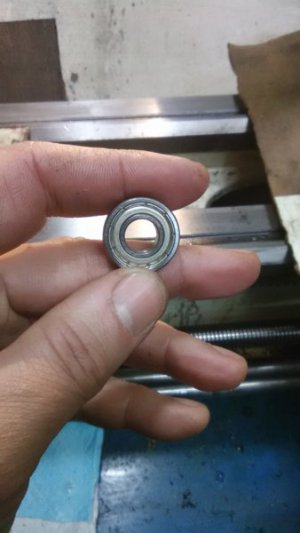
The rear bearing is an R6ZZ from VXB. It says it's "self-lubricated" with grease. The front bearing is an open cage taper bearing.

What do you think?
IMG_20180110_184307.jpg

Anyhow, we'll be putting this thing together soon and we'll know then if it spins true or, if it becomes a desk ornament.

Ray
 
beautiful work Ray. I wouldn't bother with an oil port, those bearings are greased "for life". If they're going to be behind a seal then open cage will be better, less worry about high speeds. One question though - how will you get it apart if you need to replace the bearings?
 
beautiful work Ray. I wouldn't bother with an oil port, those bearings are greased "for life". If they're going to be behind a seal then open cage will be better, less worry about high speeds. One question though - how will you get it apart if you need to replace the bearings?

I see you're Mattthemuppet 2 now... How you been?

If the bearings wear out, it will become a paperweight or food for the recycle bin.

Ray C.
 
We're at home stretch now. All set up for the MT3 taper. An oddball piece of stock about 1.25" dia was chucked-up in the lathe and live center and a straight pass was made along the length. It was verified for even diameter at both ends and after that, the angle was adjusted using the technique mentioned early on in this thread. After finishing that, a store-bought MT3 live center was chucked-up and I verified with a TDI that it showed no movement running a parallel path.

And speaking of setup, there is no room for error when making something like this. If the bearing race-ways inside the housing are not perfectly concentric and in-line with the external MT3 taper on the other end of the shaft, this thing will be a paperweight. At every step, when this part was flipped around, a tenths dial indicator was used and I did not walk away from the part until it spun dead-on true. Keep in mind that tiny little variances at one end of the part, "magnify" over longer distances.

So here's some eye-candy for now.


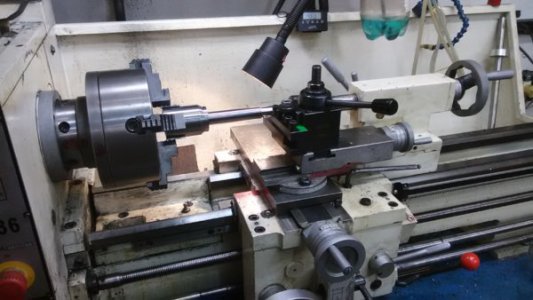
The tailstock is a tight fit which is typical of setups like this. It's important to know your lathe and know how far you can extend the ram and still hold the part w/o flexing too much. With pressure against it, everything bends! With lighter lathes like this, it becomes very critical to nail the feeds and speeds and use fresh tooling/inserts. Dull inserts not only give bad surface finish but, they put much more pressure against the part.
IMG_20180111_203757.jpg

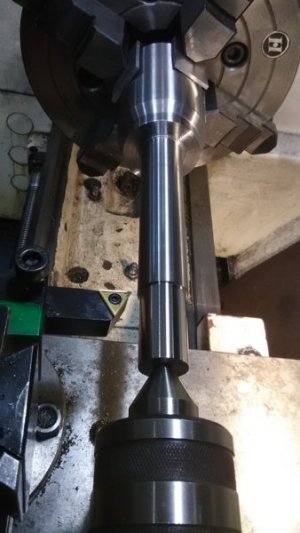
Aluminum tabs are protecting the part from the jaws. The back end of the shaft is being taking down a little less than the small diameter for MT3. This one will be cut the full 3.1" length. The camera does not do it justice but the finish on the last 1.5" is like a mirror. The metal there is pretty hard and it cuts like glass. Can only take 25 thou DoC. RPMs are about 500. Feed is around 4 thou/rev. Note the angle of the insert. It's about 95 degrees with a slight attack. Too much attack and it will dig-in and bury itself, break the insert and ruin the part. If it has too much retreat angle, it will not stabilize and push will push-away from the part. When you're cutting hard metal and the parts keep coming-out tapered, not only do you check your tailstock, you check the angle of your insert.
IMG_20180111_203745.jpg

... Will probably finish this off tomorrow. The lathe is needed for something else.

Ray C.
 
Back
Top