-
Welcome back Guest! Did you know you can mentor other members here at H-M? If not, please check out our Relaunch of Hobby Machinist Mentoring Program!
You are using an out of date browser. It may not display this or other websites correctly.
You should upgrade or use an alternative browser.
You should upgrade or use an alternative browser.
Bull Nose Live Center
- Thread starter Ray C
- Start date
- Joined
- Nov 16, 2012
- Messages
- 5,596
I'd like to hear it.
OK then. Keep in-mind, this is a shortcut but, when done properly, has produced results just as good as when I do the setup with indicators and verify with angle blocks. To do this properly, you must understand how backlash works and backlash has to be adjusted for given the directions you're traveling when doing the setup moves.
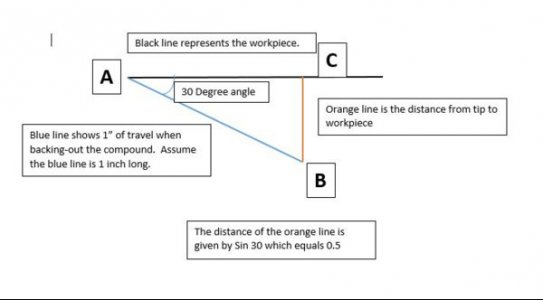
First, assume you have a triangle that has a hypotenuse (diagonal leg) of exactly 1 inch. I'm using 30 degrees as an example but any angle can be used here. Just use and assume a hypotenuse of 1 inch.
Everything is done with the lathe off (not running). Also, you should have a piece of stock that was just cut in the lathe without it being removed from the chuck.
See the diagram. Assume the black horizontal line is the workpiece. At point "A", touch the bit to the workpiece. Next, zero your compound dial and back it out exactly 1 inch to put you at point "B". Next, zero your crossfeed then, turn it to move the bit to touch the piece again at point "C". When you touch, read the crossfeed dial. If the compound was at exactly at 30 degrees, the crossfeed will read 0.500.
Repeat the process until and adjust the compound angle until the crossfeed dial reads 0.500 when it touches at point "C".
Diagram 1
Actual examples:
First make sure you'll have 1" of travel in the compound and preset to about the angle you want.
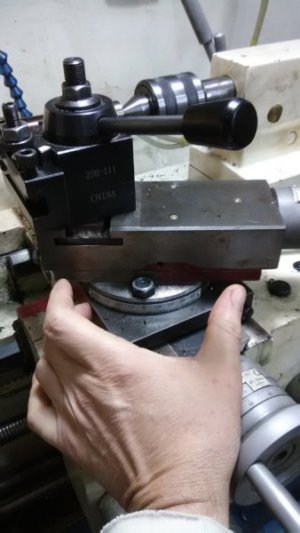
Zero the compound dial:
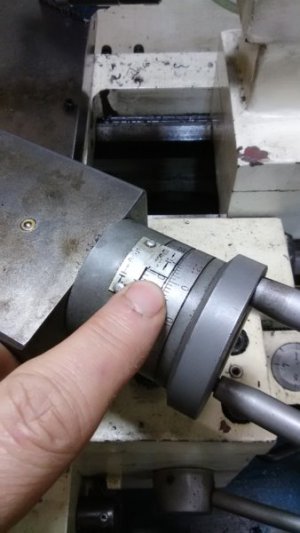
Move the bit forward to just touch the piece. Use a consistent touch for every step. In this picture I have not touched yet.
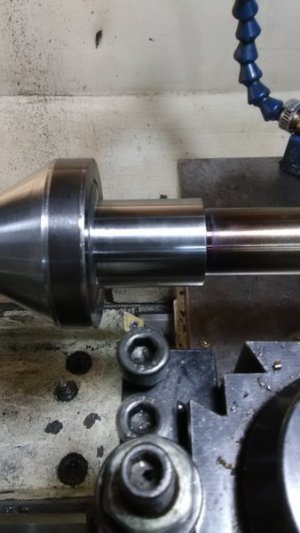
Now it's touching.
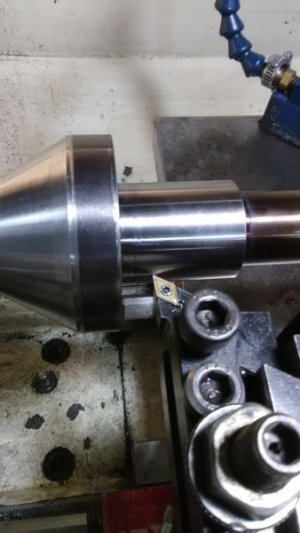
Zero the cross-feed dial as soon as you touch the piece.
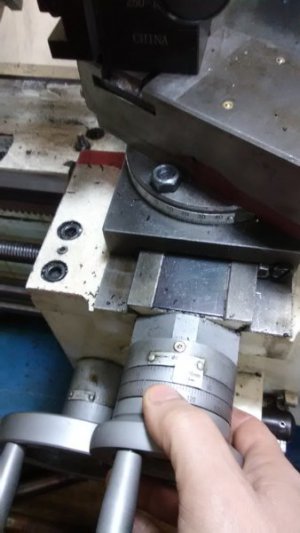
Crank the compound backward 1 inch (in my case, 10 turns).
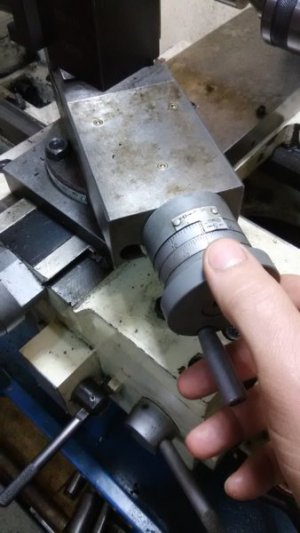
Turn the crossfeed in till the bit touches the workpiece then read your crossfeed dial again. You'll notice now the bit touches to the right (point C) of where it first touched off.
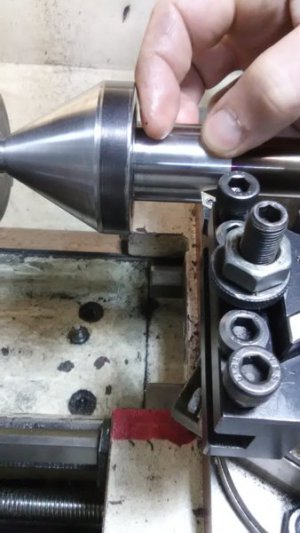
If your compound angle was set properly, the crossfeed will read 0.500 now. Keep repeating with adjustments to the compound angle until you end-up at 0.500 on the crossfeed.
If you want to make a 10 degree angle, the distance you are shooting for will be Sin(10) which equals 0.174.
I can't stress enough that you need to understand backlash and turn the dials accordingly to adjust for it. Also, keep the same touch in your fingers when you touch-off the bit to the metal. If you are consistent, you will nail this dead on.
Also, I want to mention, this is NO substitute for a massively solid lathe and a good setup with dial indicators. It's quick & dirty but, I have perfected it to work as good as this lathe can cut given it is a 12", 1000lb lathe.
Have Fun...
Ray C.
Last edited:
- Joined
- Nov 16, 2012
- Messages
- 5,596
Great trick. I'll have to try that. Thanks for sharing.
You're welcome. Also, when you're getting close to reaching the angle you want, lightly loosen the compound bolts, put your fingers on the base of where the compound rotates/pivots so you can use your fine sense of touch -and gently tap/thump the compound with your knuckle or fingertip. Snub them moderately when you re-test. Moving that thing a baby's breath will change that final touch-off indication by several thou. When you're tapping/thumping that compound, if you see it move, it's gone too far. If you barely feel it in your fingertips, you did it right. When you hit your mark, check again till you get it right 2 times out of 3. It's all about knowing your machine... (Don't forget to give the compound bolts a good snugging when you're all done).
Ray C.
- Joined
- Nov 16, 2012
- Messages
- 5,596
Work started on the MT3 shaft and housing. At the last minute, I decided to make it from two pieces just like the nose piece. No action shots of lathe work. It was stuck together just like last time -oversized shaft, undersized hole, heated/cooled and pressed together. After temps stabilize, it will be a negative tolerance fit of 0.005" (Translated, it ain't never coming apart in our lifetime).
Like last time, the seam was welded. Some eye-candy:
Fusion weld at 175Amps, straight argon at 30CFM due to the long electrode to do this. 3/32 Lanthanated sharpened to a long fine point because that gap is just a hair over 1/8" wide. Do you remember the game called "Operation"? LOL.
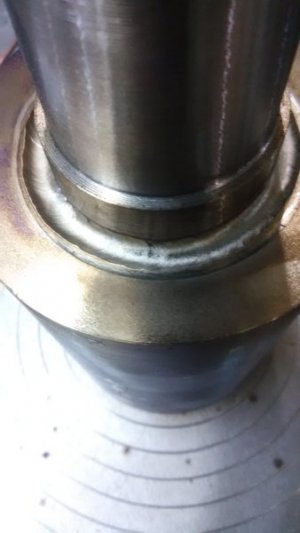
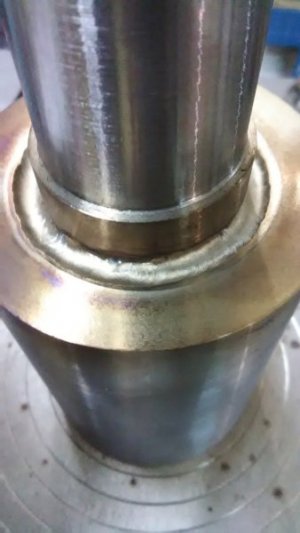
Left a little bit of a fish-eye but no big deal, it will be taken down in the lathe. Once the pedal is mashed to the floor at high amps, I have a hard time dropping down to the 10-15 amp range to taper the pull-out -and thus, fish-eyes are born. Anyhow, I love those iridescent colors and wish the camera would do them justice.
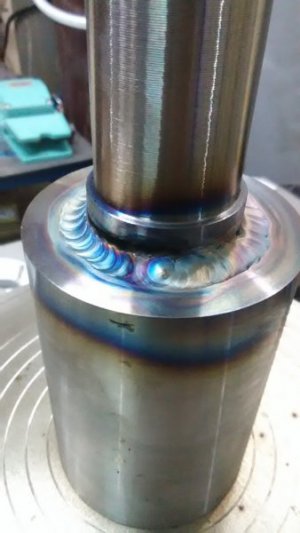
Here's the other side.
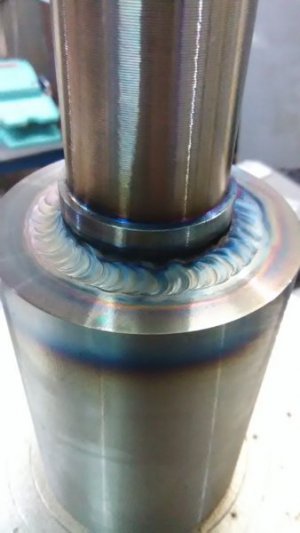
Happy New Year...
Ray C.
Like last time, the seam was welded. Some eye-candy:
Fusion weld at 175Amps, straight argon at 30CFM due to the long electrode to do this. 3/32 Lanthanated sharpened to a long fine point because that gap is just a hair over 1/8" wide. Do you remember the game called "Operation"? LOL.


Left a little bit of a fish-eye but no big deal, it will be taken down in the lathe. Once the pedal is mashed to the floor at high amps, I have a hard time dropping down to the 10-15 amp range to taper the pull-out -and thus, fish-eyes are born. Anyhow, I love those iridescent colors and wish the camera would do them justice.

Here's the other side.

Happy New Year...
Ray C.
- Joined
- Nov 16, 2012
- Messages
- 5,596
Dinner is served... On the menu today is AISI 1045, cooked to perfection at 1550F for 75 minutes followed with a rapid brine soaking down to 180F. We let the entree rest for 90 minutes at 450F for a nice crispy texture (of around 51 Rc). We'll let this naturally air cool to room temperature before we start slicing it up. (Now I gotta hurry and get that out of the kitchen before the wife gets home).
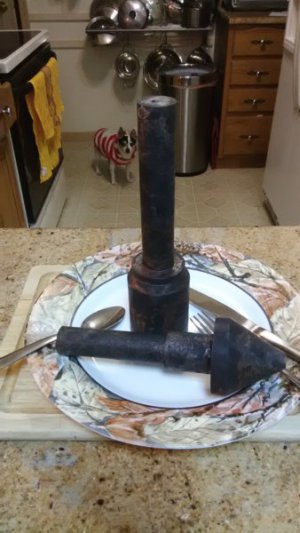
PS: I didn't feel like doing the heat in a killed environment nor did I want to go outside to dunk in the oil tank. Yes, I know, the top 10 thou is now dead metal... no worries, I left plenty of meat on the bones.
Happy New Year
Ray C.

PS: I didn't feel like doing the heat in a killed environment nor did I want to go outside to dunk in the oil tank. Yes, I know, the top 10 thou is now dead metal... no worries, I left plenty of meat on the bones.
Happy New Year
Ray C.
- Joined
- May 4, 2015
- Messages
- 3,583
Look in good , your little dog is like ours likes to be clothed . My buddy is getting up there he's over 15 now. He had a snowsuit on today.
- Joined
- Nov 16, 2012
- Messages
- 5,596
Look in good , your little dog is like ours likes to be clothed . My buddy is getting up there he's over 15 now. He had a snowsuit on today.
That's little Linus -he's a tough guy (LOL) that's part Chihuahua. He starts to shiver when the temps get below 85 for cry'n out loud. I also have little Leila (Rat Terrier) and Sash (big breed mutt that doesn't have a mean bone in her body).
Well... The metal tested-out at Rc 52. I'll test again in 24+ hours and I'll bet dollars to donuts it will be 53. It always goes up a point after 24 hours.
Here are some action shots...
The pieces warped just as much as I expected; about +/- 10thou (20 total) from end to end. And of course, it's uneven warpage. Pieces like this are tricky to setup. I had to bite it a couple different ways and indicate in a couple places before settling on a setup that didn't need deep cuts in any one particular area to get down to clean metal.
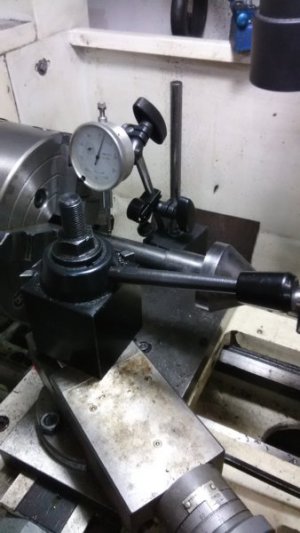
You can tell just by looking at it, that it's hard. Take notice that I do not have a solid bite with the chuck jaws. That's ill-advised but, it was done on purpose. I actually made a mistake when I first made the cone part. It had a 1/2" diameter stump sticking out at the tip that was intended to be a holding point. I blundered and parted it off close to the taper when I went to drill the center hole. Happens...
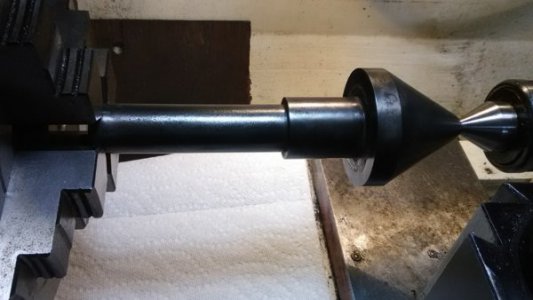
The left-handed cutting tools got a workout today going from Left to right. The ways were covered with some damp paper towels and a hand-held dremel tool with a cutoff blade was used to make a starting point near the chuck jaws. With small lathes and really hard metal, you can't just bump in like with soft metal. The junky camera I have does not do the finish justice. The shaft looks chrome plated. The DoC was around 15-20 thou to get past the warpage.
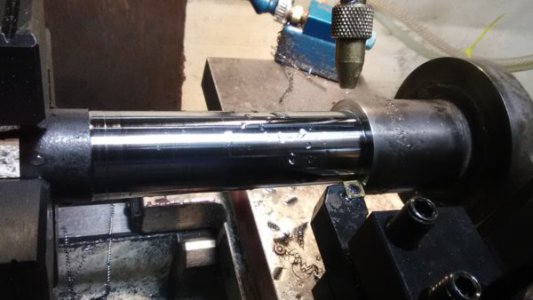
After every pass on each section, the chuck jaws were checked for tightness and the tailstock was checked too.
RPMs and DoC is low for hard machining. The thin part of the shaft is 1 to 1.5" diameter. I used an SFM of 65 so RPMs ended up being 450. DoC was very light at 0.015 from touch-off at the low parts of the warpage.
(Remember: 4xSFM/DIA is for HSS. Carbide needs 2-3 times more).
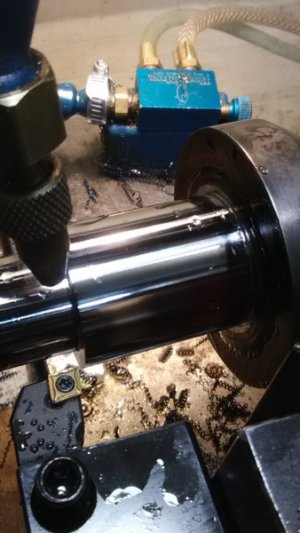
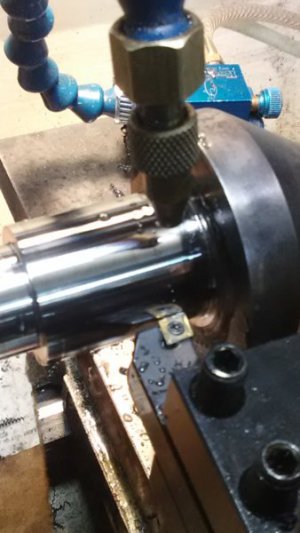
And of course, I immediately destroyed an insert when I forgot to turn the R's down before cutting the 2.5" diameter part... There went $2 real fast. RPMs for that wide part was 250.
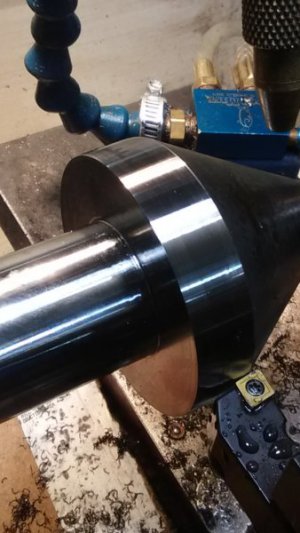
So, now the part is all trued-up. Next, I need to mic it and take everything to size on the shaft. After that we'll recalculate the angle on the compound for the other direction and bring that down stopping a few thou shy of the print. The last bit will be taken down on the post grinder or, I might setup the tool grinder -we'll see.
More to come later...
Happy New Year...
Ray C.
- Joined
- Nov 16, 2012
- Messages
- 5,596
Well, this was a PITB (Pain In The Butt)! Hard metal (and RC 52 qualifies as hard metal) has very little latitude on SFM. That cone goes from 2.5" down to 1/2". You got any idea how hard it is hold the cordless drill to power the compound and slowly turn-up the VFD at the same time? Take a close look and you'll know I'm not very good at it. Anyhow... No worries. I'll make it right with a tool post grinder or throw it in the tool grinder.
I still haven't turned the shaft down to size yet.
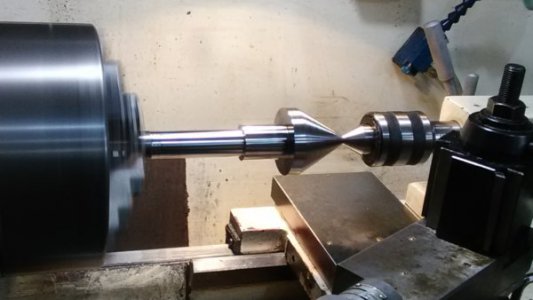
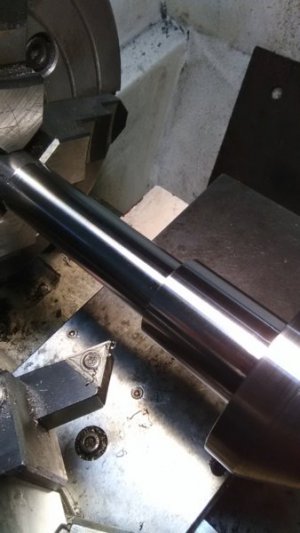
And here's a little eye candy. Take a good look before we start carving it up. The next cuts on the shaft need to be pretty critical with a -0.0000 spec.
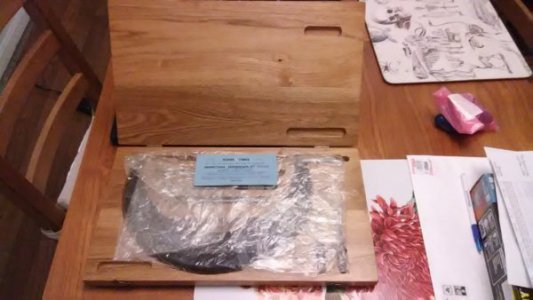
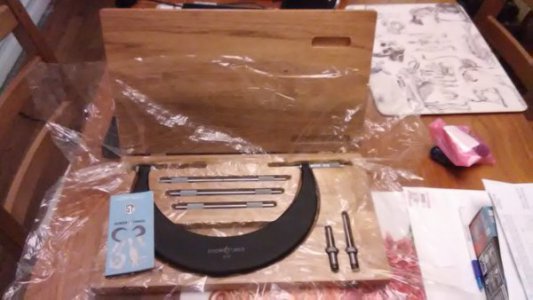
And on a side note, look what showed-up today. I'm standardizing all the mics on one brand because I dislike having about 3-4 different brands and each one has different looking graduations, which has lead me to make errors in the past. Picked this up this 6-9 on eBay for a song. I estimate it's 70's vintage and it still came wrapped in the original packing oil and cellophane. Not a scratch on it. Normally, I don't like multi-size mics but I rarely do work over 6 inches. This was $150 and I couldn't pass it up.
More coming -probably tomorrow.
Happy New Year
Ray C.
I still haven't turned the shaft down to size yet.

And here's a little eye candy. Take a good look before we start carving it up. The next cuts on the shaft need to be pretty critical with a -0.0000 spec.

And on a side note, look what showed-up today. I'm standardizing all the mics on one brand because I dislike having about 3-4 different brands and each one has different looking graduations, which has lead me to make errors in the past. Picked this up this 6-9 on eBay for a song. I estimate it's 70's vintage and it still came wrapped in the original packing oil and cellophane. Not a scratch on it. Normally, I don't like multi-size mics but I rarely do work over 6 inches. This was $150 and I couldn't pass it up.


More coming -probably tomorrow.
Happy New Year
Ray C.
- Joined
- Nov 16, 2012
- Messages
- 5,596
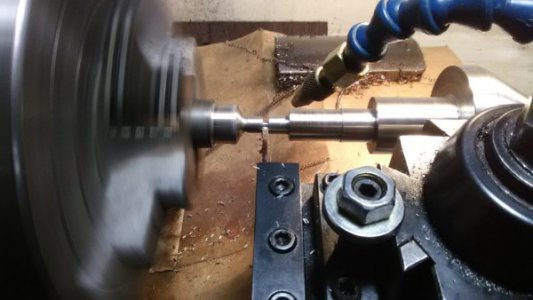
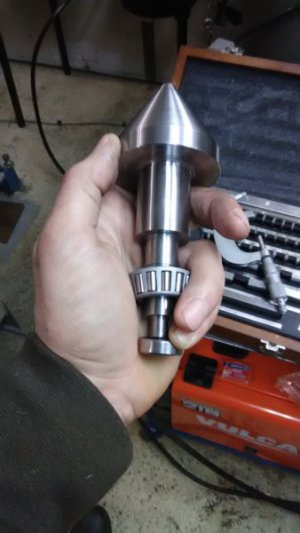
Except for grinding the cone to final shape this piece is all done. The OD's where the bearings will fit are slightly oversized as per-plan by 0.0007 and 0.0005". I got them exactly 1 thou oversize on the lathe and pinched it with emery cloth to bring them within half-thou. When they are fitted, the shaft will be chilled in the freezer and the bearings will be heated with a hand-held air heater. I'm assuming these bearings are made of the typical 52100 (or equivalent) steel; therefore, their high-end temperature is 425F. Above 425F and that steel can (and will) anneal very slightly. Bearings are usually Rc 58-60 and a 1 hour anneal at 450 will bring the Rc down 1-2 points. Moral of the story, be careful warming-up bearings when a slight interference fit is needed.
Here's an action shot of the last few moments and a better view of how it goes together.
Hard to believe this year is over!
Happy New Year...
Ray C.
Here's an action shot of the last few moments and a better view of how it goes together.


Hard to believe this year is over!
Happy New Year...
Ray C.
