Bull Nose Live Center

I guess with taper bearings you won't need a thrust bearing? I've wanted to build an interchangeable tip center for years but I'm watching to get my build right in my mind. I've picked up some bearings through the years also , my current lathe will likely be my only one ever. 11" Logan it's been used by me quite alot over the forty plus years I've owned it. Always wanted a more stout lathe in a 14-16" range ,,,, Monarch ,,, being my favorite ,, but beggars can't be choosers . Nice build I'm watching to see the completion .
 
@dlane: I'm in the people's federation of Maryland a few miles west of Annapolis.

@mike: Yeah, 1045 always looks like that. Carbon-wise, anything north of, and including 1030 cuts nice and clean. Most of the alloy steels are nice like that too.

@ed: That particular insert is a ccmt 2151 in a SCLCR, 3/8" holder. I use many different inserts (probably too many) but for that 12" lathe with a VFD driven motor that probably varies between 2-3 HP, only a handful of inserts are practical for machines that small. If you want to talk about inserts, go right ahead. BTW: Today is my lucky day, I just found a 1/2" holder for that size insert. AXA toolposts with 3/8 or 1/2" tool holders is the sweet-spot for little machines like that.


Merry Christmas...

Ray C.
 
I guess with taper bearings you won't need a thrust bearing? I've wanted to build an interchangeable tip center for years but I'm watching to get my build right in my mind. I've picked up some bearings through the years also , my current lathe will likely be my only one ever. 11" Logan it's been used by me quite alot over the forty plus years I've owned it. Always wanted a more stout lathe in a 14-16" range ,,,, Monarch ,,, being my favorite ,, but beggars can't be choosers . Nice build I'm watching to see the completion .

Taper bearings handle both radial and axial forces fairly well and this should do fine because of the rear radial bearing that's stabilizing the shaft. The taper bearing I'm using has a dynamic radial load rating of 24,000lbs. Taper bearings typically have an axial rating of about 40-50% the radial value which would be roughly 10,000lbs. Cutting forces are only a few hundred pound (at best) and a 10,000lb part on my 12" lathe would flatten it -so I should be OK.

BTW: The torque issue mentioned in the intro is basically a non-problem in this design until load rating gets near the searing limit of the diameter of the shaft in the rear radial bearing. You know how it goes in website forums though...

Ray C.
 
Nothing better than hanging-around the house with family, taking the dog for walks and screwing-around in the shop, on Christmas day. So, here's a few more action shots hot off the press...

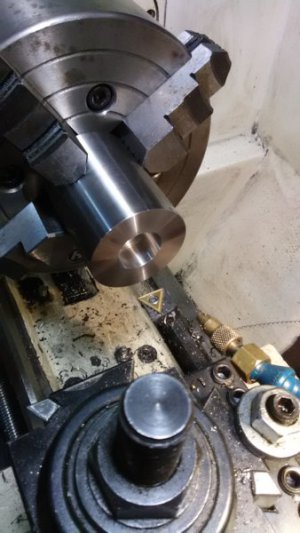
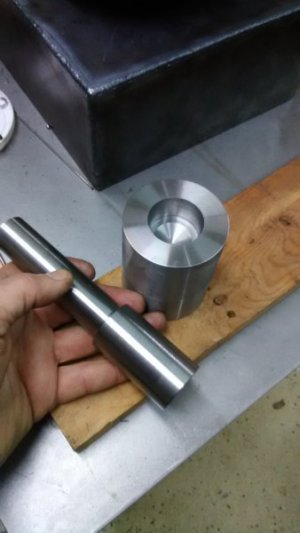
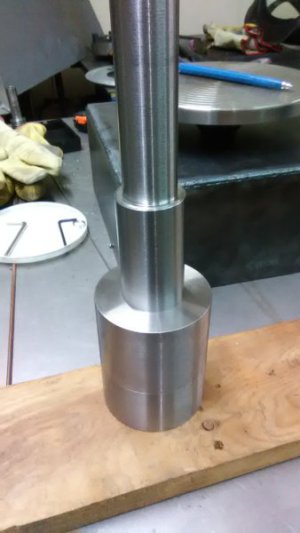
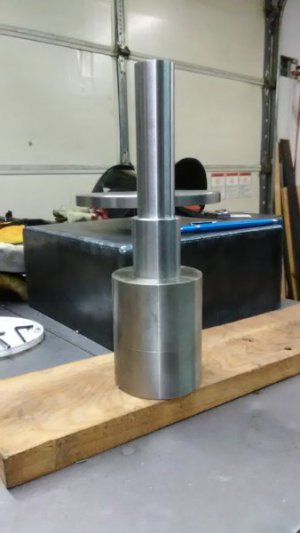
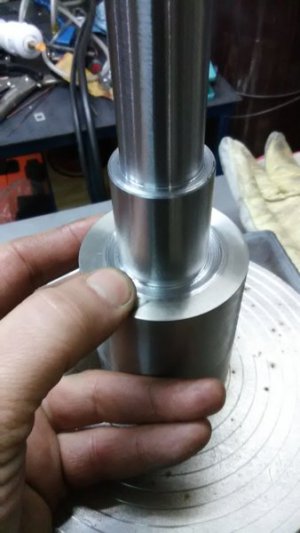
I'm making the nose part out of 2 pieces; why you ask? Because I feel like screwing-around in the shop -and because I can. The big piece is bored undersize, the shaft was cut oversize -and when the two come together they'll never come apart again. Once the two are sweated, I'll toss it back in the lathe and cut a 1/4" deep groove at the junction then, I'll TIG a bead of weld to seal the deal forever.

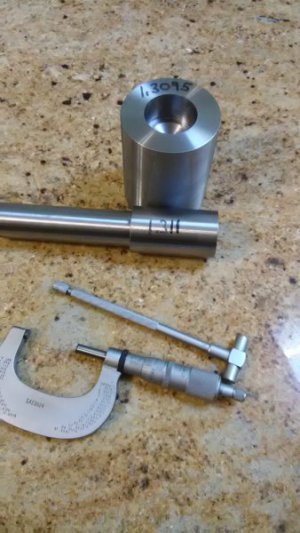
I settled on base dimensions for the sweat fit of 1.3100".
The boring came-out fine with final ID of 1.3095. Shaft OD was 1.3110 so we have 1.5 thou interference fit. The temps were measured in the shop at 60 F. The shaft is now in the freezer. The nose piece is now in grill warming-up with a rack of ribs. I'll re-measure after a couple hours of temperature soaking then, press the pieces together in the press.

Hope everyone is enjoying the Christmas holiday....

Ray C.


IMG_20171225_125303.jpg
IMG_20171225_134738.jpg
IMG_20171225_134752.jpg
IMG_20171225_135922.jpg
 
Looks good, were watching. Had a thought you could pin it through and only plug one hole for weld over. Less chance of any warping or hard spots ... maybe ???
 
So, here's how it all panned-out...

The nose part spent an hour in the grill and another 1/2 hour in a toaster oven at 450 F. It got slightly discolored. The hole expanded 1.8 thou to 1.3113".
The shaft spent the same time in the freezer at 0 degrees F. The shaft contracted 0.0003" to 1.3107.
The positive clearance was 0.0006" I didn't need the press, just needed to protect the end and thump it in with a few hammer strikes. It went in very easily. It went in very straight. I spun it in the lathe just for grins and the wobble, is almost imperceptible and compensating for the fact that my 3-jaw has a tiny bit of runout at/around that range of diameter.

They are both 1045 (same material) so as temps stabilize the two are joined with a 1.5 thou interference fit. That probably equates to a very significant crushing force.

And now for coefficients of linear expansion:

1045 steel has a coefficient of expansion of 6.3x10 EXP-6 (adjusted to Fahrenheit scale).

Here's what the expansion theoretically should have been:
Shaft was reduced 60 degrees F so, starting OD x 60 x 6.3 EXP-6 + original OD is: 0.0005". The shaft should have shrunk 0.0005".
Nose was raised about 400 degrees F so, bore ID x 400 x 6.3 EXP-6 + original ID is: 0.0027". The bore should have increased by 0.0027".

For whatever reason, the actual measured expansion/contraction fell short (just a little bit) in each direction. I suspect heat and cold soaking for 8 or more hours would do the trick.

Still though, these two pieces are stuck together and soon, I'll dig a groove at the junction and TIG them together.

Merry Christmas

Ray C.

IMG_20171225_160413.jpg
 
Looks good, were watching. Had a thought you could pin it through and only plug one hole for weld over. Less chance of any warping or hard spots ... maybe ???

Hey there Silverbullet. Happy Holidays. Hope you're having a good day.

No, not worried about warping or hard spots in the least bit. The whole thing is somewhat oversized by nearly 1/2" in some dimensions. After it's welded, I'll next cut the nose taper to rough size but it will still be over-sized by a good amount. I'll also cut the weld caps off and put some rough steps in the shaft. After that, it will get heat treated. When I do 1045, I hold the austentizing temp for 45m/1in thickness so, this part will stay in the oven for about 2.5 hours. That will completely normalize and stress relieve it. When it's quenched, it will go in the oil, suspended from a chain, nose down, linearly (not sideways). That minimizes bending of long parts.

Finally, the part will be annealed (I always do 2-part annealing) to RC 55 which is about as hard as I can cut with CERMET inserts on my lathe. The final step is to turn it down to exact/final dimensions. I'll use a tool post grinder on the shaft part. I estimate that about 0.050 to 0.100 inches of material will be needed to reduce it final size. At that depth, the hardness will only be about RC 50.

I'll do the same thing with Morse taper part but, but will temper it down to about RC 45 because A) MT shafts should not be super-hard, B) the part does not need to be that hard and C) it's really a pain to lathe cut precision bores in really hard metal. RC 45 is very easy to cut. It's 55 and above that get tricky. I'll explain how that is handled when we get there.

Regards

Ray C.
 
Ok, here we are...

Grooved-out a little notch about 1/4" deep at the junction. Kinda boxed myself in a corner and had to grind a piece of HSS to reach in there.

IMG_20171225_181808.jpg

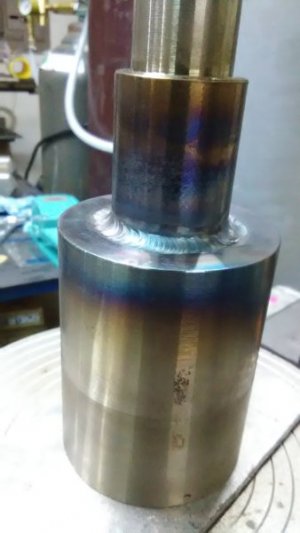
The piece was pre-heated to a light straw color (about 400-500 F) before the 1st pass bead. I hit it with 150A, pedal to the metal using 70s6.

Here's the first pass.

IMG_20171225_183712.jpg


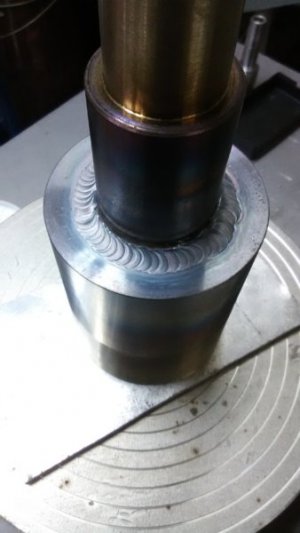
And here's the second pass. Now it needs to cool slowly and naturally. Pre-heating the metal prevents the large piece from "auto-quenching" and this does help keep the weld caps from turning into diamonds.

.... Yes, that looks like undercut but its really due to a shadow and even if it were undercut, the part is going to be trimmed-down in the lathe. The weld-fill was adequate all the way around.


IMG_20171225_184102.jpg


Regards

Ray C.
 
... A few more baby steps on the bullnose center in-between enjoying this beautiful day ...

Admittedly, I scratched my head for a couple moments thinking how I wanted to hold this piece for the roughing cuts. Here's what I did and I'd love to hear how others might have tackled it.

I chucked it up in the 3 jaw using a technique that seems to work for me. First, my 3 jaw is pretty well behaved. Through most of it's useful range, it only loses center by a few thou at most. On my lathe, I recently re-tuned the tailstock and with past history, I trust the TS pretty-much all the way down to the end of the bed.

So... a technique I often use, is to bring the TS into position and lock it down. While the jaws are very lightly grabbing the piece, I put the end of the piece in the tailstock then, use a small, hand-held leverage bar to push it lightly (but firmly) against the live center in the TS. While holding that light pressure, snug-up the chuck jaws. The jaws will grab the part and hold so the piece will naturally spin on the axis of the tip of the live center.

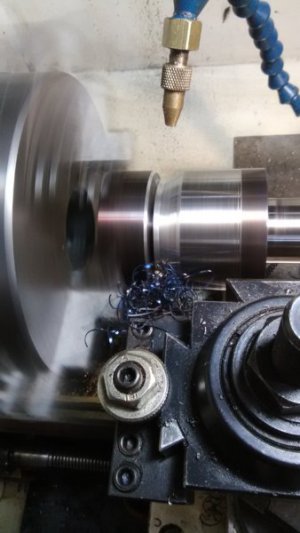
Here's a picture. Mind you, I'm only using medium, 3-finger pressure to push that piece into the TS. NOTE: Normally, I like to hold the piece further into the jaws but, I only gave myself about 1.75" of wiggle room on the stock.

With the piece tightened securely, I was pleased to see that the piece only had 8 thou total runout. Not only was I pleased, I was a little surprised.
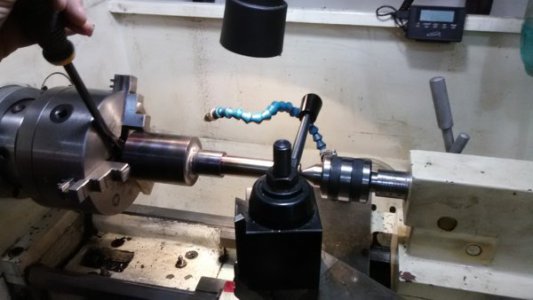
IMG_20171226_104248.jpg

The weld cap came off without a struggle! Indeed, it's a little harder than the base material but, the carbide didn't even wince or groan.
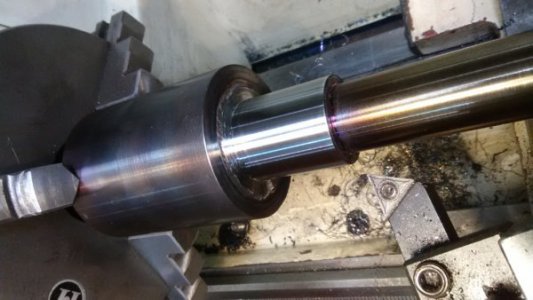
IMG_20171226_105123.jpg


You're probably wondering why I put the big piece in the chuck given that the next step is to carve a rough taper in it. Here's why... I'm going to use a parting blade to dig down to about where the taper will come to a point. Trying to dig-away at the taper using normal inserts would not be a fruitful way of doing things. Anyhow, I wanted the business end of that piece next to the chuck for the parting operation. Another note: I'm parting a fairly large piece with a 3 jaw chuck. This is dangerous territory but, since the linear distance from one jaw to the next is less than the diameter of the part, I will be OK. Need to keep these things in mind when putting a lot of pressure on a piece. (ask me how I know).

And BTW, I really like that parting tool. It's a Shars brand that does very well with these small lathes. I've tried 3-4 different parting tools on this lathe and this one works the best for me. Let me know if anyone wants a part number and I'll look it up.

BTW: Kool mist works just fine for parting.
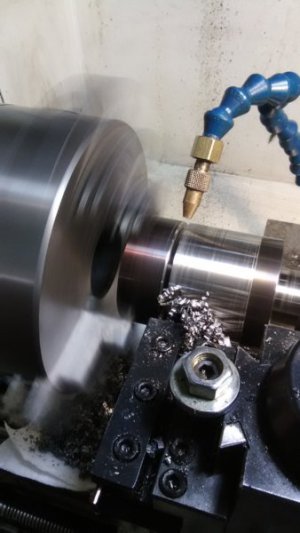
IMG_20171226_120921.jpg

OK, going to take another dog walk now...

Happy upcoming New Year.

Ray C.

PS: Feel free to share ideas and start-up a conversation about different ways of doing this.
 
Now we're cutting the taper in multiple passes. The carriage position is adjusted once and then it's locked down. Multiple passes are made with the compound doing all the work after being set to 30 degrees. Whenever I do something like this, I clean and oil the compound ways and adjust the gibs. Doing this will likely prevent the acme screw from imprinting in the cut.

IMG_20171226_151229.jpg

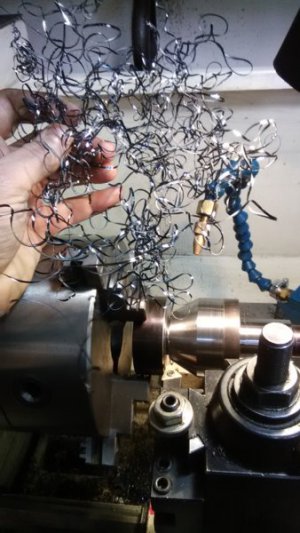
Once in a while though... nasty swarf is unavoidable for a while. Here is your worst nightmare that can take you out of commission. When this kind of swarf is happening, I clean it up after every pass using a pair of long-nose grabbers. This kind of swarf will slice tendons instantly.

IMG_20171226_152741.jpg

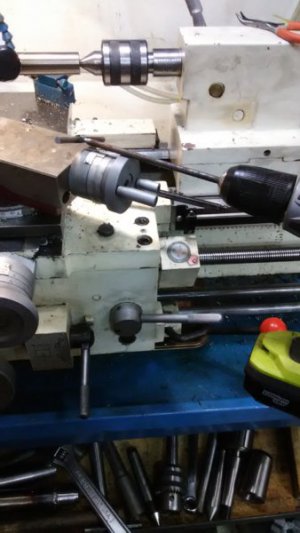
BTW, I use a simple drill attachment in the compound to feed it smoothly. It's just a piece of T-shaped rod. Carbide does not like to be toyed with. It wants a decent DoC and feedrate. Using a drill helps keep the carbide buried in the cut. Uneven hand motions from manual turning is the enemy of carbide.

IMG_20171226_153329.jpg

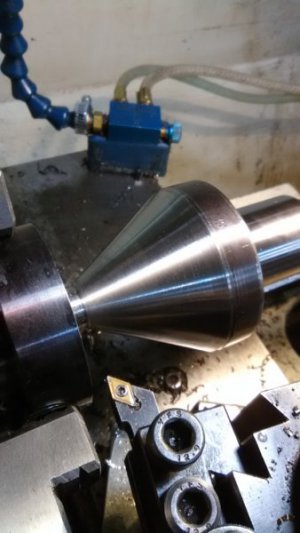
And here's what it's looking like right now. It's just about ready to come out and get ready for heat treating. It's still oversized by a good bit because it will brought to final size in the hardened condition. I'm allowing about 0.050 for warping (but I know it won't warp anywhere near that much). Before it's heat treated, I'll cut the scrap plate off the front and will drill a center hole in the tip that will be needed to mount it after it's heat treated.

IMG_20171226_163848.jpg

FYI: Once I got rolling on that taper cut, I was able to make some 0.135" DoC with a slow feedrate. This is not advisable because of the injury potential with such razor sharp swarf. Ultimately, I reduced DoC to about 0.035 (eye-balled) and increased feed with the drill. That ended-up producing ideal (and very safe) blue chips.

IMG_20171226_164343.jpg


If anyone wants to hear/see my shortcut for setting the compound to 30 degress w/o using an indicator of any sort, let me know. It's quick and dirt but has always produced great results. When this project is over, I'll take it to the granite bed of truth to see how close I get to 60 degrees...
In the upcoming days, we'll start working on the mating part.

BTW: Things are going to slow-down now. I have to spend some time in the "other office" to keep the rails greased.

Happy upcoming New Year...

Ray C.
 
Back
Top