Bull Nose Live Center

I see you're Mattthemuppet 2 now... How you been?

If the bearings wear out, it will become a paperweight or food for the recycle bin.

Ray C.

yep, it's the new me. I've been roaming the wilderness and now I have returned :) Good to see you back too!

I guess with the precision that you're trying to hit, even if you could replace the bearings the likelihood of getting the same TIR on reassembly would be pretty low.

I just finished making a new tip for the live center that came with my Atlas 618. It's a 3 piece - thread in MT1 shank, body with bearing and the tip that is a tight fit in the bearing. Once i got the tip shank to size and roughed in the angle, I tapped a 10-32 thread in the body end of the tip and held it stationary in the body. then i could use the 4 jaw to hold the body and tip and do the final grind of the angle. Came out well as far as I can tell without doing a trial cut. Now I need to do a bull nose, it'll just be a lot smaller than yours :)
 
Lots of pictures coming your way!

As expected, the Morse taper was a struggle. I've cut a bunch and each one kinda stinks in it's own special way. It all had a happy ending so here's a blow-by-blow pictogram...

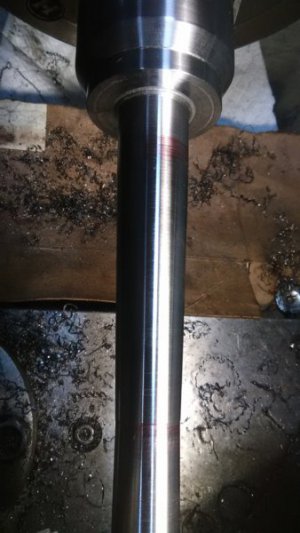
Here's what it looked like after the raw cut. The same drill attachment was used to drive the compound. Two passes were required and as you can see, I started pretty far back (to give myself room to make corrections) in case something went south. The hard part is keeping even trigger pressure on the electric drill to keep the cut moving. I was not too pleased with the outcome but decided to take it and run. It's got some ridges. Yuk!
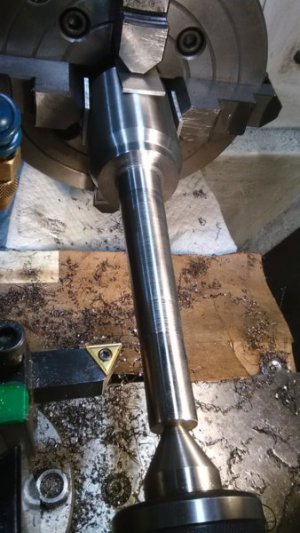
IMG_20180112_092008.jpg

Next steps were to take a flat file, grinding compound and Dykem to locate the high spots and remove them. From start to finish, it took about 20 minutes to complete the task. I can honestly say, I do not have this process down to a cookbook procedure. The last couple times I've done this, I used a flat file. This is the first time I tried grinding compound and it worked very well and made the work much quicker. Also, this was not a messy ordeal and I was not concerned about grit getting everywhere. It was all very localized and of-course, the ways were carefully (safely) covered.

NOTE: When you take a file near a spinning chuck, you must have a handle on the file point and you must be aware of how close your arm is getting to the chuck. No loose clothing. Keep a sharp and clear mind when you do these things.
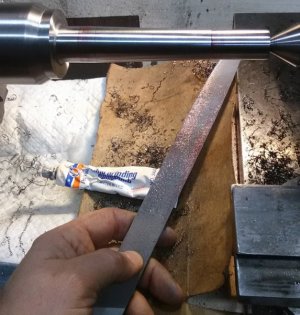

IMG_20180112_101949.jpg

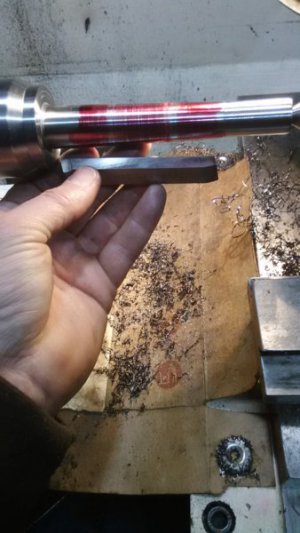
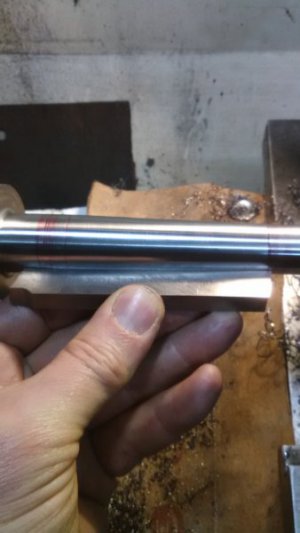
First, cover the part with dykem then, use the flattest edge you can find and press it to the rotating part. Upon doing that, the high spots are easily seen and addressed with the file and grinding compound. A 3 or 4" long HSS tool blank was used as a flat surface to scrape the dykem. It makes a pretty good edge. For filing, only use medium to light pressure and of course, a file is only worked one way. I opted to have the chuck spin forward and press down on the the top of the part. As a safety, sometimes when I need to touch a file to a part, I reverse the chuck and go from the bottom side. This is less likely to get you wrapped around your chuck.
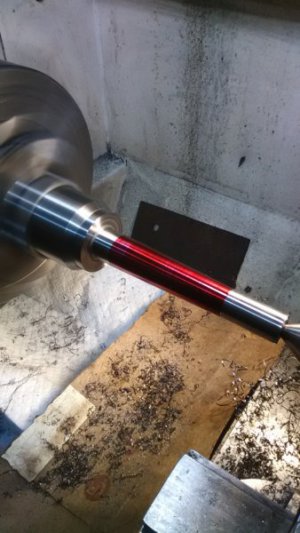
IMG_20180112_101129.jpg IMG_20180112_100421.jpg

It did not take long to clean up. The valve grinding compound seemed to automatically hit the high spots and leave the low spots alone. I wrapped some emery around the tool blank and started to polish once I felt all the big ridges were gone. The edge of the tool blank is fairly sharp and it scraped all the dykem off leaving only tiny ridges that I can live with.
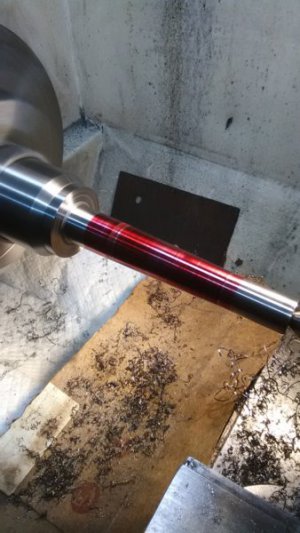
IMG_20180112_101406.jpgIMG_20180112_101848.jpg

Some close-ups as we got close to the end. Once again, this is the first time I tried grinding paste and it worked very well. Only 20, maybe 25 minutes of messing with it after the initial lathe cut. If anybody else has ways to improve this, I'm all ears.
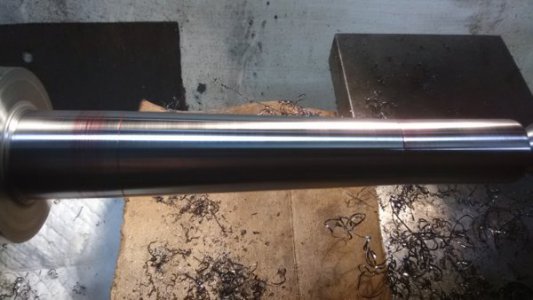
IMG_20180112_101619.jpg IMG_20180112_102748.jpg

A final check with the TDI shows that it came out pretty good. The angle was preserved very well and the jiggling in the needle was very slight. Not as good as store-bought high production parts but, given what we're trying to pull-off with basic equipment, we can take this to the bank.
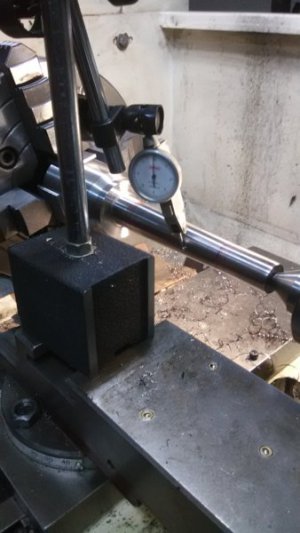
IMG_20180112_102409.jpg


Lunch time!

Ray C.
 
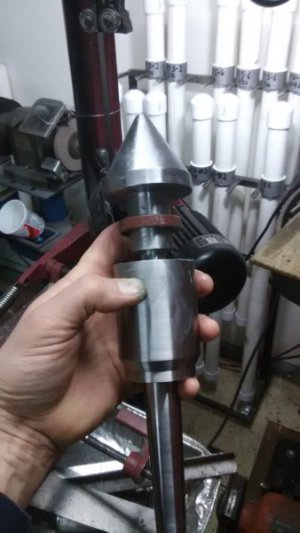
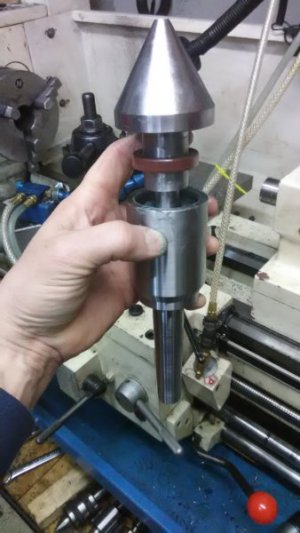
Well, this had a very delightful ending... The bearings were pressed in after turning a couple scrap shafts suitable to press them in. They were entombed in the housing with a little extra grease. The nose cone was put in the freezer. Upon assembly, I almost forgot to put the grease seal on the shaft before tossing it in the hydraulic press. Woah baby, that would have been a bad way to start 2018!

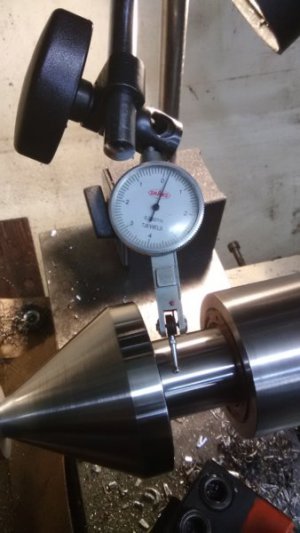
Eureka! It works fine. I hope you can see the video but, with a tenths DI on there, you basically can't see the needle move. It runs perfectly true. If the video does not show up for some reason, I'll need to ask instructions on how to post it here.


IMG_20180112_160655.jpgIMG_20180112_160716.jpgIMG_20180112_162309.jpg

Hope you enjoyed the show. I had fun doing this...

Regards

Ray C.

EDIT: Let me know if the video shows as an attachment and you can see it. Since I'm the author of this thread, it shows-up but, I don't know if you folks can see it (or if anyone is even reading this at all).
 

Attachments

  • VID_20180112_162313.mp4
    40.9 MB · Views: 28
Last edited:
I can see it. Great write up Ray.
 
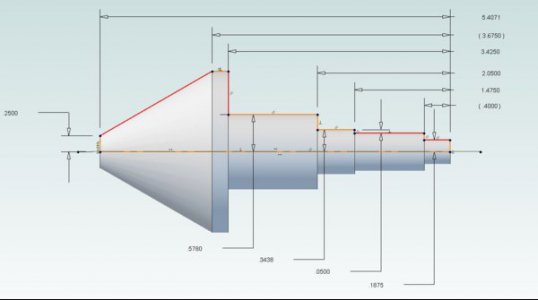
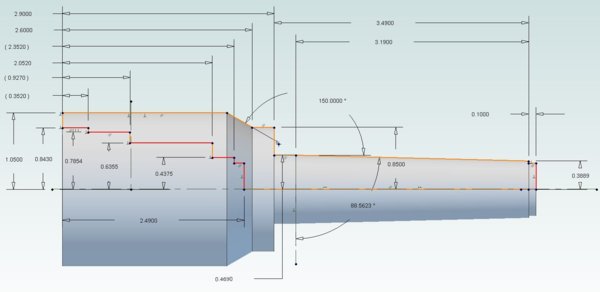
And if you're so inspired to start a new project, here are the prints....

The front bearing is: http://www.vxb.com/LM11749-LM11710-Taper-0-6875-x1-57-x0-545-inch-p/kit7211.htm
The rear bearing is: http://www.vxb.com/R6ZZ-Shielded-3-8-x7-8-x9-32-inch-Miniature-p/r6zz-1.htm
The oil seal was a 1.156" X1.687" X0.312" which is not all that hard to track down.

I would recommend making the rear bearing a R8ZZ instead of an R6. If so, change the dimensions accordingly.
Nose Dimensions.JPG
Body Dimensions.JPG


Last but not least, I used it to turn a shaft and it worked just fine. For grins, I've always wanted to make one of these things and I can scratch that off my list now.

Enjoy...

Ray C.
 
Any suggestions on alternative ways to get grind a precise center?
I have a surface grinder but with a 3x5 mag vise that isn't going to work.
 
Any suggestions on alternative ways to get grind a precise center?
I have a surface grinder but with a 3x5 mag vise that isn't going to work.

Unless the metal is very hard, it can be cut on the lathe. The only reason the cone was ground in this project, was because the metal was about Rockwell 50 and it was too challenging to maintain the proper feed & speed as the diameter varied from 2+ inches down to about 3/8". With any kind of softer metal, you can fudge your way thru that.

Ray
 
Great write up Ray! Impressive accuracy - I will use your shaft turning, boring and MT tuning methods from this thread in the future!
 
Great write up Ray! Impressive accuracy - I will use your shaft turning, boring and MT tuning methods from this thread in the future!

Thanks! Practice the techniques on scrap as much as you can and if you have questions, just reach-out and ask.
When you practice on your own, there may be setbacks and you might miss the mark. It happens and is part of the learning curve.

Good luck...

Ray
 
Ray,
A couple questions.
Why didn't you turn the MT first and do your boring with the piece held in the H.S. MT?
Also, would it be "better" to grind your 30° point after completion? I wouldn't know how you'd hold the MT though unless you did it in the H.S.
These questions are mute though as yours turned out perfect but curious to your answer.
 
Back
Top