2021 POTD Thread Archive

This must've been the most frustrating milling job I've ever done.
For once the CNC parts worked without a problem but man, those 2mm endmills break if you as much as breath on them too hard.
Finger for scale...
IMG_1480.jpeg

Took almost two days in the garage to get this one sorted.
Cleared out the outside perimeter with a 8mm endmill but was then forced down to a 4mm to hog out around the letters, and finally a 2mm to get any kind of definition around the font.
Took some scrapwood and turned up a handle and called it a day.
Really happy with the end result but I'm going to stay away from small endmills for a long time! :grin:
IMG_1488.jpeg
 
If I understood my colleague correctly, it's going to be used as a branding iron on wood.
 
Today i continued with the task of sending this 206 to heaven. Started with dropping the front end on couple of blocks, so the front subframe and engine will be supported, i marked the back tires as well it will help me set the other body shell. Then i cut off the roof and pillars to lighten it, unbolted the 6 bolt for the engine and subframe used my floor jack and drag the body off the engine. Then i cut apart the front end, so it can be carried out by hand. At this point i stopped, all the lifting, moving parts and cutting out the windscreen was tired so i stopped. I have few hours to finish dropping the rear axle and cutting the rest of the body, also i need to clean out the garage.
IMG_20210707_154606.jpgIMG_20210707_154623.jpgIMG_20210709_191350.jpgIMG_20210709_191403.jpgIMG_20210709_191415.jpg
 
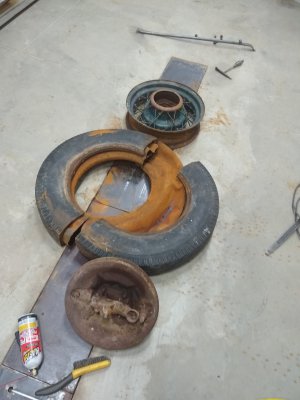
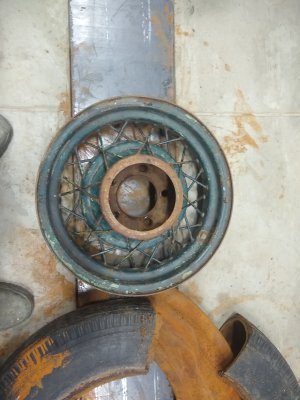
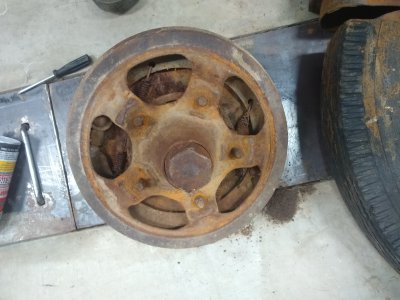
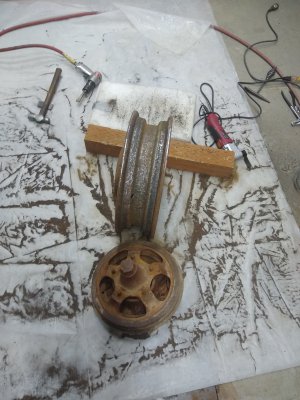
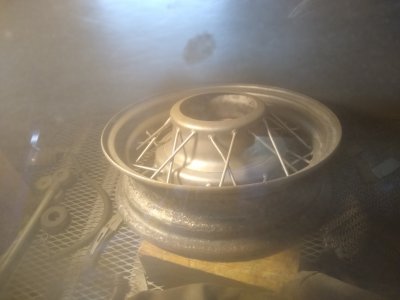
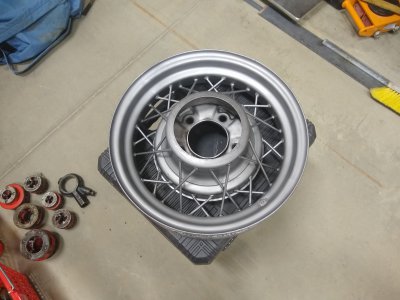
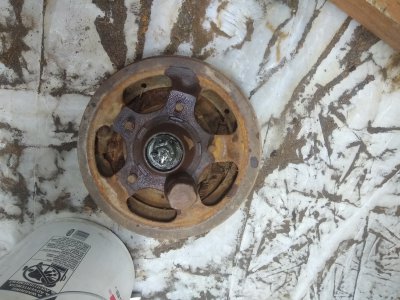
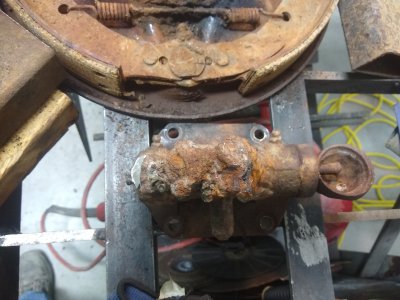
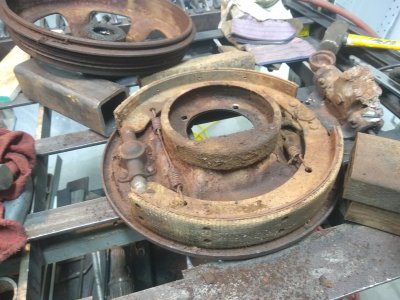
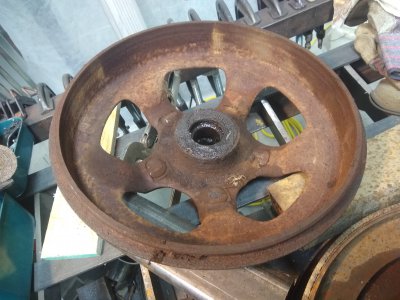
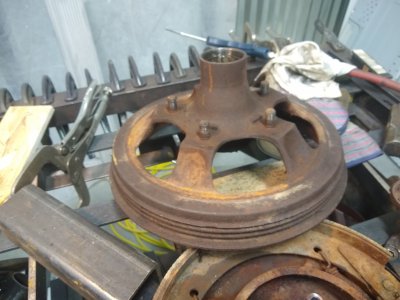
Sunday is supposed to be my self appointed day off, So I usually do something that is not on the has to be done list. Picked up this old wheel assembly. It had been sitting outside for years, and was full of water, and weighed about 100lbs. Started off by cutting the Allstate tire in half (remember those), then took an air chisel and a multi tool to it, to remove the heaviest rust from the inner rim, and straighened a few of the bent spokes. Next was about two hrs in the blast cabinet. Was going to paint it white and blue, but the wife said it looked good with the blasted finish, so I just shot it with rattle can satin clear. It looks pretty good, and saved a lot of time masking off spokes and such. Working on the hub/drum next. Have it apart after a lengthy battle, involving big hammers and a fire wrench. Appears to have been a very early juice brake setup with the wheel cylinder on the outside of the backing plate built into the spindle assembly, which someone had torched off. The brake linings look brand new, and are made out of some odd looking, almost rope like material. My guess is it's from something like a one ton truck from the late 20's-early 30's. If anyone recognizes it, I would be interested in knowing. The current plan is to clean up the drum and spindle (won't be using the brakes or backing plate), and incorporate the whole shebang into the shop second story deck railing somewhere. Cheers, Mike
 

Attachments

  • IMG_20210725_092417257.jpg
    IMG_20210725_092417257.jpg
    2.6 MB · Views: 31
  • IMG_20210725_092426560.jpg
    IMG_20210725_092426560.jpg
    3 MB · Views: 26
  • IMG_20210725_092445421.jpg
    IMG_20210725_092445421.jpg
    3 MB · Views: 23
  • IMG_20210725_111349065.jpg
    IMG_20210725_111349065.jpg
    3.3 MB · Views: 22
  • IMG_20210725_125203035.jpg
    IMG_20210725_125203035.jpg
    2.5 MB · Views: 24
  • IMG_20210725_183551492.jpg
    IMG_20210725_183551492.jpg
    2.9 MB · Views: 22
  • IMG_20210725_183612923.jpg
    IMG_20210725_183612923.jpg
    3.9 MB · Views: 22
  • IMG_20210726_130434192.jpg
    IMG_20210726_130434192.jpg
    3 MB · Views: 22
  • IMG_20210726_130456326.jpg
    IMG_20210726_130456326.jpg
    3.5 MB · Views: 21
  • IMG_20210726_130503943.jpg
    IMG_20210726_130503943.jpg
    3.3 MB · Views: 21
  • IMG_20210726_130549242.jpg
    IMG_20210726_130549242.jpg
    2.7 MB · Views: 26
More bow parts,and cleaning/organizing whilst working with the machines. Gotta admit,it's a little bit faster when everything is pitstop ready.

Left the machine shop long enough to spray primer/sealer on my new bicycle. 1977 Fuji, 5 speed with upright original bars and comfort seat. Am putting an old aluminum rack on back. Making a "geezer'ish",flat land relax,go to town bike. Wifey wants a cruiser bike. We're going to go ride some real easy,paved "trails".

The donor bike frame was well loved,needing some help,going with gloss black,catalyzed enamel. This way,I can tig on modifications and any mounting brackets, with super easy paint touch up. This is the same approach we take on equipment. A bike frame will never see that kind of abuse unless you threw it off a cliff? And I'd still bet on the paint survival.

Got a bunch more parts to crank out tomorrow. Looking forward to it.
 
Quicky project: arbor press pin holder!
I saw someone's arbor press with a drill chuck stuck to the side with a magnet, for holding pins...
I have a tiny press, so I hunted down this hilarious Zinc alloy chuck for $12.39 on Amazon... actually well made!
I removed the draggy wave washers, turned a disc to fit where they were, superglue on magnets, and voila! Pin holder!
69092e652fbc15b36e2436671072f92a.jpg
72680dac312ade3a4838da1f1f8259be.jpg
72a5d8f6f0693d39121a3a945d382252.jpg


Sent from my SM-G892A using Tapatalk
 
Today i spent few more hours finishing the job from yesterday. Finished striping the backside of the body shell, remove the fuel tank, rear axle, brake lines and others small pieces. Then i cut apart the rest of the body shell, swept the floor and arranged the pieces ready to be taken out.
IMG_20210713_124755.jpgIMG_20210713_124804.jpgIMG_20210713_124811.jpgIMG_20210713_125224.jpg
 
That zinc alloy chuck is cool! Basically a disposable chuck. I am sure I will have a use for that sometime!
R
 
I made a mess. :)

No, seriously, the inside of my lathe headstock was filthy - as was all the components. It’s been cleaned as much as It can - it’s as rough as a badger’s arse in there, so stuff it clinging. I do hope I remember how it all goes back together once the new bearings arrive.

C8A05BA2-4E6F-4A57-9332-FD501D76CBB7.jpeg
8C6DF4E8-8EAE-4DDC-B3ED-DD4B5041D5B0.jpeg
8436F056-56CD-4B71-8F50-25412CE3B724.jpeg1AFE12C3-C3F2-4490-8D49-EB56262A4A54.jpeg29247539-3F62-4550-911E-9FC828109314.jpeg
 
Back
Top