-
Welcome back Guest! Did you know you can mentor other members here at H-M? If not, please check out our Relaunch of Hobby Machinist Mentoring Program!
- Forums
- THE PROJECTS AREA
- PROJECT OF THE DAY --- WHAT DID YOU DO IN YOUR SHOP TODAY?
- Project of the Day Mega-Thread Archives
You are using an out of date browser. It may not display this or other websites correctly.
You should upgrade or use an alternative browser.
You should upgrade or use an alternative browser.
2021 POTD Thread Archive
- Thread starter Gaffer
- Start date
Simple but effective. Or is it simply effective. Great job.I just got tired of dumping out a box of inserts and pawing through them for the right kind. I can’t really justify the horizontal surface area to lay them out in a drawer, so I made a kind of Rolodex for insert holders. It was about a 30 minute project, had to mount the Freud dial-a-dado head (which is a very nice design, btw) and that took most of the time. You can flip the holders forward to scan through the collection.
Other storage ideas?
View attachment 366992
I started making a little toy gyroscope as a thank you gift for my grandma. I needed a piece of 3" heavy stuff for the flywheel, and the closest thing I had was an off cut of D7 tool steel. I generally like machining tool steels, so I went with it.
Holy crap, what a mistake. This is literally the worst metal I have ever machined. It's abrasive as all get out, relatively hard, and everything gets painfully hot as you're turning it. All the sites online list the machinability as 30% and I believe them. It's so tough that my horizontal bandsaw wouldn't cut through it, and that thing has had no problems with 4140PH, O1, A2, S7, H13, and a bunch of other strong steels.
I think the issue is around the vanadium and carbon content. Everything I'm reading is saying that there's enough of both for vanadium carbide particles to form in the steel, and that stuff is like Rockwell 80-85C. I don't know if that's present when the steel is annealed, but it wouldn't surprise me.
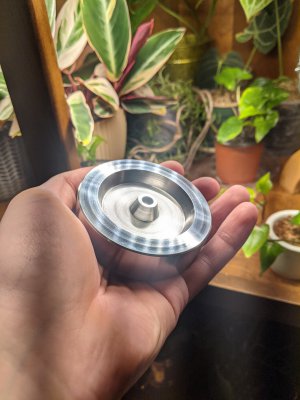
About the only upside to this steel in the home shop is the surface finish you can get. Using a Seco CNMG 21.50 uncoated carbide insert at 700 RPM with a very slow feed, I was able to get a pretty good mirror finish:

This was a first for me. I've gotten dull mirror finishes off of the lathe before, but never something this bright and truly mirror-like. Not pictured are the 7 inserts I fully burned up learning how to deal with this stuff.
Also attached is a picture of the other side, which has had some face profiling done. I'm following the plans put out by Clickspring for Make magazine.
Holy crap, what a mistake. This is literally the worst metal I have ever machined. It's abrasive as all get out, relatively hard, and everything gets painfully hot as you're turning it. All the sites online list the machinability as 30% and I believe them. It's so tough that my horizontal bandsaw wouldn't cut through it, and that thing has had no problems with 4140PH, O1, A2, S7, H13, and a bunch of other strong steels.
I think the issue is around the vanadium and carbon content. Everything I'm reading is saying that there's enough of both for vanadium carbide particles to form in the steel, and that stuff is like Rockwell 80-85C. I don't know if that's present when the steel is annealed, but it wouldn't surprise me.
About the only upside to this steel in the home shop is the surface finish you can get. Using a Seco CNMG 21.50 uncoated carbide insert at 700 RPM with a very slow feed, I was able to get a pretty good mirror finish:

This was a first for me. I've gotten dull mirror finishes off of the lathe before, but never something this bright and truly mirror-like. Not pictured are the 7 inserts I fully burned up learning how to deal with this stuff.
Also attached is a picture of the other side, which has had some face profiling done. I'm following the plans put out by Clickspring for Make magazine.
Attachments
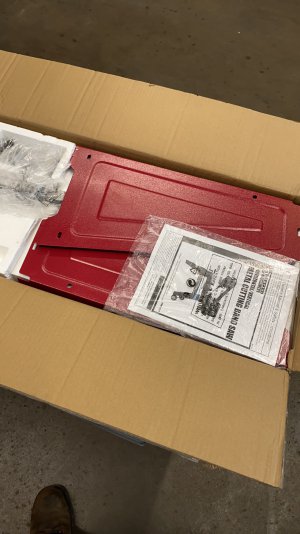
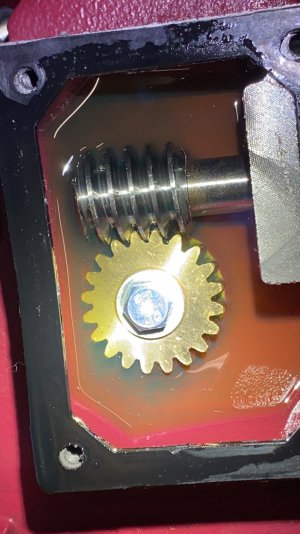
Started to put my saw together. Took a lot longer then i wanted to. 5 hours in and i am ready for a test cut. I was having trouble squaring up the guide bearings with the saw to run straight. I kept having the blade pop off. Before i put it together i did check the gearbox and there was some stuff in there. I took a magnet in a bag and tried to pull most of it out. The picture is what i had left in there that i was having trouble pulling out.
Attachments
When I had my (now returned) eBay dividing head open, I saw similar swarf on the worm. You can probably break most of it off with a needle nose pliers. Magnets will help with any steel leftovers. Have to say the oil looks cleaner than what was in my 4x6 saw.


