-
Welcome back Guest! Did you know you can mentor other members here at H-M? If not, please check out our Relaunch of Hobby Machinist Mentoring Program!
- Forums
- THE PROJECTS AREA
- PROJECT OF THE DAY --- WHAT DID YOU DO IN YOUR SHOP TODAY?
- Project of the Day Mega-Thread Archives
You are using an out of date browser. It may not display this or other websites correctly.
You should upgrade or use an alternative browser.
You should upgrade or use an alternative browser.
2021 POTD Thread Archive
- Thread starter Gaffer
- Start date
- Joined
- Mar 17, 2018
- Messages
- 1,400
Buy Guns & Parts Online: Free Shipping with up to 10% Off! | Fusion Firearms
Buy the latest guns & gun parts online! Find quality weapons & accessories with fast shipping. Safe & secure purchases with a 100% satisfaction guarantee. Shop now!
Forgot to mention that the parts needed for a conversion are, a slide, barrel, slide stop, and an ejector.
Last edited:
Beautiful work ShootyMac. God I have a soft spot for guns. Even though I don’t get much shooting time anymore. I still love guns. That’s a beautiful 1911. Very very nice.I just finished this up, and test fired it with its owner. He was thrilled with the results, as am I.
It was a stock stainless steel Ruger 1911 .45acp.
My buddy wanted a custom 1911 in 9mm, so here is what he got.View attachment 357874View attachment 357957View attachment 357956
Haven’t been in shop much. Cold weather and tired. A couple of weeks ago, I finally finished unclogging our home sewer. It kicked my butt.
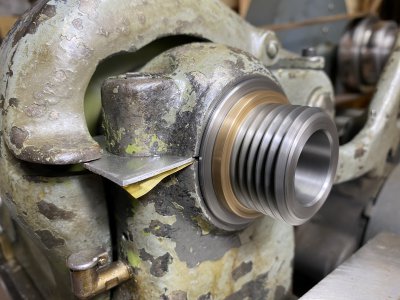
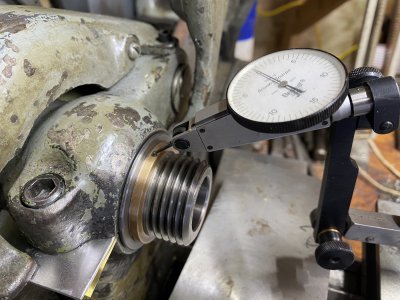
Anyway, today I finally think I’ve got my South Bend 9” lathe properly shimmed. The lathe has never been right. When I first got it, I noticed that the previous owner had left the bolt loose on the front bearing cap. If I tightened it, the lathe locked up. So I tried to shim it with a bunch of brass shims stacked on each other but that was a failure. So I tried soldering the brass shims but that didn’t work because the solder upset the shim specs.
Then I tried a piece of 1/32” aluminum. I cut it to the right shape and kept trying to file it to specs. I needed something around .062
But even though it was an improvement, it was still wonky. I could never get it perfectly flat.
So, I ordered a shim from McMaster. The aluminum peal away 12” x12” shim at 0.094”
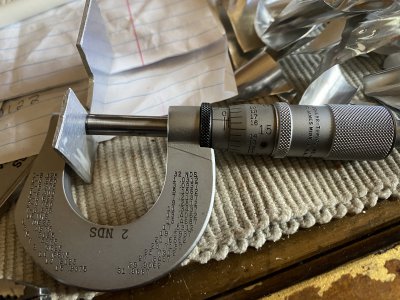
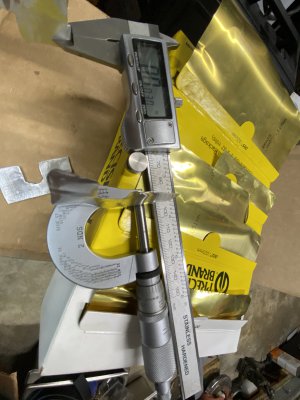
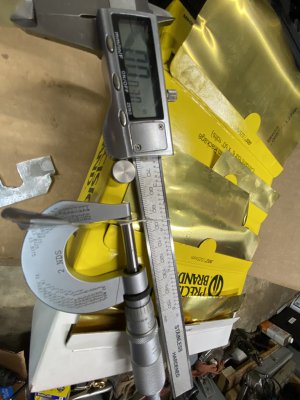
Each peal away layer is .003
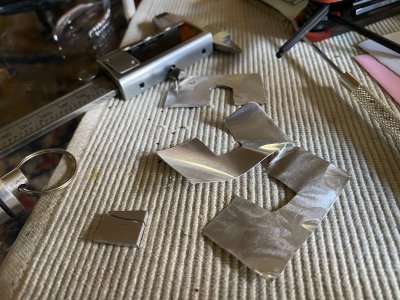
This worked much better even though pealing off .003 at a time is easier said than done. Sometimes I took a .003 piece off and other times the best I could achieve was a layer of 0.006
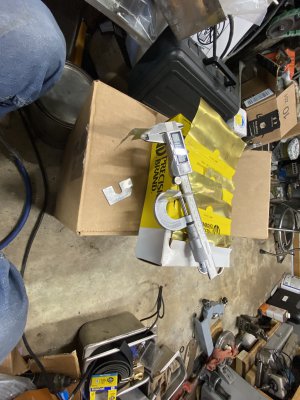
By the way.... that picture with the mic and the caliper is of a 0.003 piece of shim in the digital caliper I pealed away when getting real close to desired specs. I then wanted to remover 3 thousandths more....peal away another as best as I could...and end up pealing away a shim 6 thousandths of an inch. I have to tell you....I played with that piece trying like the dickens to split it in half and I swear it’s a solid piece of aluminum. I know it’s not but I’ll be damned if I can peal it into two 3 thousandths pieces.
So anyway...as life goes...when I got close to my final desired shim specs...a 0.006 layer comes off. So I cut a piece of .003” brass shim and stuck that in with the aluminum peal away shim.
I think I finally have that sweet spot. I checked the headstock and have about “one and one half thousandths “ play. I ran the lathe for about 20 minutes so hopefully I golden now.
And even though the peal away shim isn’t perfect in my opinion, it’s the best alternative in this sort of thing. To get these shims in my lathe, I’ve got a 30” piece of 1/2 rod machined to 3/8” on one end so it fits snugly into the bearing cap and it allows me to pry up the cast iron cap so I can get the shim in place. Even with that, if I try to slide stacked brass shims it... it’s almost impossible. The thin ones keep getting mangled. That’s why I tried to solder them . But I failed trying it like that. I’ve been farting with this headstock for a while now. Hopefully... it won’t act wonky anymore. Time will tell.
If it acts up much more, I may try putting another headstock off another SB I have. Or I’ll just move on to swapping the complete lathe. But in any case... I just hate giving up on something like this. I get anal that way. I hate defeat.
Attachments
-
 35D6DEF9-C14B-413E-B174-E5FA4A4C5CE6.jpeg3.5 MB · Views: 42
 -
 A03A63C2-BA3A-44CA-936B-9D4E6745C06F.jpeg1.4 MB · Views: 41
 -
 939118B4-9F62-4B75-9C03-022A79D455A5.jpeg3.5 MB · Views: 41
 -
 177432C5-B812-4208-8500-25857BC5A9CC.jpeg3.3 MB · Views: 41
 -
 5F383B9E-4CB8-4933-95F9-C1737A133F22.jpeg1.5 MB · Views: 38
 -
 809C46CA-E729-41E1-80A3-262DD6D53473.jpeg1.9 MB · Views: 34
 -
 6C00B6AA-78C7-4D49-8E2E-9BE9F4C2936E.jpeg3.4 MB · Views: 34
Last edited:
- Joined
- Mar 17, 2018
- Messages
- 1,400
Thanks Tim, and everyone else who commented or liked!Beautiful work ShootyMac. God I have a soft spot for guns. Even though I don’t get much shooting time anymore. I still love guns. That’s a beautiful 1911. Very very nice.
- Joined
- Mar 17, 2018
- Messages
- 1,400
I paid my used tool dealer a visit today. I found a few odds and ends that I needed, taps, dies, a couple of Craftsman C-clamps and these unexpected gems. The indicator ($25) needed a cleaning inside and out. The big needle was bent and hitting the crystal making it a bit sticky. I watched a quick video and took it apart without being too invasive, cleaned it with some alcohol, very lightly lubed a few spots, and made a new tension spring for the bezel. I've been looking for a 3/8 impactgun for months. I spotted this one ($40), it looked like trash, but worked ok. I buffed it and lubed it good, works fine!
I am fortunate to have a used tool dealer only 10 miles away. I watch his website for a new video of what came in every Tuesday. He had a smalish band saw blade welder that I wanted, but he sold it yesterday.

I am fortunate to have a used tool dealer only 10 miles away. I watch his website for a new video of what came in every Tuesday. He had a smalish band saw blade welder that I wanted, but he sold it yesterday.


