-
Welcome back Guest! Did you know you can mentor other members here at H-M? If not, please check out our Relaunch of Hobby Machinist Mentoring Program!
- Forums
- THE PROJECTS AREA
- PROJECT OF THE DAY --- WHAT DID YOU DO IN YOUR SHOP TODAY?
- Project of the Day Mega-Thread Archives
You are using an out of date browser. It may not display this or other websites correctly.
You should upgrade or use an alternative browser.
You should upgrade or use an alternative browser.
2019 POTD Thread Archive
- Thread starter GoceKU
- Start date
- Joined
- Jun 12, 2014
- Messages
- 5,081
Needed to make a micrometer stop for a control systems that I am sending out, seems that the manufacture is out for some time. In the past I made these slightly different with the adjustment knob in the middle of the block, but in this case I made it similar to the stock micrometer stop. Body is aluminum, foot and all other hardware are steel. The threaded shaft is 10 mm and has a 0.50" - 20 pitch threaded section so 0.05" per revolution. Normally I engrave the increments, but not really needed when used with the proximity stop. Might be done at a later date. Also the last micrometer stop I pressed in a metal female thread section, as aluminum can gall but seemed to be ok in this case with close tolerance threads. The micrometer knob position is fixed by a groove and an allen screw underneath with the head trimmed down, the knob shaft has a 1/8" pin through it which slides in a shaft groove to rotate the shaft. Always takes a bit longer then you think, took most of the day. Would look nice anodized, but not going that route.
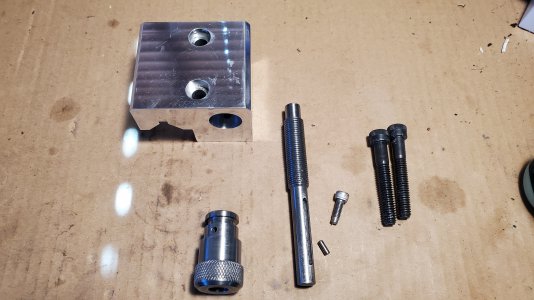
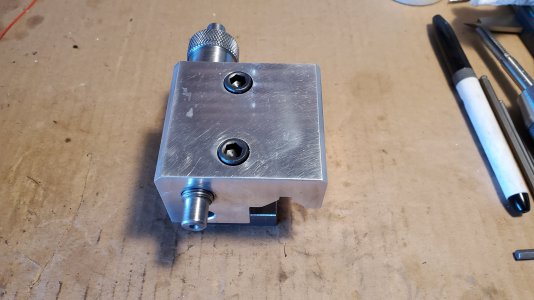
Comparison to stock micrometer, some slight dimensional changes and different hardware.
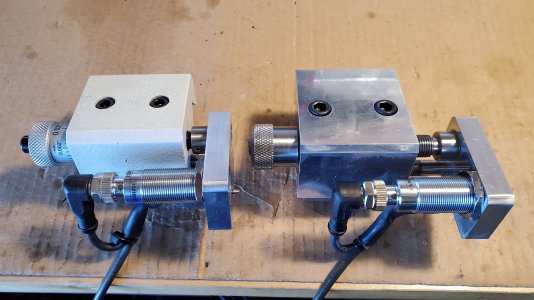
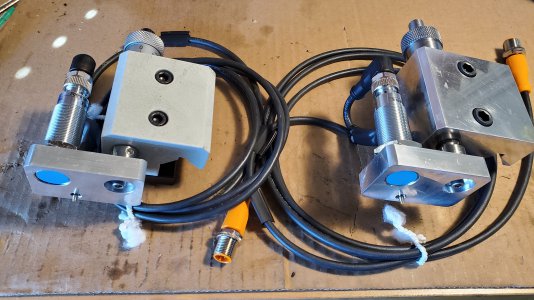


Comparison to stock micrometer, some slight dimensional changes and different hardware.


Story of my life...'yeah dinner in an hr sounds good, I'll only be in the garage for 30 mins max' 2hrs later 'ok, ok...I'm coming in now, but I'm only about half way done'.Always takes a bit longer then you think, took most of the day.
I've used a BR600 for years, and after a couple of years, I realized it would help if the nozzle was closer to the ground for me (I'm 6'5"), but for whatever reason, the way Stihl joins their nozzle parts, and the nozzle parts they sell, you can't just insert an extension onto it. So, I tried a gluing an extension onto the end of the nozzle, but that only worked for a short time, likely due to both extreme cold (-30C and colder) and stress (from the tip hitting various things). After gluing it together a couple of times, I switched to using pop rivets to make the extension, and that worked great.
I switched a couple of years ago to a Husqvarna 580BTS, as it has significantly more blowing power, and as a bonus, I could just buy an additional middle section for the blower tube, and it was a good length for use (perhaps a couple inches too long, but still WAY better than 12" too short). The downsides for the 580BTS for me are that it's much louder than the BR600, the kill switch wires break regularly so I have to use the choke to kill the engine (breaks right as it comes out of the control due to flexing as you use it), and the offset control from the tube causes pain in my elbow when I use it a lot.
I just recently bought the BR800CS, and like the BR600, the blower tube is ridiculously short for me.
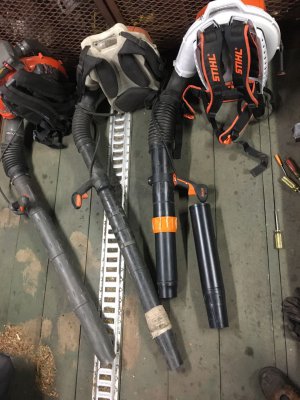
Here's a pic of the 580BTS (left), BR600 (center) and BR800CS (right, with original tube, but it is missing a short tip at the end). Also, there's new blower tube I bought to use as an extension to the existing tube (it has the tip removed from the BR800CS).
I removed the whole tube assembly from the BR800CS so I would work on it on my bench, as well as access the inside of the tube, as the end section doesn't come out the front.
Connecting the outlet end of the existing tube to the inlet of the new tube was actually pretty straightforward, as the outlet end is tapered a bit. So, I first measured to just past where the ridge on the new tube was, where pop rivets could be put flat against the tube:
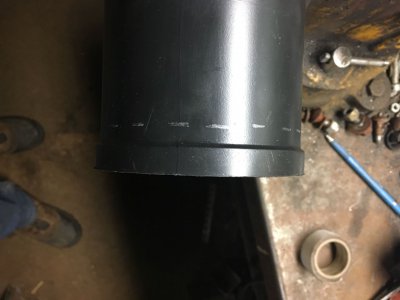
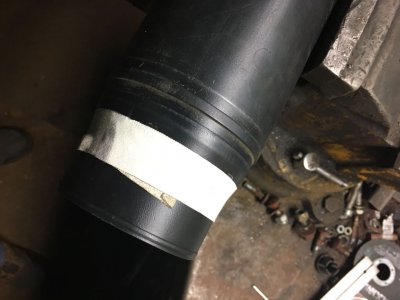
Then after marking how the two tubes overlapped, I measured the outlet of the original tube 1/4" past where the pop rivets will go, marked it with tape and then cut the end off using an angle grinder with a thin cutoff wheel:
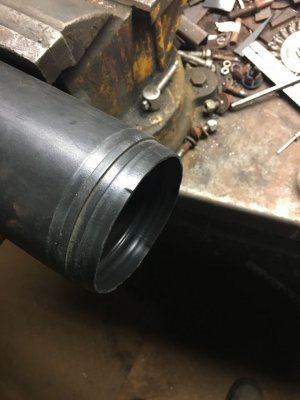
I used Aluminum rivet/aluminum mandrel, 3/16 diameter, 3/8 head, 7/16" under head pop rivets, with backing washers for holding them together. I picked using aluminum pop rivets instead of steel mandrel ones, because the tubes are plastic and the steel pop rivets take a lot of force to "pop", and it might cause damage to the plastic from being squeezed too hard.
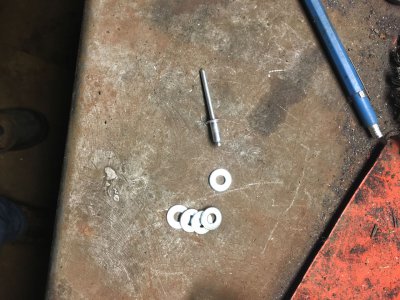
While I have long arms, they are a little too big to reach into the tube to put the backing washers onto the pop rivets, so I needed to use a part-grabber tool to put them on:
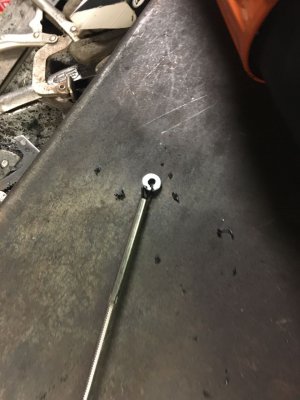
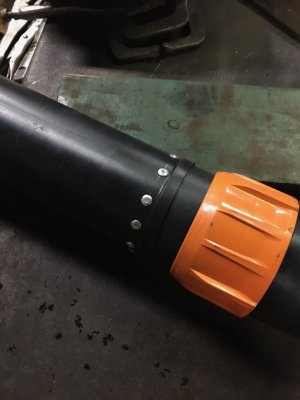
I lined up the tubes, drilled & riveted one side, then drilled & riveted the opposite side, then worked my way around the tube, installing 12 rivets in total:
Finally, a comparison shot of the fully extended new tube vs the other machines:
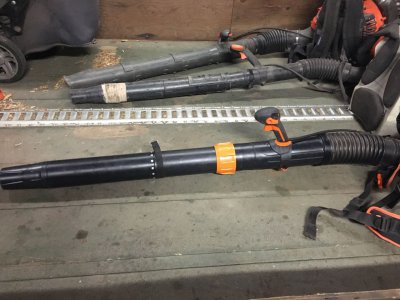
Now, it's probably a little too long, but I can use the adjustment mechanism to shorten it to what is just right for me. From waving it around a bit, it seems to be attached firmly and won't readily break.
As a downside vs how I lengthened the BR600 tube, if any part of the blower tube needs replacing (other than the short tip at the end), I'll need to drill out the rivets and remove the extension, as all the other pieces (tightening screw [the orange part you see], clamp [what the orange part squeezes], and rear part of the tube) need to go forward over the front tube, and they can't go over of the ridge on the tail end of the extension. If I do need to take it apart, I'll probably grind down that ridge and see if I can then slide it through.
I switched a couple of years ago to a Husqvarna 580BTS, as it has significantly more blowing power, and as a bonus, I could just buy an additional middle section for the blower tube, and it was a good length for use (perhaps a couple inches too long, but still WAY better than 12" too short). The downsides for the 580BTS for me are that it's much louder than the BR600, the kill switch wires break regularly so I have to use the choke to kill the engine (breaks right as it comes out of the control due to flexing as you use it), and the offset control from the tube causes pain in my elbow when I use it a lot.
I just recently bought the BR800CS, and like the BR600, the blower tube is ridiculously short for me.
Here's a pic of the 580BTS (left), BR600 (center) and BR800CS (right, with original tube, but it is missing a short tip at the end). Also, there's new blower tube I bought to use as an extension to the existing tube (it has the tip removed from the BR800CS).

I removed the whole tube assembly from the BR800CS so I would work on it on my bench, as well as access the inside of the tube, as the end section doesn't come out the front.
Connecting the outlet end of the existing tube to the inlet of the new tube was actually pretty straightforward, as the outlet end is tapered a bit. So, I first measured to just past where the ridge on the new tube was, where pop rivets could be put flat against the tube:

Then after marking how the two tubes overlapped, I measured the outlet of the original tube 1/4" past where the pop rivets will go, marked it with tape and then cut the end off using an angle grinder with a thin cutoff wheel:


I used Aluminum rivet/aluminum mandrel, 3/16 diameter, 3/8 head, 7/16" under head pop rivets, with backing washers for holding them together. I picked using aluminum pop rivets instead of steel mandrel ones, because the tubes are plastic and the steel pop rivets take a lot of force to "pop", and it might cause damage to the plastic from being squeezed too hard.

While I have long arms, they are a little too big to reach into the tube to put the backing washers onto the pop rivets, so I needed to use a part-grabber tool to put them on:

I lined up the tubes, drilled & riveted one side, then drilled & riveted the opposite side, then worked my way around the tube, installing 12 rivets in total:

Finally, a comparison shot of the fully extended new tube vs the other machines:

Now, it's probably a little too long, but I can use the adjustment mechanism to shorten it to what is just right for me. From waving it around a bit, it seems to be attached firmly and won't readily break.
As a downside vs how I lengthened the BR600 tube, if any part of the blower tube needs replacing (other than the short tip at the end), I'll need to drill out the rivets and remove the extension, as all the other pieces (tightening screw [the orange part you see], clamp [what the orange part squeezes], and rear part of the tube) need to go forward over the front tube, and they can't go over of the ridge on the tail end of the extension. If I do need to take it apart, I'll probably grind down that ridge and see if I can then slide it through.
- Joined
- Apr 23, 2018
- Messages
- 6,886
Ground a perfect 90 degree shaving edge onto my scraper. Band aids not included.


- Joined
- Oct 9, 2019
- Messages
- 1
Well, last weekend I cleaned up and tested 16x 240V electric motors (from 3/4 to 3hp) for sale and checked another 12x matching and unused 3ph motors. I had one dead one, and several I have projects for. I was originally after two motors and after looking at the prices for new, I stumbled across an auction and won 34 used motors for less than the two new ones. They're pump motors from a food processing factory and have been looked after well. I felt like a kid in a lolly shop. 
Then yesterday I was given a free treadmill which I've "deconstructed". A DC motor, a lift motor and nice bunch of fasteners, knobs and trims. I think I'll use the motor for an old wood lathe I am restoring
Sent from my SM-N960F using Tapatalk

Then yesterday I was given a free treadmill which I've "deconstructed". A DC motor, a lift motor and nice bunch of fasteners, knobs and trims. I think I'll use the motor for an old wood lathe I am restoring
Sent from my SM-N960F using Tapatalk
Ground a perfect 90 degree shaving edge onto my scraper. Band aids not included.
Nice! With your recent big iron acquisitions I think there's a KO Lee grinder out there somewhere with your name on it. Then you can sell this one- and as coincidences go...I happen to like that smurf blue color
I finished my screw and nut for the 9a. I used bearing mount locktite on the screw as well as pinning it. I'm giving the locktite a day to setup before reassembling the crosslide. I thought I had a pic of the finished nut...I'll have to post more pics tomorrow.Today I started making a crosslide nut for the 9A. I cut a piece out of a bronze plate that I had in my scrap collection. Roughed it out on the mill. Mounted it in a 4 jaw bored and threaded it. I sized it to the unworn part of the crosslide screw, up near the gear.View attachment 302928View attachment 302929View attachment 302930View attachment 302931
Then I cut a screw to fit the nut. I still have to finish shaping the nut and attach the new screw....but it's time to watch football.


Sent from my SM-G930V using Tapatalk
- Joined
- Jul 14, 2017
- Messages
- 2,455
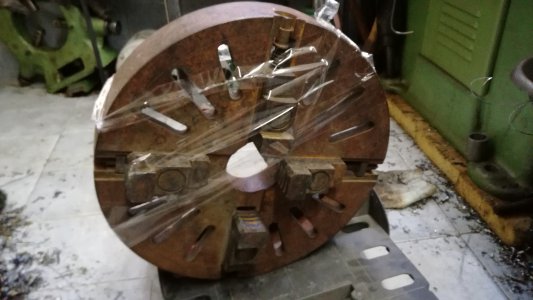
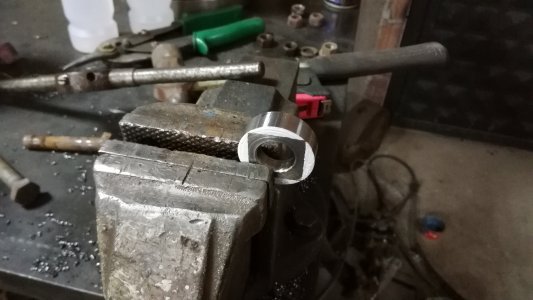
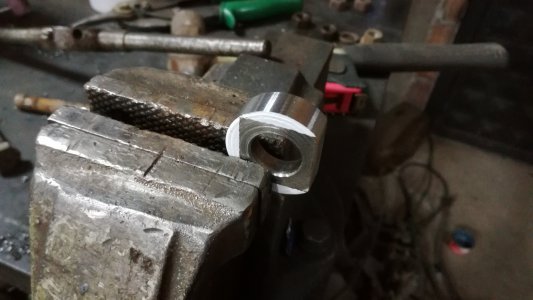
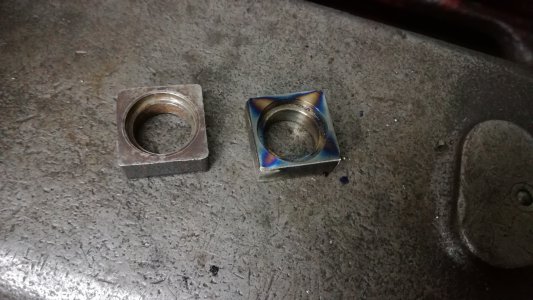
Couple weeks back i bought a 4 jaw chuck, for my lathe, it come incomplete, it was missing one keeper. So i decided to make it, i have a square stock in that size but wanted to make it from better quality steel. So i started with a casting with about 5-60 rockwell hardness, machined the outside, then drilled and bore it, all with carbide tools, then i marked it put it in my bench vice and cut it on all the corners with a 4" angle grinder. Now this check is complete and i can start cleaning it and getting it ready for installation.
