2019 POTD Thread Archive

Franko,
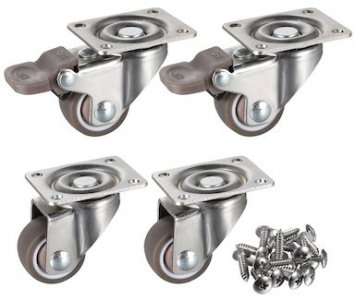
Nice job. I'm curious about the wheels/bearings that you used. They don't look like skateboard wheels to me. Did you make the up custom or, if commercial items, please indicate a source so I can do some research for a future project of my own. Thanks.
 
Extropic, I searched Amazon for 1" wheels. They turned out to be the very first hit. They are great little ball-bearing wheels. They came on the coolest little casters you ever saw. And reasonable at $9.99.
They are available in 1", 2", and 3" sizes.

71ERPfa-gUL._SL1200_.jpg

Here's a link.
 
POTD was a follow-up on the prototype Ergonomic /flange bender tool from a previous POTD post. I put the wooden prototype over the door part and needed to make a couple of tweaks before cutting the Delrin final tools. Here's the link to the original post:


Problem was the part that the “U” section slips over is wider at the base than at the spot where the tool pushes against. The tool rocked enough that it tended to slip off on the back side. Simple fix, lengthened one leg and added a radius “chunk” on the end so the point where it touches and reacts against on the back side are parallel to each other, so no slipping.

The tools will be used on both sides of the assembly line, so made five which gives us a few back-ups. The CNC routine is stored on my Tormach so no problem making more if need be.

Thanks for looking, Bruce


Block of Delrin in the Tormach 1100 cutting the new profile
View attachment 302871

Secondary operation to cut a boss on the end which slips into a piece of tubing for a handle.
View attachment 302872

Final flange bender / Ergo tool
View attachment 302873

Made up 5 for our floor. We'd measured as high as 45 lbs. of effort to seat the part which is way over the Ergonomic limit of 20 lbs. The length of the handle maths out to a force of 8 lbs. at the end to get 45 lbs. at the reaction surface, so no sore thumbs for our Team Members.
View attachment 302874

Front glass run channel for the Buick Enclave. The upper clip in the photo was tough to seat. Solution is the simple machine of a lever so no one goes home sore at the end of the day.
View attachment 302877

Slip the tool over the glass run channel and give a little push on the end to seat the clip.
View attachment 302875

View attachment 302876

Does the Path Pilot have a routine that would let you write something on those in the Delrin like "BGHansen"? Both sides on the long part.

Hope the company knows you are helping out. I recall GM used to have a deal where if you thought of something in the factory that saved them money you would be given a check for one year of savings. For example one guy suggested that if a long drive shaft got ruined in manufacture they could cut it off and use it as a short drive shaft for a smaller car saving buying a drive shaft and saving discarding the flawed one.
PathPilot has a pretty easy to use Engraving tab. Pick a font, type a line of text (need multiple files which can be merged into one for multiple lines), give it a location, character height, depth of cut, feed rate, tool number and a Z-height for clearance. Then write to a file which you then load and run the routine. Good idea, really simple to do.

GM has a Suggestions program that pays 20% of the annual savings on an ideas with a tangible savings. Max payment is $20K for an individual, $25K for a team award. Always fun to award one of those to someone on the floor (gave out 2 of them this year). We also have a recognition program between salaried peers. We had a problem with puckers in our door seals that I worked with our Team Members to get resolved. New process and part changes were documented in the Job Element Sheet. Had an engineer from the CAMI plant in Canada ask for some help, so sent him copies of our JES and background on what we did to fix it. Got some recognition dollars from their staff for helping out. My leadership here did the same for the Ergo tool.

Amazing what we pay for tools like this one. Outside job shop quote was something like $250 each. The routines each took about 2 1/2 minutes to run because I wasn't pushing the Tormach. Only did a 0.25" DOC at 40 ipm feed rate with a 1/2" end mill. The load meter on the spindle motor didn't even move when it started cutting. Someone a little more aggressive than me would have the routines run in under a minute. Of course, a job shop has to pay for the building, tooling, equipment, tool maker, etc. I could see doing this type of thing in retirement, but then my hobby would become a job . . .

Bruce
 
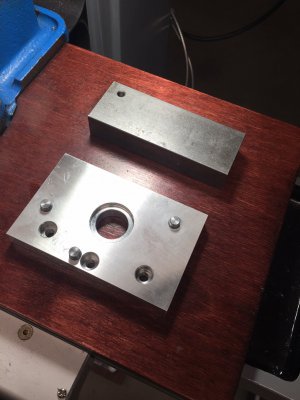
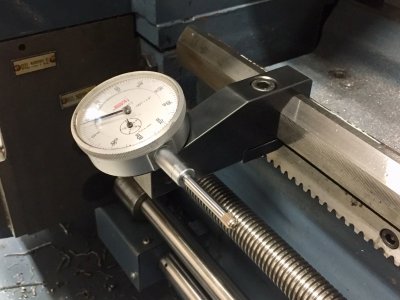
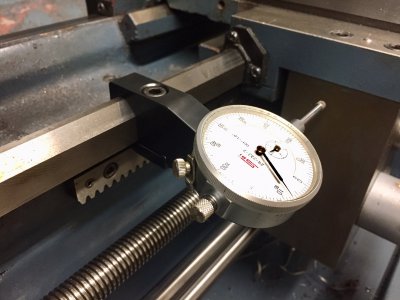
A lathe carriage indicator holder has been on my short list of things to make. I designed this one around some steel I already had on hand.
IMG_6830.JPG
I repurposed a plate from a former project to create a way to orientate the holder blank up at 45 degrees to mill out the bed way clamp. The blank will rest on the 3 dowel pins and clamped together in the vise.

IMG_6834.JPG
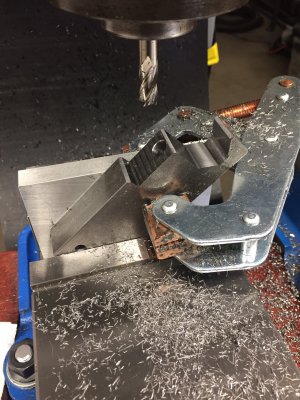
Shown here milling the bed way clamp.

Blue Group.JPG
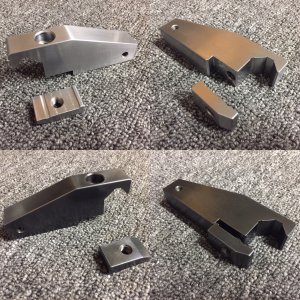
The finished machined holder and clamp both before and after bluing.

IMG_6849.jpg
All done and installed. I'm very happy with the finished project.

IMG_6850.jpg
 
Last edited:
@celsoari and @Janderso provided the initial inspiration to make a AXA tool holder with a dial indicator permanently attached.

48851039177_7636f8e100_o.jpg


48850847426_d1902e9747_c.jpg
 
It is infact a desert rose No clue the name.
A lathe carriage indicator holder has been on my short list of things to make. I designed this one around some steel I already had on hand.
View attachment 303239
I repurposed a plate from a former project to create a way to orientate the holder blank up at 45 degrees to mill out the bed way clamp. The blank will rest on the 3 dowel pins and clamped together in the vise.

View attachment 303240
Shown here milling the bed way clamp.

View attachment 303238
The finished machined holder and clamp both before and after bluing.

View attachment 303241
All done and installed. I'm very happy with the finished project.

View attachment 303242

It is infact a desert rose No clue the name.
Thanks for the answer. I stayed in a hot province (Limpopo) in South Africa until two years ago and had a small nursery in the backyard with about 5,000 of them. I had to sell them all but about seven managed to get on the truck and living in a very cold province now. I replaced that hobby now for working with the lathe??!?? It is Adenium Obesium.
 

Attachments

  • DSC00435.JPG
    DSC00435.JPG
    706.1 KB · Views: 23
  • DSCN1422.JPG
    DSCN1422.JPG
    3.4 MB · Views: 23
  • dup fotos dec 155.JPG
    dup fotos dec 155.JPG
    862.4 KB · Views: 24
  • Video kamera 17 Dec 034.JPG
    Video kamera 17 Dec 034.JPG
    947.6 KB · Views: 24
  • Video kamera 17 Dec 037.JPG
    Video kamera 17 Dec 037.JPG
    790.5 KB · Views: 24
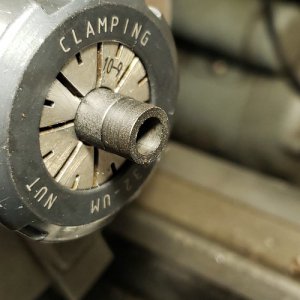
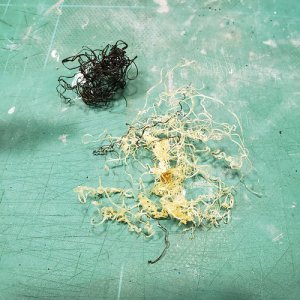
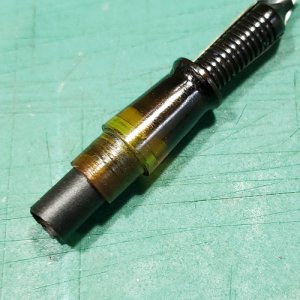
Had a good day in the shop today. The reason I have a lathe is to fabricate replacement parts for vintage fountain pens, from their original materials, which I described here some weeks ago when I made my first sac nipple from Delrin, clearly not an original material. Today, I made one in ebonite, black hard rubber, as they were originally made. Ebonite is a treat to turn and bore, the only issue being its softness and absence of rigidity; makes Delrin feel hard! So, it was great practice working close to the chuck, even with the carriage powered. Boring also turned to be very easy; I was able to bore to within .002 of my target, with the Micro100 BB180750 carbide boring tool in my homemade boring sleeve. I also bored celluloid, the amber part, to make room for the added sac nipple. Equally easy. The chips in the second picture are ebonite on top and celluloid below. They built up really fast while turning, and I was so close to the chuck I couldn't see, so didn't cut deeper than .010 each pass. I think I'll turn these left-handed from now one. The third picture shows the new sac nipple friction fit into the existing section, which I had bored to take the extra part. This was my last practice run, since the next one I'll do will be from a 1930 Waterman 92, an early celluloid pen with ebonite fittings.
48855154288_6673d099ba_e.jpg48855710442_4d0f8ab9ff_e.jpg48855511581_188d7a233f_e.jpg

Mikey, the square tool worked incredibly well on the soft material. Thanks for all your patient teaching!

Tim
 
Back
Top