tapered bore

Unless I am seeing wrong that drawing says you need 8 degrees, not 4 degrees. The inclusive angle would be16 degrees Jump in here and correct me if I am wrong George.

"Billy G" :))
 
Ah ha, my mis reading the naming convention.
Thanks guys, wow, there is a lot of awesome info to digest here.
 
That drawing indicates 8° with respect to centerline, or "per side" and would match the compound markings.

As far as the hole size, dimension A should be bored to print before taper cutting begins.

Here's one for you to think about. How are you going to gage the mouth diameter - dimension B? I know you can ink up the parts and see if you have good contact, but how about an accurate measurement? There is a small chamfer drawn there, probably a 45° angle, so even to eyeball with calipers is iffy, even before the chanfer is cut. How are you going to do it?
 
The first thing you need to do is drill a hole "A" diameter by "E" deep. It's just a clearance hole so the diameter isn't critical.

Next comes the tapered bore. The taper you want to cut has a 16º included angle. Since you are only cutting on one side, you need to set your compound at one half the included angle or 8º relative to the center line of the spindle. The angle is critical because you want it to match the taper of your collets. It the taper is off, the collets may rock and cause whatever they are holding to wobble. There are ways to set the compound dead on to 8º, but for this first taper, just take a cut on the bore and check it to one of your collets. Get some Prussian blue from an auto parts store or an industrial supply, lightly blue the collet and give it a twist in your bored hole. The blue will transfer to the sides of the bore and tell you whether the taper of the bore matches the taper of the collet. Just keep adjusting the compound and taking trial cuts until the entire bore is blue, then you'll know your taper is right on.

I doubt the depth of the tapered bore is all that critical, but if you wanted to make it exact and know a little trig, you can drop a ball in the bore and calculate how far in it goes based on the diameter. Balls and rolls are how tapered bores or angled surfaces are measured.

It looks like an interesting part to make. Have fun with it.

Tom
 
That drawing indicates 8° with respect to centerline, or "per side" and would match the compound markings.

As far as the hole size, dimension A should be bored to print before taper cutting begins.

Here's one for you to think about. How are you going to gage the mouth diameter - dimension B? I know you can ink up the parts and see if you have good contact, but how about an accurate measurement? There is a small chamfer drawn there, probably a 45° angle, so even to eyeball with calipers is iffy, even before the chanfer is cut. How are you going to do it?

Do you think it's going to be that critical? As you say, inking the collet and checking the contact marks is the method I was intending to use.

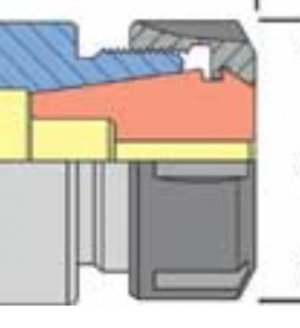
If you look at this (rather fuzzy) diagram of how the collet engages the nut and the taper of the bore, you can see that it sits proud of the bore entrance somewhat. I'm guessing that this is to allow it to be forced further down so that the collet is compressed and clamps tight to the workpiece it's holding. As long as the taper is correct, how critical do you think dimension B is going to be?
I'm not sure I really see the chamfer you're refering to, but I was intending to use digital calipers to check when I was about there.
I suppose I could take an impression on a piece of thin card and measure that, but I'm not sure it would be any more accurate.


Taper.JPG

What do you think?


M

Taper.JPG
 
The first thing you need to do is drill a hole "A" diameter by "E" deep. It's just a clearance hole so the diameter isn't critical.

Next comes the tapered bore. The taper you want to cut has a 16º included angle. Since you are only cutting on one side, you need to set your compound at one half the included angle or 8º relative to the center line of the spindle. The angle is critical because you want it to match the taper of your collets. It the taper is off, the collets may rock and cause whatever they are holding to wobble. There are ways to set the compound dead on to 8º, but for this first taper, just take a cut on the bore and check it to one of your collets. Get some Prussian blue from an auto parts store or an industrial supply, lightly blue the collet and give it a twist in your bored hole. The blue will transfer to the sides of the bore and tell you whether the taper of the bore matches the taper of the collet. Just keep adjusting the compound and taking trial cuts until the entire bore is blue, then you'll know your taper is right on.

I doubt the depth of the tapered bore is all that critical, but if you wanted to make it exact and know a little trig, you can drop a ball in the bore and calculate how far in it goes based on the diameter. Balls and rolls are how tapered bores or angled surfaces are measured.

It looks like an interesting part to make. Have fun with it.

Tom

Ha, fun, yes! ;) Turns out it's not quite the simple project I first imagined, but that's ok I'm learning a lot and that's really what it's about.

I certainly wouldn't be getting very far without the knowledge available from the folks here on the forum.

I'll post on how it goes with the candle once I get one.

Thanks all,

M
 
No Mike, it's not really going to be all that critical and the chamfer is more functionally as an edge break which would be put on last, so you could likely get plenty close with your dial calipers. It's safe to assume that you are just inside the diameter (with the inside jaws), so if anything, the actual size will be ever so slightly larger than your reading.

I was just tossing that out as food for thought. Tom has the proper method outlined. Using balls, and actually 2 different sized balls, you can get a very accurate angle measure and a projected diameter for dimension B. I don't think you need to do that, I just wanted to stimulate some thinking on measuring tapers and tapered holes.

As long as you get good contact with the blue, and have enough movement in Z to compress the collet completely, you're done.
 
Ah ha, my mis reading the naming convention.
Thanks guys, wow, there is a lot of awesome info to digest here.

The naming game can get jumbled easily. Sometimes things just change over time. Sometimes it is widespread, othertimes it is a local name change to simplify something. That is why in a conversation like this one a simple word can cloud an even dimpler method. It is important that we are all speaking the same.

Mike --- Tom has pretty much summed the process up for you and Tony has filled in any blanks. The rest is up to you. Use the candle as you said then if there is any problem we are here. Tapers are intimidating at first. You will do just fine. Keep us informed of your progress.

"Billy G"
 
I would think the diameter of the tapered hole is critical and should be checked often as you cut it leaving room for finishing. it would take very little oversize to set the collet in too deep to tighten at this low angle.
steve
 
O.K.,now that I can see a drawing,the bore is tapered 8º ON EACH SIDE. That's different from just saying "an 8º taper"(at least to me). Drawings always clarify things.

If I were using a protractor, I'd use a more accurate model,like a Starrett,which has a vernier,and nice THIN markings rather than the fat ones on the General. General has always been a "hardware quality" tool maker even back in the 1950's.

You are still assuming that the edges of the cross slide and the compound are truly parallel to their directions of movement. If it were a Monarch 10EE,I'd take it for granted,but not on an Asian lathe.

To tell the truth,I usually set the compound as well as I can,taper bore,and sneak up on the final degree setting by boring part way,and twisting the tapered part with some blue on it into the hole. When the blue wipes off all along the tapered part,I know my compound is set correctly,and I finish the hole. It is easier than fiddling around with setting angles that may not actually give perfect results.

Having said this,everything I said in my little treatise is still correct,except for the correct degree,which the drawing has revealed as 16º total taper,not 8º. Many times words are just not sufficient. I only had 1 regular customer who could correctly and clearly describe to me OVER THE TELEPHONE what he wanted,and never cause a misunderstanding. We did that many times without having to re make his needed part.
 
Back
Top