Setup and Continuing Saga of the Charter Oak 12Z

Hi Bill
Thanks Bill will do, I think i will ring him when i am ready to get one, next year,
but will give him time to get one in as they are not allways in stock.
as any one any clue of the S&H to the UK. ???

jeff
 
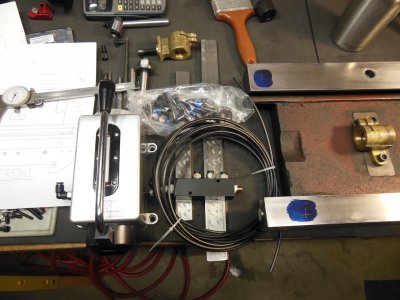
Ok, received the oiling system kit today and thought I'd start prepping the saddle for the install.

The kit. Pretty basic. Paul is working on putting together an install video. I reviewed an early test take, but it needs finishing.

DSCN4249.JPG

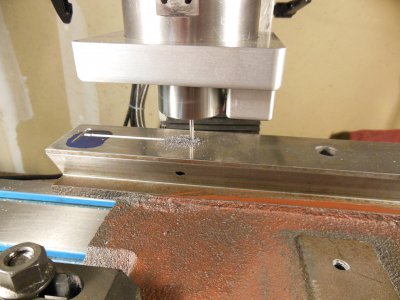
After drilling the oil pathways from where the fittings will thread into the saddle to the ways, it is time to lay down the oil galleys. The video shows a long galley parallel to the axis. I decided to add perpendicular galleys that will allow oil to better work it's way between the sliding surfaces. I will edge break along the sides of the galleys where I want oil forced onto the ways.

DSCN4251.JPG

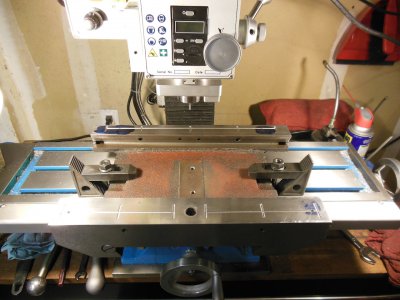
This is what the X-axis ways look like after I got done.

DSCN4254.JPG

Blue certainly earned his keep today. Who says a PM25 is only good for plastic and aluminum? :)

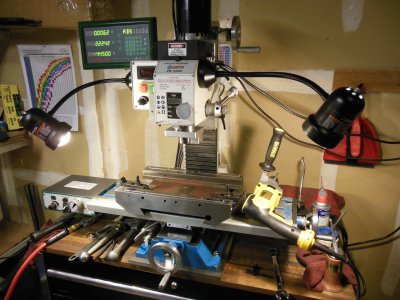
DSCN4255.JPG

Tomorrow I will have to slot the gibb strips (not sure how to mill a groove in a tapered surface) and the opposing dovetails with a slotting saw. Then all that will be left for the saddle will be drill and threading the saddle for the 1/8" NTP fittings. It was a good day.

DSCN4249.JPG DSCN4251.JPG DSCN4254.JPG DSCN4255.JPG
 
Last edited:
Awesome Bill. That is pretty much how I planned to mill oil grooves in my saddle (on the G0704) so now you have proved it will work for me, thanks. I did actually order the material to make my ball nut mounts now so when they are done I will dissemble my mill and add oil grooves at the same time. I ordered (2) 3/16 ball nose carbide cutters to cut the grooves, what did you end up using and how deep?

Did you see Will's ring light mod to his PM45 http://www.hobby-machinist.com/showthread.php/27279-Spindle-Light-For-PM45M?p=240529#post240529 ? We should be able to do pretty much the same thing.
 
Awesome Bill. That is pretty much how I planned to mill oil grooves in my saddle (on the G0704) so now you have proved it will work for me, thanks. I did actually order the material to make my ball nut mounts now so when they are done I will dissemble my mill and add oil grooves at the same time. I ordered (2) 3/16 ball nose carbide cutters to cut the grooves, what did you end up using and how deep?

I used what was recommended in the video, a 1/8" carbide ball. There was no mention of depth so I just WAG'd it and picked 50 thou. That's a bit deep, maybe should have gone 30, but hey it will hold a bunch of oil. :)


Yesterday I finished Y-axis ways and drilled the gibb strips by putting them on the saddle and holding them with a 2x4 and C-clamp. Then where the drilled hole meets the saddle I put a small groove (1/2" either side) across the hole to allow for oil flow as the gibb wears and moves. On the sliding side of the gibb I put a 1/8" carbide burr in my Dremmel (sp) and hand cut the oil galley. Same for the opposing dovetail on each axis. Won't show pics as it's pretty ugly. But it's functional.

Next weekend is the fun part: I have to pull the head and head/column slider and modify that. The mod is pretty simple. The head removal not so much. The video shows using two small sections of 4x4 on each side of the head and strapping the head down to the table. Then unbolt the head and use the Y-axis to move the head away from it's mount. I will document as I go along. I will also document how they suggest routing the oiling lines. Pretty slick.


Did you see Will's ring light mod to his PM45 http://www.hobby-machinist.com/showthread.php/27279-Spindle-Light-For-PM45M?p=240529#post240529 ? We should be able to do pretty much the same thing.

Yes, I've seen that. May be something I do for El Hefe.
 
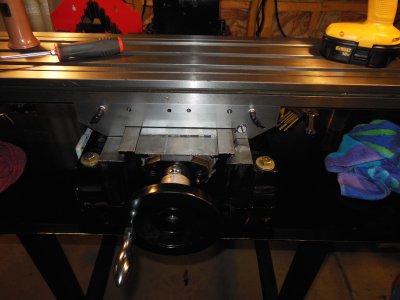
Finished setup on the saddle and got it and the table back on the mill.

DSCN4258.JPG

DSCN4259.JPG

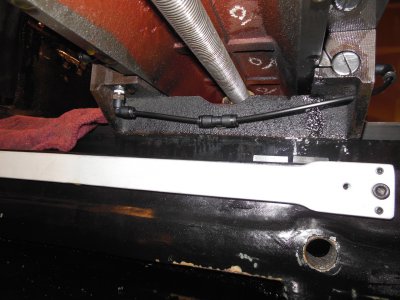
Need to do the head next, mount the oil reservoir, manifold, and run the lines. I don't have the drawings for the head install, so waiting on CO to get me that. Just for grins I put my oil can up to the back fittings for each side and gave it a couple squeezes. Got oil going everywhere.

Now that the table is back on, I can finish the DRO and power feed install. More stuff to do... :))

DSCN4258.JPG DSCN4259.JPG
 
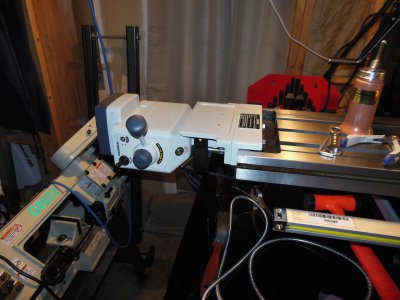
And got the power feed on. Bit of an IQ test, as the directions were basically an iso drawing. Wasn't too hard though.

DSCN4260.JPG

DSCN4260.JPG
 
Looking good Bill. You should be operational soon at your current pace.

Given any thought to changing out the way locks yet? If you need broken ones to work from, I have 2 now. You might be surprised how far those things can fly when they snap off, this last one I think I got almost 8 feet!

You had discussed some protection for the y way, were you thinking a flexible cover or the squeegee type?
 
Looks like you are making good progress Bill. You'll be making chips soon by the looks of it.
 
Back
Top