ScubaSteve's Van Norman #12 Restoration

LONG STORY:

Well, I got everything moved and put back together in my new shop. Been using the VN12 for various small projects like drilling and squaring up parts. I noted the motor didn't work great, but it worked adequately, so I didn't think much about it...it didn't heat up or smoke, etc.

Fast forward to a few weeks ago; I sold a SB 9" lathe and got a much nicer 13"....I hooked everything up, assuming it was set up for 3ph 220v...after having power problems and smoke, I finally realized it was wired for 440v. Once I rewired it, it worked fine.

Since I was fiddling with everything else on 3 phase, I began to think My RPC was running awful loud and I got busy trying to balance it. I got her balanced out nicely and the motor runs smooth and quiet.

This week I needed to use the VN12 but found it would no longer run! After digging around, I found that IT TOO had been wired for 440v and I had been running it on 220v all along.

The problem is that I can confirm the RPC is working well because the lathe works perfectly. The motor on the VN 12 hums but doesn't turn....I have properly wired it for low voltage, etc. Not sure what to do? I really think I should keep the motor since it is aesthetically part of the machine. Probably can't afford a professional rewind (I hear quotes of $500+)...I looked at how to DIY a rewind, but materials alone are close to $200.

Does anyone have any suggestions?
 
Did you change the motor wiring for 240?

Do you have a volt/ohm meter and do you know how to use one?

Cal
 
Did you change the motor wiring for 240?

Do you have a volt/ohm meter and do you know how to use one?

Cal

Yep...I know how to use one in general circuits....but had to look up diagnostic procedures for testing windings. FWIW, I pulled the motor and found that it was very difficult to turn...could be mixture of electrical/mechanical problems. It was freezing in my shop and the grease was so firm I think it was gumming up the armature.

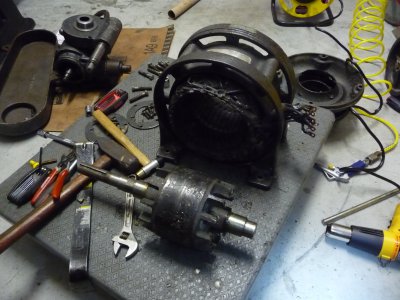
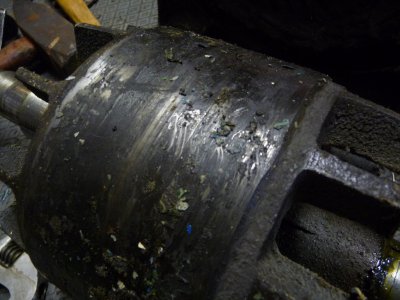
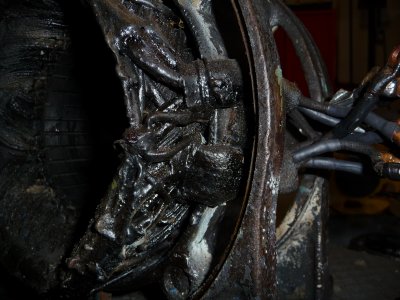
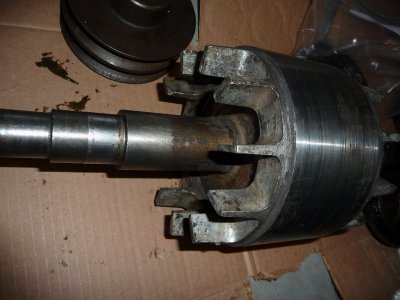
Here's some before pics of the motor....it was obviously overgreased at one point and that grease was all over EVERYTHING. Notice in pic #2...the "fingers" on the rotor are so grimy I thought they were cast iron! They are actually copper...lol.

P1050357.JPGP1050358.JPGP1050363.JPGP1050368.JPGP1050372.JPGP1050355.JPG

P1050357.JPG P1050358.JPG P1050363.JPG P1050368.JPG P1050372.JPG P1050355.JPG
 
Last edited:
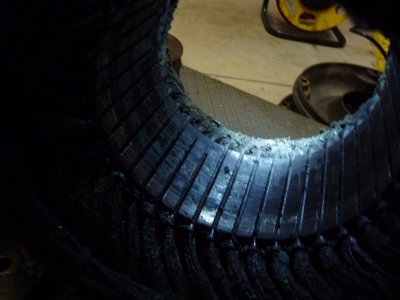
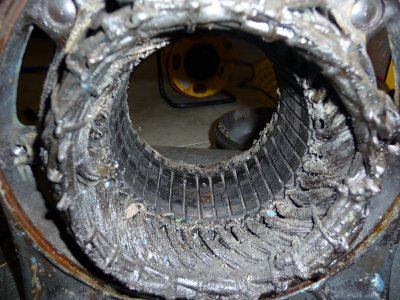
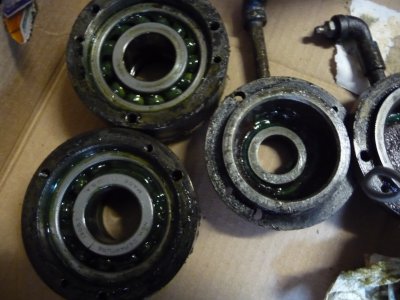
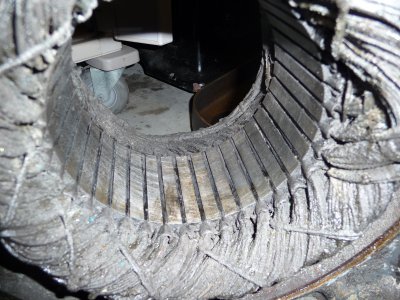
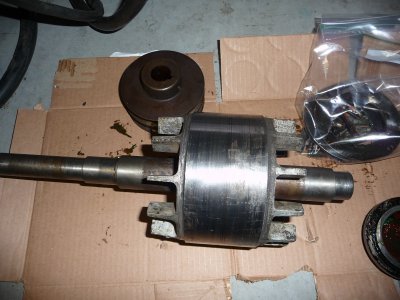
Here's some "after" pics...even though it's still a work in progress....I used electrical parts cleaner spray and a soft toothbrush to clean up the windings/rotor/stator. They were NASTY. The armature has copper "fingers" which I assume are for heat dissipation, etc...and I literally had to chisel off the grime!

I also flushed the bearings...they too were full of grease, which appeared to be fresh (I previously greased the bearings) but it was cold and gummy. I used an NLGI 2 with polyurea base...Lucas Xtra Heavy duty...seems to be good stuff...not sure if I just needed to warm the bearings up or what.The bearings appear to turn smoothly when clean with no grinding, etc....they are a 1306C ball bearing...actually somewhat expensive to replace so I am glad they are okay. I noticed the rotor was difficult to turn at one point, then it would free up, then bind again. Maybe the bearings were misaligned or the shaft is bent?

When I get some time, I will sit down and check w/ an ohmmeter, etc. and reassemble. I may have wasted several hours cleaning if the windings fail tests, but I learned a lot ;)

P1050382.JPGP1050383.JPGP1050384.JPG

P1050382.JPG P1050383.JPG P1050384.JPG
 
Yep...I know how to use one in general circuits....but had to look up diagnostic procedures for testing windings. FWIW, I pulled the motor and found that it was very difficult to turn...could be mixture of electrical/mechanical problems. It was freezing in my shop and the grease was so firm I think it was gumming up the armature.

Here's some before pics of the motor....it was obviously overgreased at one point and that grease was all over EVERYTHING.

Don't try too hard to get all of the grease out of the windings. It isn't really hurting much there (interferes with cooling a bit) and aggressive cleaning could damage the insulation.
 
Here's some "after" pics...even though it's still a work in progress....I used electrical parts cleaner spray and a soft toothbrush to clean up the windings/rotor/stator. They were NASTY. The armature has copper "fingers" which I assume are for heat dissipation, etc...and I literally had to chisel off the grime!

I also flushed the bearings...they too were full of grease, which appeared to be fresh (I previously greased the bearings) but it was cold and gummy. I used an NLGI 2 with polyurea base...Lucas Xtra Heavy duty...seems to be good stuff...not sure if I just needed to warm the bearings up or what.The bearings appear to turn smoothly when clean with no grinding, etc....they are a 1306C ball bearing...actually somewhat expensive to replace so I am glad they are okay. I noticed the rotor was difficult to turn at one point, then it would free up, then bind again. Maybe the bearings were misaligned or the shaft is bent?

When I get some time, I will sit down and check w/ an ohmmeter, etc. and reassemble. I may have wasted several hours cleaning if the windings fail tests, but I learned a lot ;)

The fins are for cooling. I think that the binding was probably due to gunk jamming between the rotor and stator. If the bearings are good I bet it will run fine.
 
...

I also flushed the bearings...they too were full of grease ...

... The bearings appear to turn smoothly when clean with no grinding, etc....they are a 1306C ball bearing...actually somewhat expensive to replace so I am glad they are okay. I noticed the rotor was difficult to turn at one point, then it would free up, then bind again. Maybe the bearings were misaligned or the shaft is bent?
...
There should be a plug on the bearing cap, opposite the grease fitting, to let excess grease out. Lots of "mechanics" out there who don't know what they're doing and don't take the plugs out, causing excess grease to get pushed into the motor.

It's hard to tell much just by feeling a bearing, but if it feels OK and wasn't making noise when running, it may be OK. There may be other bearings that will work. What are the dimensions of the bearings (ID, OD and width)?

Cal
 
I followed the instructions here: http://www.youtube.com/watch?v=A6IjX6nP_H8

And everything seems to check out....the wires are pretty beat though (looks like they were cut into/chafed by the hole in the peckerhead), and the cloth insulation is pretty deteriorated.

I'm inclined to cut them back to a few inches before the winding and replace with fresh wire, but that could be asking for trouble. At any rate, it *appears* that the winding has survived all these years of abuse.

I will try to get to reassembly and re-lubrication this weekend.
 
I followed the instructions here: http://www.youtube.com/watch?v=A6IjX6nP_H8

And everything seems to check out....the wires are pretty beat though (looks like they were cut into/chafed by the hole in the peckerhead), and the cloth insulation is pretty deteriorated.

I'm inclined to cut them back to a few inches before the winding and replace with fresh wire, but that could be asking for trouble. At any rate, it *appears* that the winding has survived all these years of abuse.

I suggest that rather than cutting the wires back you slip new insulation over what's there. Heat shrink tubing should do fine.
 
Funny you should mention that...I actually already did that! However, I was just not sure of the condition of the underlying wires and whether connectivity would be positional because of broken wires. I guess I'll just wrap them up a bit and revisit that problem if something comes up.
 
Back
Top