Mike's SCARA Robot

Did a bit of work on the robot hardware again yesterday and measured the "zero angle orientations". This is the angular distance between the home position (random based on home sensor installation) and the cartesian world definition (the XY axes of the table the robot is mounted to). In layman's terms, this is the difference in angle of each joint from home position to "arm-straight-out"

This was admittedly a super frustrating experience. I need to measure this as accurately as possible to allow the kinematics to give accurate final positioning of the robot, however even leaning on the table top could generate a 30 thou movement in the dial. I drew out a straight line down the table centered on the robot base and called this the workspace Y axis. I centered the indicator tip over this line to the very best of my abilities (using the yellow plastic level as a vertical fence) and swept the T1 axis back and forth. The position of highest indicator travel indicated when the axis was lined up with the Y axis.
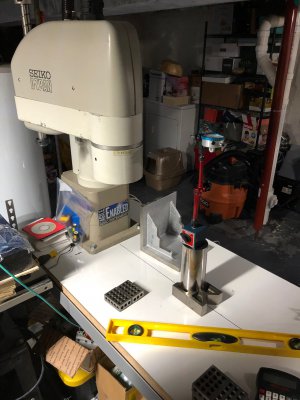
IMG_9862.jpg

In tried measuring on the casting, but found it too uneven to get good measurements. The machined steel bearing between the joints was better. I took 10 measurements (looking at the PLC's reported axis position measured from the motor encoder) and did an average.
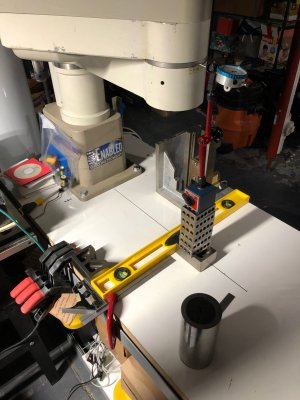
IMG_9863.jpg

Once the T1 axis position was found, I turned that axis on and locked it in the zero angle position. I repeated the process with the T2 axis, measuring against the collar on the end of the ballscrew.
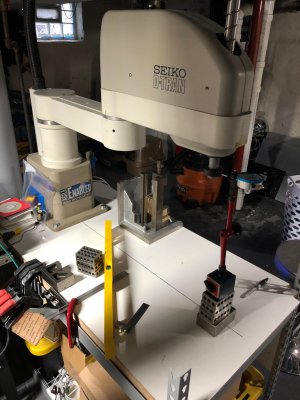
IMG_9864.jpg

The zero angle orientations I measured (relative to the home position, CW motion positive) are the following:
T1 = -7.4910°
T2 = -18.8768°


Honestly I don't trust these numbers past 1 decimal point but whatever, it will be a good start. If I ever bump one of the homing sensors, I will need to remeasure these values. Here is the dialog box in the PLC which handles all the robot geometry.
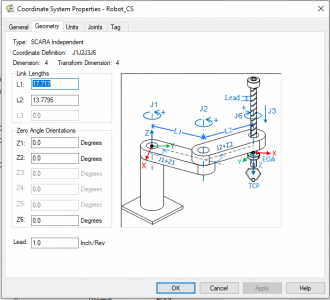
1603118873074.png

I *think* I should be able to get the kinematics working now. Wife and I are doing a few days of vacation this week so I'll tackle it when we get back!
 
I would have thought that those distances from pivot point to pivot point on the robotic arm would be something that would be available from the manufacturer for individuals to use in their programing of the movements.

What is the approximate distance from pivot point to pivot point based on your measurements? It would certainly be easier to help with a measuring concept if we knew that.

The link lengths (L1 & L2 in the diagram) are provided by the manual for the robot and are 450mm and 350mm respectively. The angle offset from home is typically measured on a “mastering” fixture at the manufacturer. I didn’t have these numbers, but even if I did, they changed when I replaced the sensors.

This data is usually stored in NVRAM in the robot controller, which is why it is important to match the controller to the robot if buying used.
 
Ok I've just spent the past 4 days worth of commode time reading through this thread. I admit, there were some portions I zoned out for. I tend to do that as I have the attention span of a 6 y/o.

Not to open old wounds but I never got closure, I need to know... when you found that your commutation signals were going into that MUX chip (and you soldered magnet wire to them) why didn't you just use them? Why mess with the custom de-MUX board? I'm sure I missed something. My apologies if the question has already been answered.

And now for something more relevant, why are you trying to store an entire g-code file in your PLC? I assume you're familiar with 3D printers? I would be looking at something like that, where the PLC gets its instructions from a computer one at a time (or one snippet at a time - in 3D printers this snippet would represent a single layer or "slice" of the model). This way you (your computer) could be in total control of what the PLC receives, no comments, no illegally long instructions, etc. Your PLC could have a bit of a buffer so it isn't waiting between instructions.

Really cool project and cool thread. I'm glad i read through it an now im subscribed for future updates. Can't wait to see what direction you take this!


So the biggest issue is that the robot already had cable harnesses wired for the multiplexed encoder scheme. These cables plug into a custom PCB which pins them to the 68 pin signal connector which matches the robot cable I have.

If I wanted to use the non-multiplexed commutation signals, I would have needed an additional 6 conductors per encoder which just don't exist in the cable harnesses. Not to say I couldn't have scrapped the guts of the robot and started over, but designing the encoder interface board felt like the path of least resistance to me - but it was probably a wash.

Additionally, the commutation signals in the encoder were not buffered or line driven. I would seriously question whether they would transmit cleanly over the 20' of cable between them and the drive.

The simplest solution would have been to replace the encoders entirely, but once I removed the original encoder I was committed to replacement since they were factory aligned, and this concerned me. I'm really glad I went down the encoder interface board path anyways. I had a blast designing the circuit and learning about digital logic. I've never had any good reason to learn that before and now I have a new skill. I should still hit up some of the people offering to help me with the CPLD/FPGA stuff since I bet that is a lot more useful in today's world.

As far as the G-code stuff, my hope is to not need a laptop to be connected to the robot in order to run it. There will be a mini-PC which runs the HMI client, so I guess it could go there. If I run into issues with storing the program in the PLC, I can trickle feed it.

I designed a G-code interpreter at work for fun before and it ran great, unfortunately my laptop which had the program got stolen and I had no backups. I want to recreate that. Bit frustrating that I know I figured this out once, but have no notes or memory of the details of how it worked.
 
Last edited:
I am still trucking along with this project. Mostly I've been reading the documentation for the robot kinematics instructions with orientation control. Rockwell changed the way that kinematics work since I last learned them, so I have a lot of catching up to do. I'd be willing to argue that this is one of the more complicated things that can be done in a PLC (at least that I have experience with).

The new instruction uses a Motion Axis Path Move (MAPM) instruction instead of the traditional Motion Coordinated Linear Move (MCLM) and Motion Coordinated Circular Move (MCCM) that I am used to. This seems to have some neat benefits, but the learning curve is a bit steep right now.

I did get my program set up with functioning kinematics (the Motion Coordinated Transform with Orientation (MCTO) is running), but thus far it has not moved an inch under control of the kinematics. Getting close.
 
Well as Vilfredo Pareto said, the last 20% of a project will use 80% of the Effort or something like that.
 
Took a little mental hiatus from this project while I was doing a side job, and now I've jumped right back into it. I'll do a more detailed follow up post once I get things cleaned up a bit better, so consider this a check-in.

I have a rudimentary software interface for the robot built. It can correctly handle startup, homing, controlled shutdown, and fault checking. There is also the start of the HMI interface built, basing it off of the Powerpoint mockup shown above. The kinematics are functioning mostly correctly, however I am having issues with my moves becoming non linear over long distances. This sounds like I have the wrong values for gearbox reduction ratios or joint lengths, however I have measured these geometrically and they spit out the correct values within the tolerance of my measuring (sharpie and measuring tape).

After exhausting my knowledge of things to adjust, I decided to go back to an older version of PLC software and try setting up the robot with the non-orientation controlling kinematic transform. This will give me proper control of X,Y, and Z, but I will need to manually control the U axis. If I can set this up correctly then I can try to take what I have learned and compare it to the newer version of software with the orientation controlling kinematics.

One major limitation of the new kinematics that I learned, is that there is an inability to control rotation while doing circular interpolation in XYZ space. I don't know if this is still in development or what, but it is annoying. An application where you might want this is a tangential drag knife where the knife should trace out curves. I could see myself building the orientation control manually in the older version of software and just using that going forward - we will see.

Knock on wood, but there has not been a mechanical or electrical hiccup in months. Those feedback interface boards I built are working perfectly! I had to return the oscilloscope I was borrowing from work, so I decided to suck it up and get my own. You can get a pretty powerful scope for not a ton of money these days. I hope that this one will cover me for any project I need it on for a very long time. There is a Mixed Signal (MSO) option module available for an extra $450 if I ever wanted which would add 16 digital channels to the existing 4 analog channels. This would have been SO helpful when I was originally designing the board

 
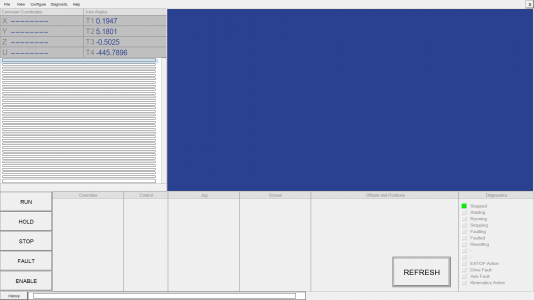
OK here is a little bit more of the update I promised. First off, here is where the screen stands:

The blue window is a graphics display of the toolpath in XY space. The control buttons are in the lower left corner. ENABLE/DISABLE starts the homing and turns on all the motors. Clicking it again stops all motion and turns off the robot. The FAULT/RESET button initiates a manual fault on the system and the RESET button will clear any fault, manual or mechanical, and return the system to a stopped state. The state machine status is indicated in the lower right. Axis positions are in the top left, and the program code will eventually be displayed below. The X in the top right exits the program.

Untitled.png

I have exported my code and set it up in V32 of the PLC software as well as V33. V32 only has basic XYZ kinematics while V33 has XYZU kinematics with orientation control and Tool Center Point (TCP) control.

My issue of non-linear motion appears in both forms of the program leading me to believe that somewhere I have the software configured wrong. The configuration gives the PLC a virtual description of the robot mechanics. The software then decides how the motors must move so this virtual robot creates the desired motion. If the virtual description of the robot mechanics does not match the physical robot, then motion positioning issues will occur. I think this is my issue.

There are a few things that can be wrong:
-Axis direction - I do not think this is my issue since the motion would be VERY wrong

-Gearbox ratios - I am pretty confident in these values based on data out of the manuals. The best method would be to open up the joint gearboxes and either count teeth or get a part number to reference. I expect these to be integer gearbox ratios since they are harmonic drives and the numbers I calculate from the manuals are within 4 decimal places of an integer multiple.

-Arm lengths - These are provided in the manual and In trust them pretty well, however I'd like to do something to physically measure them. I did this once but will repeat the exercise.

-Home offsets/zero angle orientation - these are values I measured manually a few posts ago. This is how the robot knows where it is in XY space after being homed. An error here would give the kind of issues I am seeing. In thought my method was sound, however I think I need to assume these are totally wrong and try again to measure them. When they are done, T1 = 0.0 degrees and T2 = 0.0 degrees should place the arm straight out along the length of the table.

Other than this, I do understand the programming now. I will be able to write up a program pretty quickly I think.

-Mike
 
OK, my next test is to measure all these values empirically to the best of my abilities. I can easily and accurately measure encoder counts, but not much else. I will have a hard time getting even a rough measurement (directly) of the following: joint angles, arm lengths, XY positions. The robot is very large and there are no good surfaces to take direct measurements from.

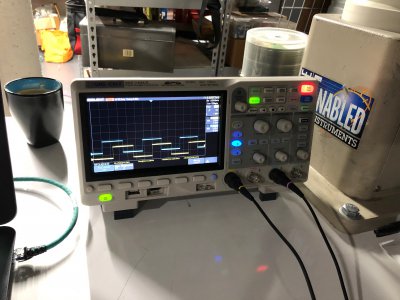
My new scope arrived as an early Christmas present to myself (with some help from my dad as well). It is awesome, and I will be using it to take some direct measurements from the encoders.

IMG_0082.jpg

First order of business is to validate the joint gearbox ratios. I will be using the scope to count the number of rising edges of the pulses on encoder channel A. I am placing the scope in segmented memory mode where it will capture many instances of the waveform and save each to memory. It can store 80,000 waveform instances or 14 million samples, whichever is less. I don't need to see the waveforms, but rather I care about the count of triggers as I sweep the arm across a roughly known distance. I will multiply the triggers by 4 (quadrature counting) and the number should match the data in the manual to a reasonable degree of accuracy. Encoder counts divided by the degrees swept will give me the gearbox ratio of the joint. I do not trust my zero angle location or the hard stop location so the degrees swept will be an estimate. Also there is a furnace duct overhead that limits how far I can sweep the J1 joint so I will be measuring 0 -> -100 degrees rather than +100 -> -100 degrees of travel.

In this test, the scope acquired 59342 triggers which equates to 237,368 encoder counts. The robot manual indicates that this model of robot should have 100 degrees of travel in each direction from 0. Doing some dimensional math gives us 237368 pulses / 100 degrees = 2373.68 pulses per degree. 2373.68 pulses per deg * 360 degree / rev = 854524 counts per revolution. We know that the motor has 8192 counts per motor rev so 854524counts per rev / 8192 counts per motor rev = 104.312 rev/motor rev which is the calculated gearbox ratio.

This answer corresponds closely to the 100:1 value I calculated from the numbers in the robot manual. The source of error is mostly likely in the position of the zero location or the hardstop location. My program shows this value of the distance traveled as 103.52 degrees. I repeated the measurements over a larger swept angle using the angle measurements from the PLC and got a ratio of 100.005:1. I expect the value to be an integer ratio since it is a harmonic drive. so I consider this to be a confirmation of the ratio. The only better check will be to open up the robot and find a gearbox part number. It is not listed in the manual.

The process was repeated for T2 joint. I traveled from 0 to the minus hardstop, very roughly 140 degrees, and measured 67624 pulses or 270496 quadrature counts. This is actually quite a bit more than the 248575 counts estimated in the manual. Unfortunately my scope has a max memory of 80000 acquisitions so I have to separately repeat the process to measure from zero to the other hardstop. In total, I measured approximately 531012 counts over the full travel rage which exceeds the 497150 counts stated in the manual. In practice this is not unexpected since the working range should be smaller than the range between hardstops. Using these numbers and assuming 280 degrees of travel, I get a gear ratio of 83.3:1. Not super close to the 78:1 I calculated from the manual. I need a better measurement of actual degrees traveled.

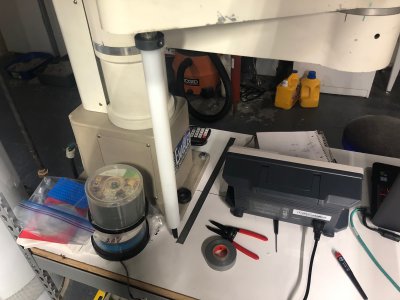
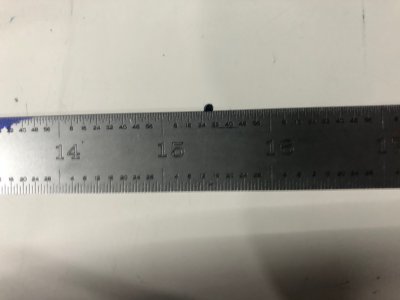
By locking T1 in position, I was able to manually position T2 at each endstop and use a sharpie held in the robots end effector to mark dots on the table. A machinists scale was used to measure the distance between the dots. By using the formula for a circular chord, I could calculate the angle traveled as 291.87 degrees, a bit larger than the published 280 degrees. Recalculating the gear ratio with this value gives 79.95:1. Again, curiously higher than the 78:1 ratio I calculated from the manual.

IMG_0083.jpg

IMG_0084.jpg

The next step was to open up the harmonic drive and locate a part number or count teeth. Doing this ruins my zero angle orientation measured above.
 
Last edited:
Back
Top