Looking to get a 3D printer soon.

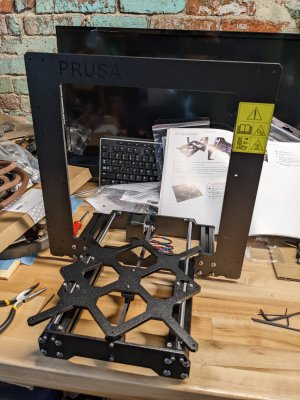
Got up to step 21 in the Y axis tonight. Putting in the 3 bearings was a fiddly operation, seemed I needed one more hand to do the job! Got a bit tired so stopped for the night. Kit seems well made. There's a lot of labor involved, but it's been a good break from my broken x axis DRO on my mill.


Great. I'm eager to see the finished product!
 
Hopefully they had instructions to grease the linear bearings before installation. Harder to do later. The original instructions didn't have that for mine. Anytime I hear the balls start to buzz I re-grease them, or periodically for good measure.
 
Hopefully they had instructions to grease the linear bearings before installation. Harder to do later. The original instructions didn't have that for mine. Anytime I hear the balls start to buzz I re-grease them, or periodically for good measure.
In the book, there weren't instructions for that. Mine seemed to have enough grease in them, so I didn't bother.

Finished the Y axis. The instructions are there, but there are some subtleties I missed. Like needing every single mm of that belt! First time I fitted it up it wasn't even close. Have to say, by the time I am done, there's a lot more than $200 of labor involved putting this together. Not hard, but really fiddly little stuff and strange assembly positions. Having a few bears now to celebrate the first axis.
PXL_20221110_164701468.jpg
 
I would use the online instructions rather than the printed book which doesn't have the comments and recent updates that the online instructions add. The book is adequate.

Glad to hear they are pre-greasing the linear bearings. When I got my early pre-ordered MK3 there was only rust preventative oil on the linear bearings and it doesn't last too long, now they recommend a light grease. Early on they recommended oils which were not a great solution. They have instructions now to grease it by putting some on the rails and exercising it, this works but isn't a very efficient way of getting grease past the seals. Proper greasing requires quite a lot of disassembly.

When they say it is a kit they weren't kidding. Building a little CNC machine from a pile of parts does take some labor. About 9 hours or so for most. It is less work than building a Railcore or Voron though. :)
 
X is done. But that was not too hard. I have mixed feelings about the crowd sourced comments. Are they curated? It's hard to tell what is authoritative.
 
I suspect they are well curated. It's a Prusa documentation website, not a social network. The instructions are not community sourced. One can compare the manual to the online and see what differs. The MK3S+ is pretty mature, so I don't expect a lot of change. Mine was early days, and the manuals had to go to print well beforehand so there would have been more value in the updates than is likely today. I have used the online instructions for upgrades and maintenance, and they were good. One of the values one gets for buying Prusa is the support and the online documentation is part of it. They are also very helpful if you have questions for their support staff.
 
Z is done. However, I lost 4 balls on the left side vertical during assembly. Might order some bearings, but honest not sure if I need to.
 
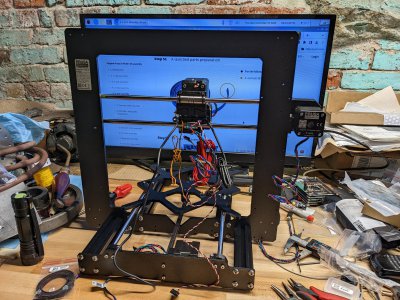
Well this one is taking me a while. Never done a kit like this. Even installing a full AC system from a box of parts on my truck was easier. Up to step 51on the E axis assembly. What a wild mess of cables.
PXL_20221111_020336002.jpg
 
I don't think missing a few ball bearings on the Z will matter, the X and Y bearings are more important. But having a spare set (or at least a few) of new linear bearings is not a bad idea. They are not too costly. I heard Prusa uses Misumi linear bearings which are pretty good quality.. When mine started making noise I got a spare set but after greasing the existing set I didn't install the new ones and print quality seems fine so they are still in the spare parts inventory. So perhaps it is a low priority.

Some of the new printers use a canbus board at the printhead so only 4 wires are needed through the harness. Otherwise there are a lot of conductors needed. Once they are wrapped up and the enclosure closed on the mess it isn't too bad, but if you have to change a heater or thermistor the harness has to be opened and the home-run wire replaced. The Voron's add a connector at the printhead which makes it easier to swap things.
 
Well this one is taking me a while. Never done a kit like this. Even installing a full AC system from a box of parts on my truck was easier. Up to step 51on the E axis assembly. What a wild mess of cables.
View attachment 426287

Congratulations on getting the printer and living through telling your wife after the fact. LOL

I just followed the book; I made a couple mistakes on the way but overall, it went well.
 
Back
Top