Installing a Logan QCGB. Logan 9B to 400 adaptation.

Last night i tackled the gear box mount surface. What a pain to align.

My guide was this web site.
http://madmodder.net/index.php?topic=7917.0

After borrowing some adjustable stands and finding suitable clamps i began to align. About an hour later i had the average readings all under .001". I say average as the surfaces themselves were not very flat to begin with. I took this as assurance that i did not have to hit the alignment dead on.

I noticed a calculation error in one of my previous posts. I added 1" to one of my measurements. So the .920" material removal should have been .08". Good thing i found that before i cut.

I overcut both surfaces a little so i did not have to re-align on the mill and instead plan to shim on the lathe. A test fit after milling show that i am about .010" off in both directions which is what i wanted. Will start shimming out and then mark and drill the holes.
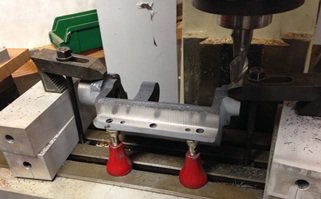
IMG_1081sm.jpg

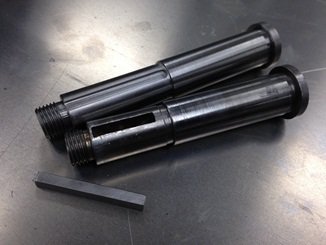
I also finished the new key for the new stud shaft. Hope to have the shaft done tomorrow.

IMG_1081sm.jpg
 
Grizzly G3102

Had a mini mill. Sold it to get the grizzly

The picture above was done at another shop. That one is a Bridgeport. Can't fit one of those in the garage...
Ahhh ... I thought you had said you had a smaller mill, then I saw the pic and went hmmmm. However that Clausing clone Grizzly is nice looking too. I'm looking for something to replace my mill/drill ... just have not found the right one yet. I would really like a MillRite.
 
Wish i could have fit a bridgeport. Was offered one for $500. The mini-mill was good for softer materials but needs updates or a patient machinist for anything beyond that with accuracy. I did make a DRO for it and that made a huge difference.

The Grizzly was an opportunity that i could not pass up. Sold one to buy the other and it fits well in my garage. What a challenge to move. I like the knee alot. It has a DRO but still is a bit wiggly. Better than the mini-mill thought.

I use the bridgeport when i can. Otherwise i am happy with the grizzly for what it is.
 
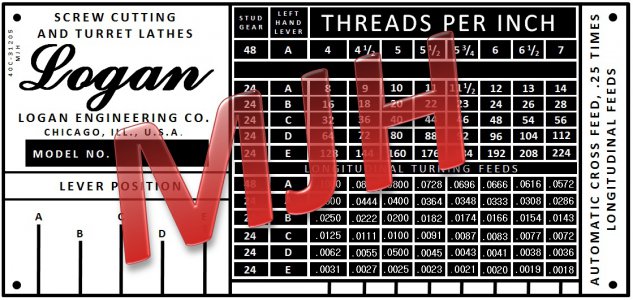
Designed this a few weeks back. Artwork for the new ID plate i plan to etch. It was fun. The only part that is not spot on is the "Logan" font. Did the best i could to match it but even the new one is different from the original. I'm OK with that.

$_572sm.jpg
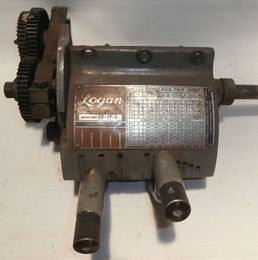
Original Tag. Hard to tell but the upper right is damaged and being curved it would be really hard to re-paint.

Logan new QCBG ID.gif
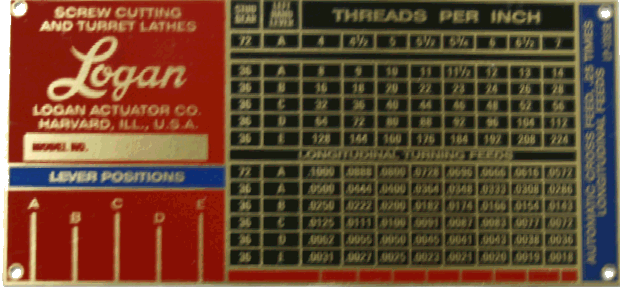
What Logan sells. This is for newer boxes with a different gear set.

ID tag.jpg
New artwork.

ID tag.jpg Logan new QCBG ID.gif $_572sm.jpg
 
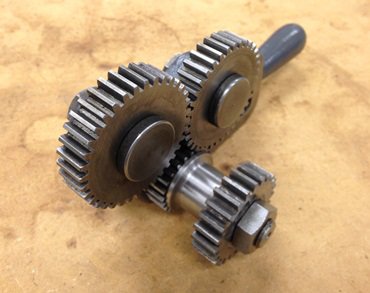
Finished the stud gear shaft and put it all together.

IMG_1085sm.jpg

IMG_1088.JPG

Test fit the gear box last night with some shims and it looks like i am .015" out in both directions. Will be making some shims tonight.

IMG_1085sm.jpg IMG_1088.JPG
 
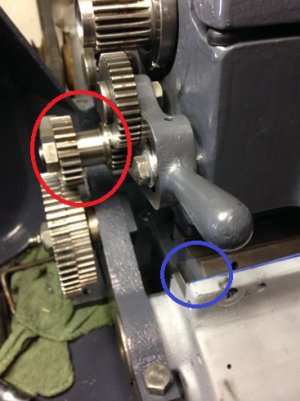
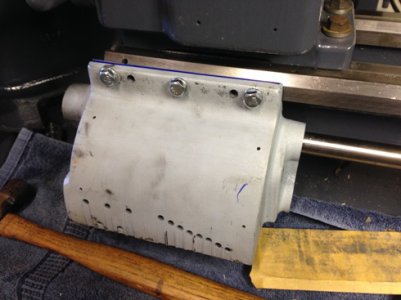
Reversing assembly is now installed. Perfect fit. Red circle is the new stud shaft and spacer. The spacer is now 3/4" instead of the original 1/4". Also the gear box is now properly placed with the overhang from the bed shown in blue. The mount holes are transferred and my shims sizes are calculated.

IMG_1091sm.jpg

Now that the box and gear assembly are located I went back and looked at the gear cover again. The cover is now identified as yet another piece that is different.

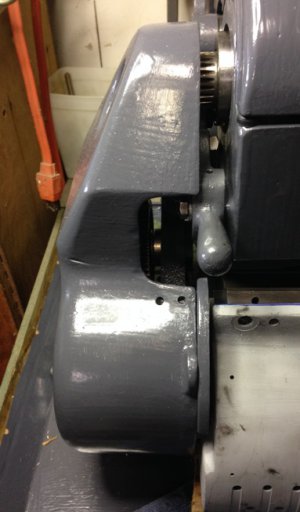
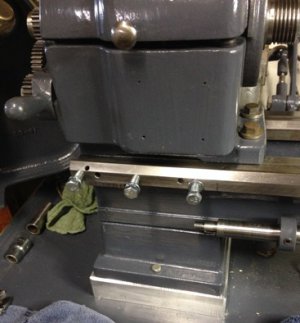
Notice the left picture below (my lathe) that the upper part of the cover is in line with the lower. I spaced my cover off by moving the mount on the bed so that the cover aligned with the filler that bolts to the side of the box to protect FOD from getting into the cover.

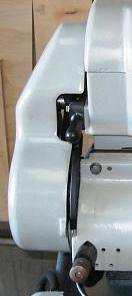
When I did that I noticed the gap at the upper drive gear as shown below left. Now look at the right picture. Notice that the upper part of the cover sticks out farther then the bottom. They are different. Even the profile is different. The angle at the top starts higher up. This along with the hole identified earlier and the clearance at the bottom for the box mean I am not going to be able to modify mine.


IMG_1090sm.jpg IMG_0062sm.jpg

Another part to look for but I do not think it is critical right now.

IMG_1090sm.jpg IMG_1091sm.jpg IMG_0062sm.jpg
 
The gear box is mounted. Shims worked great and the lead screw lines up perfectly. Woo-hoo.:thumbzup3:

Details.

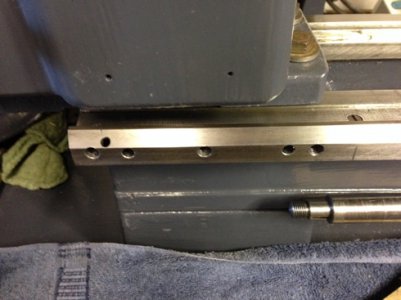
I made my shims today and drilled the holes in them. The front shim was .035" and the bottom .010". I sandwiched the front shims between some aluminum and drilled them out to the perfect size and location by clamping them to the gear box and chasing the holes right thru the gear box holes. Perfect match.

I then placed the gear box on the bed and transfer punched the mount holes. Drilled and tapped the mount holes for 5/16-18 screws next. Mounted the box with its screws using my 1/4" drill bit and transfer punches to align the shims to the box. Once tight I then drilled the dowel holes 1/16" undersize and then chased the hole with a 1/4" reamer. Perfect match.

The gear box finally has its first coat of paint on it and I can start to look toward putting the gear box back together.

IMG_1093sm.jpg

IMG_1092sm.jpg

I also finally mounted the longitudinal rack. If you recall I had to cut it short to clear the gear box. It is mounted and I was able to then mount my apron handle.

I did some more looking at the left side cover and am now wondering if in fact the bottom is actually cut back instead of the top being casted forward. The reason I looked is that the hinge for the cover is WAY off the end of the bed in order to line up. Hmm.... :thinking:

I may need some more measurements Rex.

IMG_1092sm.jpg IMG_1093sm.jpg
 
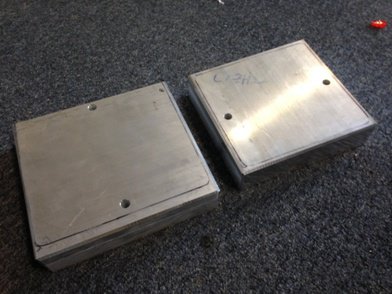
Finish fly cutting, drilling holes and chamfering the edges of my riser blocks today. Also mounted them. I must say, being a tall guy it is nice to have the lathe a little higher. Have to find longer mount bolts but that is OK.

IMG_1094sm.jpg IMG_1095sm.jpg

Was going to try my hand at etching today. Bought the Hydrochloric acid, hydrogen peroxide, gloves and container. Figured out how to mirror my artwork, printed a sample and..... Had to stop. The resolution of my printer is just not enough for the small text. I have a 600dpi laser. Going to have to figure out some better way to print on to the pnp-blue transfer paper. Weird thing is that the resolution seemed fine till I mirrored it. Will play with it and see what I can figure out. :think1:


Also got the second coat of paint on the gear box today. I can see the end in site. Lets hope it's not a freight train.

IMG_1094sm.jpg IMG_1095sm.jpg
 
Looks like you're closing in on it. Great job!

You might try one of the copy places. They may have a high res printer.
 
:banghead:......

Gear box together. Does not turn.....

Will take apart Tuesday and see what I can see. I suspect the gear cluster shaft is binding. It was tough to install.
 
Back
Top