-
Welcome back Guest! Did you know you can mentor other members here at H-M? If not, please check out our Relaunch of Hobby Machinist Mentoring Program!
You are using an out of date browser. It may not display this or other websites correctly.
You should upgrade or use an alternative browser.
You should upgrade or use an alternative browser.
Installing a Logan QCGB. Logan 9B to 400 adaptation.
- Thread starter mjhenks
- Start date
- Joined
- Feb 5, 2014
- Messages
- 198
Rex
If you look at your second picture. You will see that the top edge of the cover near the back side of the spindle covers that whole area. You will also see the edge that mates with the removable guard on the QCGB also covers it's area.
Now notice that those two edges are not on the same plane. The top one is farther out by about 3/4".
Mine are co-planer and therefor when I align to the gear box cover I have a gap at the spindle. See red circle below.
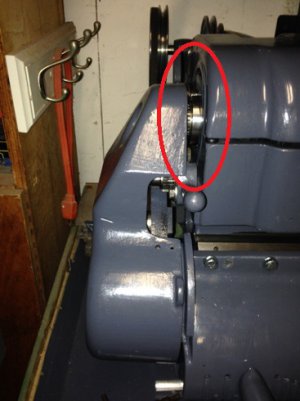
Make sense??
Can't just cut mine back because then I would hit the gears. I would have to weld a new lip up top.
Other differences are mine has four small holes to moving the gear chart and yours will have one hole to grease the gear train. Both have the hole for material thru the spindle.

If you look at your second picture. You will see that the top edge of the cover near the back side of the spindle covers that whole area. You will also see the edge that mates with the removable guard on the QCGB also covers it's area.
Now notice that those two edges are not on the same plane. The top one is farther out by about 3/4".
Mine are co-planer and therefor when I align to the gear box cover I have a gap at the spindle. See red circle below.

Make sense??
Can't just cut mine back because then I would hit the gears. I would have to weld a new lip up top.
Other differences are mine has four small holes to moving the gear chart and yours will have one hole to grease the gear train. Both have the hole for material thru the spindle.

Last edited:
- Joined
- Feb 5, 2014
- Messages
- 198
So I've had it. I am tired of this project. I just give up. :whiteflag:
The project is just too much to handle. I knew I was over my head but stubborn me..... I cannot finish it to my standards. Sorry to waste your time.
Just so the lathe does not sit in pieces forever I decided to hire a journeyman to finish the job. He is just learning but was highly recommended and works cheap. We will see if I made the right choice.
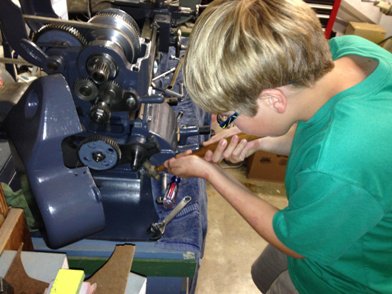
Can't help but wonder if I had any of you for at least a second. My oldest son spend some time with me last night in the garage as I mounted the gear box. He is shown tapping in the input shaft woodruff key. He does work cheap and is rather inexperienced but no, I did not give up. )
)
It is mounted and get this....... It even works. Had to take it off and on a few times as I would forget this or that as we went along but after about 30 minutes we got it mounted properly.
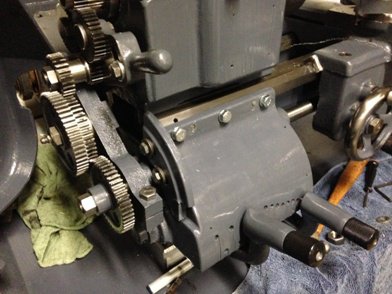
The gear train aligned pretty well. Looks like I am about 1/16" too far inboard with the box location but the gear train has adjustment. We lubed it all up and flipped the switch. We did that systematic wise first keeping the box disengaged and slowly working our way to the point where the lead screw was spinning. All went well. Then the real moment when I flipped the halfnut lever. Wala..... Motion. Awesome...... Then even better I changed speeds in like 10 seconds. Oh man. That is why I did this. Totally Awesome.
Of course then I went and crashed it.... Without a chuck on the spindle the distance you can drive into the headstock is deceiving. I ran out of thread on the lead screw and WHAM!!!! All is OK. Installed the chuck and figured I would hit that long before in real life.
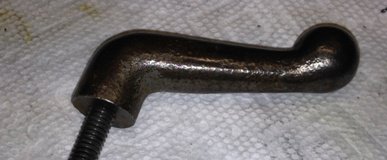
A gift showed up. Thank you.....
Started working again on the ID plate. Hvontres was helping me with the artwork and got the image to mirror without loosing resolution. Below is my first try at transferring the image. You can see that the transfer was OK. Debris is tough to keep off of the pieces. That is why some of it did not transfer.
Not shown but my second attempt was better but still had issues.
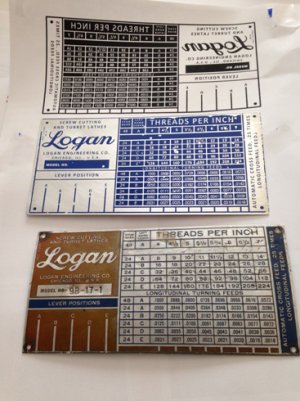
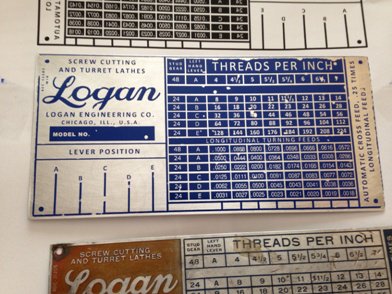
I will likely still etch these two today to start to learn that part as well.
Oh, did I forget to say that I actually cut chips last night. Just a few light passes on some 303 but still, cut chips non-the-less......


The project is just too much to handle. I knew I was over my head but stubborn me..... I cannot finish it to my standards. Sorry to waste your time.
Just so the lathe does not sit in pieces forever I decided to hire a journeyman to finish the job. He is just learning but was highly recommended and works cheap. We will see if I made the right choice.

Can't help but wonder if I had any of you for at least a second. My oldest son spend some time with me last night in the garage as I mounted the gear box. He is shown tapping in the input shaft woodruff key. He does work cheap and is rather inexperienced but no, I did not give up.
It is mounted and get this....... It even works. Had to take it off and on a few times as I would forget this or that as we went along but after about 30 minutes we got it mounted properly.

The gear train aligned pretty well. Looks like I am about 1/16" too far inboard with the box location but the gear train has adjustment. We lubed it all up and flipped the switch. We did that systematic wise first keeping the box disengaged and slowly working our way to the point where the lead screw was spinning. All went well. Then the real moment when I flipped the halfnut lever. Wala..... Motion. Awesome...... Then even better I changed speeds in like 10 seconds. Oh man. That is why I did this. Totally Awesome.
Of course then I went and crashed it.... Without a chuck on the spindle the distance you can drive into the headstock is deceiving. I ran out of thread on the lead screw and WHAM!!!! All is OK. Installed the chuck and figured I would hit that long before in real life.
A gift showed up. Thank you.....

Started working again on the ID plate. Hvontres was helping me with the artwork and got the image to mirror without loosing resolution. Below is my first try at transferring the image. You can see that the transfer was OK. Debris is tough to keep off of the pieces. That is why some of it did not transfer.
Not shown but my second attempt was better but still had issues.


I will likely still etch these two today to start to learn that part as well.
Oh, did I forget to say that I actually cut chips last night. Just a few light passes on some 303 but still, cut chips non-the-less......


M
Mister Ed
Forum Guest
Register Today
Can't help but wonder if I had any of you for at least a second. My oldest son spend some time with me last night in the garage as I mounted the gear box. He is shown tapping in the input shaft woodruff key. He does work cheap and is rather inexperienced but no, I did not give up.)
Yes you did. I was reading from email and could not see the pic (and did not read past the first couple lines before clicking on the link).
Once I saw the pic ... I had a chuckle.
- Joined
- Feb 5, 2014
- Messages
- 198
Playing with Acid this AM.
Boil & bubble. Tested out both of the samples I did to see how much time in the acid. 20 minutes seemed to be the right number.
Cooking
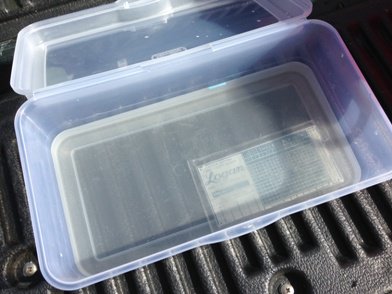
After being etched. The blue is the mask.
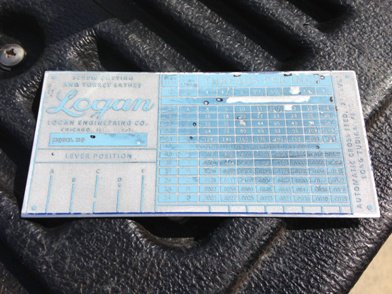
After the mask is removed you can see the depth and definition.
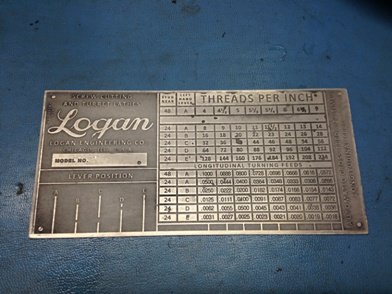
Painted. What do you think??
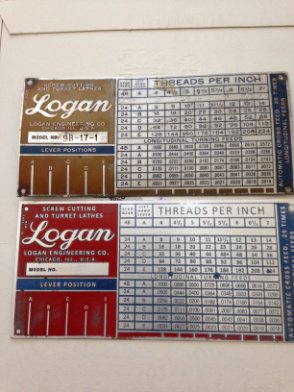
I am encouraged. I also etched a piece of brass as well.
What have I learned...
- etch a little longer
- clean everything to get a good transfer
- sand with 220 first and then switch to 360 grit
- This is also totally awesome. I see some cool things you can do with this.


Boil & bubble. Tested out both of the samples I did to see how much time in the acid. 20 minutes seemed to be the right number.
Cooking

After being etched. The blue is the mask.

After the mask is removed you can see the depth and definition.

Painted. What do you think??

I am encouraged. I also etched a piece of brass as well.
What have I learned...
- etch a little longer
- clean everything to get a good transfer
- sand with 220 first and then switch to 360 grit
- This is also totally awesome. I see some cool things you can do with this.


- Joined
- Dec 8, 2013
- Messages
- 2,651
Playing with Acid this AM.
Boil & bubble. Tested out both of the samples I did to see how much time in the acid. 20 minutes seemed to be the right number.
Cooking
View attachment 74879
After being etched. The blue is the mask.
View attachment 74880
After the mask is removed you can see the depth and definition.
View attachment 74881
Painted. What do you think??
View attachment 74882
I am encouraged. I also etched a piece of brass as well.
What have I learned...
- etch a little longer
- clean everything to get a good transfer
- sand with 220 first and then switch to 360 grit
- This is also totally awesome. I see some cool things you can do with this.
Beautiful. You need to make a plate for Bill to put on his TCG.
M
Mister Ed
Forum Guest
Register Today
Ok Matt, more info required. Where did you learn that process?

I think this deserves an entire new thread!!
- Joined
- Feb 5, 2014
- Messages
- 198
No new thread for me thank you. And here I thought I had been giving too much detail...
It is already detailed in the link below.
http://www.instructables.com/id/How-to-etch-aluminum-panel-labelsdesigns-with-a-r/
I was trying to figure out how I was going to replace my ID plate. Did some research and came up with that link. It is similar to what they do for PCB's.
The cost for the chemicals, gloves and container was about $20. The artwork as you have read, was a challenge getting to mirror and keep its resolution. Transferring is also a challenge.
My etching of the brass went OK. I have to figure out how to keep it in the acid longer without the mask coming off. I want to etch deeper. Likely I will add more acid.
- Joined
- Feb 5, 2014
- Messages
- 198
More Acid testing.  )
)
Ran a few more tests. Transfer tests, painting test, sanding tests and rolling tests. Good results.
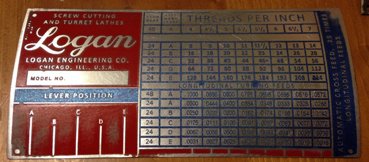
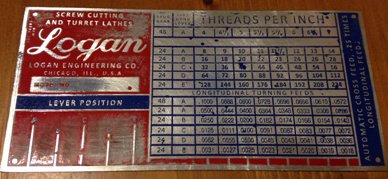
First two I will call patina Id plates. The transfers were not the best and the etching not deep enough but once painted they kind of pull of a decent new-used look for the guy who does not have a restored lathe but is missing or cannot recover his old plate. The one on the left is also rolled. Contour matched pretty darn good.
As a side note, the original ID plates are bent, not rolled. The curve is made thru 16 or 17 bends in the sheet metal about .2" apart. You can see it from the back side. (Bet you did not realize that) I just used a sheet metal roller. :thumbzup:
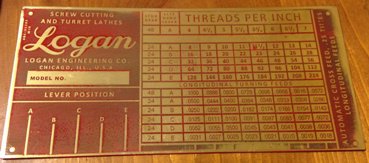
How about Brass?? Looks good. I was going to two tone paint it but the etch depth is much too shallow. This had 20 minutes in the 2:1 solution. Would have needed another 40 minutes to get something usable. Looks classy though. The older QCGB's have a brass ID plate I think.
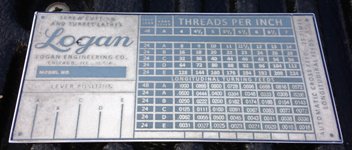
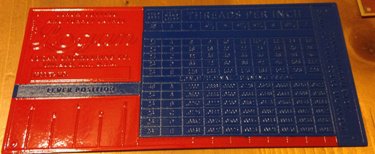
The good stuff is above. Not finished but....
So I got tired of bad transfers, shallow etching and the mask starting to come off after 20 minutes in the bath. What to do. Research and experiment of course.
After reading up on transfer issues I realized that this stuff is meant for copper and most of the suggestions were polar opposite to each other. High heat vs. lower heat. Longer press time vs. shorter press time. yada, yada, yada..... I finally figured I was on my own but I had a few things to try.
What you see above was made by ironing the transfer on high "cotton" heat for 5 minutes with a T-shirt between the transfer and the iron. After 5 minutes I removed the T-shirt and went over the transfer with the tip of the iron and high pressure to get some good heat and direct pressure. I then replaced the T-shirt and ironed another 5 minutes. This was all done with a timer. When done I stuck it in the fridge for 30+ minutes.
I then carefully removed the tape holding down the transfer and carefully lifted the edges with my x-acto knife. It came off really clean and I immediately noticed that the color of the transfer was way different. A very dark royal blue instead of sky blue. Hmmmm..... :makingdecision:
Into the Acid bath. I increased the Muriatic acid to 1:1. Be careful..... The plate started bubbling right away this time. Could tell things were different. I also immediately got some brown residue floating in the acid. Still do not know what that was and it had me concerned. I let it etch for 30 minutes checking every 5 and what a difference. The etching is about .6mm deep and very well defined.
You can see I have it painted and will sand it off tomorrow. I have high hopes.....
I also wonder if I can repeat it. Stay tuned. I also think I am going to have to make a new thread showing how this is done once I gain confidence.....
Anyone need a new, used looking ID plate?


Ran a few more tests. Transfer tests, painting test, sanding tests and rolling tests. Good results.


First two I will call patina Id plates. The transfers were not the best and the etching not deep enough but once painted they kind of pull of a decent new-used look for the guy who does not have a restored lathe but is missing or cannot recover his old plate. The one on the left is also rolled. Contour matched pretty darn good.
As a side note, the original ID plates are bent, not rolled. The curve is made thru 16 or 17 bends in the sheet metal about .2" apart. You can see it from the back side. (Bet you did not realize that) I just used a sheet metal roller. :thumbzup:

How about Brass?? Looks good. I was going to two tone paint it but the etch depth is much too shallow. This had 20 minutes in the 2:1 solution. Would have needed another 40 minutes to get something usable. Looks classy though. The older QCGB's have a brass ID plate I think.


The good stuff is above. Not finished but....
So I got tired of bad transfers, shallow etching and the mask starting to come off after 20 minutes in the bath. What to do. Research and experiment of course.
After reading up on transfer issues I realized that this stuff is meant for copper and most of the suggestions were polar opposite to each other. High heat vs. lower heat. Longer press time vs. shorter press time. yada, yada, yada..... I finally figured I was on my own but I had a few things to try.
What you see above was made by ironing the transfer on high "cotton" heat for 5 minutes with a T-shirt between the transfer and the iron. After 5 minutes I removed the T-shirt and went over the transfer with the tip of the iron and high pressure to get some good heat and direct pressure. I then replaced the T-shirt and ironed another 5 minutes. This was all done with a timer. When done I stuck it in the fridge for 30+ minutes.
I then carefully removed the tape holding down the transfer and carefully lifted the edges with my x-acto knife. It came off really clean and I immediately noticed that the color of the transfer was way different. A very dark royal blue instead of sky blue. Hmmmm..... :makingdecision:
Into the Acid bath. I increased the Muriatic acid to 1:1. Be careful..... The plate started bubbling right away this time. Could tell things were different. I also immediately got some brown residue floating in the acid. Still do not know what that was and it had me concerned. I let it etch for 30 minutes checking every 5 and what a difference. The etching is about .6mm deep and very well defined.
You can see I have it painted and will sand it off tomorrow. I have high hopes.....
I also wonder if I can repeat it. Stay tuned. I also think I am going to have to make a new thread showing how this is done once I gain confidence.....
Anyone need a new, used looking ID plate?


