-
Welcome back Guest! Did you know you can mentor other members here at H-M? If not, please check out our Relaunch of Hobby Machinist Mentoring Program!
You are using an out of date browser. It may not display this or other websites correctly.
You should upgrade or use an alternative browser.
You should upgrade or use an alternative browser.
How do start my mini mill setup
- Thread starter Hd172
- Start date
- Joined
- Mar 21, 2013
- Messages
- 4,067
I personally stay with a 1/2" endmill or smaller. And at 1/2" I'm usually using a rougher to keep cutting forces reduced.
If you stay within the performance/size envelope of the machines, they work very well.
For example: I was countersinking a screw to be as near perfectly flat with it's surrounding surface. I couldn't go any further with the countersink without leaving a line around the screw head, so I used a 3/8" endmill, zero'd to the surrounding surface on my dro, pulled up .0002" and milled the head of the screw and never touched the surrounding surface.
May not be a big deal to some, but I was impressed.
I also do work in stainless and titanium, but on small (less than 4" square) parts. I buy good cutters and that seems to make a difference with the harder materials, i.e., less stress on the machine.
OP: not trying to threadjack, just answering a question.
Bill
- Joined
- Apr 1, 2013
- Messages
- 1,142
HD,
Not real bad looking. As bill said always give a few taps with a dead blow or with a bock on the part as you Tighten up the vise. If the pallels are loose then start over if they are tight then you did it right.
As far as the creaping deeper into the cut it could be a couple other things that come to mind. The end mill itself isbeing pulled down by the cut. are you using endmill holders or collets? if you are using collets make sure they are tight and that they are not creaping (a shot of bluing, or a marker line can help see this)
The next thing that comes to mind with this Machine is head drop. be sure when you set the depth of cut, you do iton a down feed of the crank. If you need to go up a few thous then go up one full turn of the crank and come back to you mark. also I believe it was statedalready be sure to lock the Z axis. The wieght of the headalong with the vibrations of the machine will cause the head to creap/drop as you cut if you do not lock it
Mark you were right on the end mill pulling itself out of the collet. The mill instructions say to hold the tool/spindle by hand when tightening and not to use the lock pin. I decided to use the lock pin to help but I kept in mind that I might over tighten. Doing it that way worked out and I had no problem removing the tools after. I also went back around and retightened the gibs so there was some drag when I turned the handles and stopped the head movement on the z-axis. I went down to a 5/8" end mill and made straight passes into the fixed jaw of the vise with conventional cuts. The cuts are looking much better. I need to take a few more thousandths to get them perfect. The accuracy is not that important and I'm just doing it for practice. Thanks again everyone I'll post the finished parts in about a week. I only get machine time on my weekends.
- Joined
- Mar 21, 2013
- Messages
- 4,067
Didn't think of the end mill creeping. I was mentored on a BP clone, and we always locked the spindle when tightening the drawbar, and i have always done it since. I even made a little holder for my spindle lock pin on my LMS so I could hold the end mill in one hand so it doesn't drop onto the table, and use the other to cinch down the drawbar.
Glad things are better.
Bill
Glad things are better.
Bill
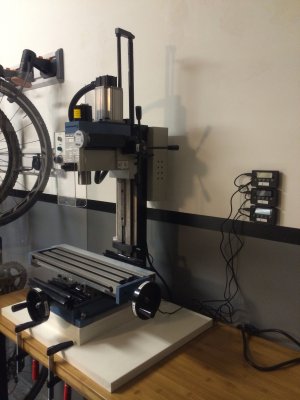
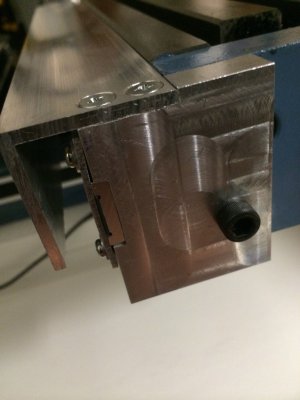
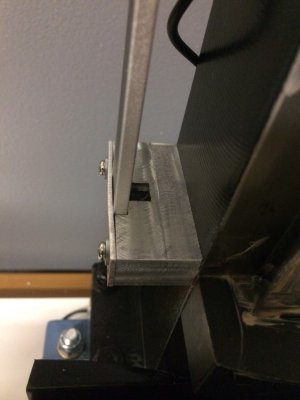
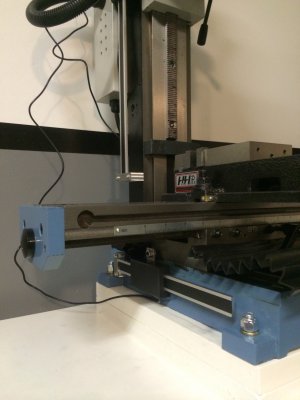
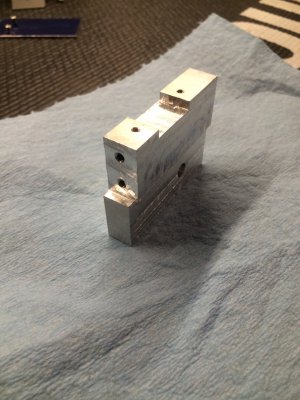
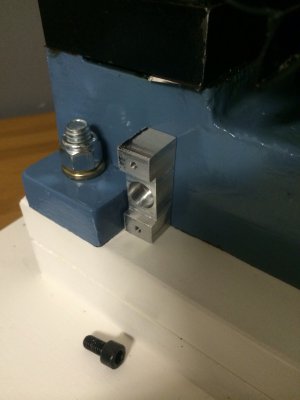
Ok everyone I've got good news and bad news. Mostly good news. We'll start with the last hole that I was countersinking. The bit jammed and the chuck spun off the arbor. I then thought to myself " you should hammer the day lights out of the end of the arbor back on to the chuck". Bad idea. The arbor was then deformed and would no longer fit into the spindle. Good news is I ordered a new chuck and arbor. The next good news is I finished my very first project. It was a bit of a learning curve for me but I'm pretty happy with my DRO install. I made scale mounts for each axis and installed a shield for the x-axis in the back. I used 1-1/2" angle because that's all they had at the hardware store. The y axis bracket came out a little off because I had to cut the 5 degree angle on the band saw. I'd like to redo it with a sine vise later on to make it perfect. My wife made me labels for all my handles so I know which way to turn when I'm not thinking straight. These little brackets took me a lot of time to figure out and get all the dimensions right. I appreciate everyone's help. Let me know what you think.


- Joined
- Mar 21, 2013
- Messages
- 4,067
Nice. 
Wish someone had thought to label the directions on the mill handles when I first started. Would have saved me some money, i.e., less scrap. Now the only time I go the wrong way seems to be when I stop and think about it...
Bill
Wish someone had thought to label the directions on the mill handles when I first started. Would have saved me some money, i.e., less scrap. Now the only time I go the wrong way seems to be when I stop and think about it...
Bill
- Joined
- Apr 1, 2013
- Messages
- 1,142
HD it looks nice. Great planing and good work. Make sure the wires can't get snaged. That would be bad.As far as the 5deg cut goes there is a way around a sine vise till you get one. that is find the sine of the angle and multiply it by the lengh of your part in inches I subtract to the nearest inch from the end (5-1/2" would be 5". 7" would be 6") this give you space to shim and a place mark the part. then you shim up at the far side of the line. Ex. the sin of 5 deg. is 0.0871. lets say your part is 6" so you would make a mark at 5" then mutiply 0.0871 x 5 = 0.4357. this is the amount of shim to add. The part should rest on the shims right at the 5" mark. Hope that makes sense and helps you. Just make sure if you do this in the vise that the 0' end of the piece rests on the vise not past the end of the vise.

