- Joined
- Jun 7, 2013
- Messages
- 10,101
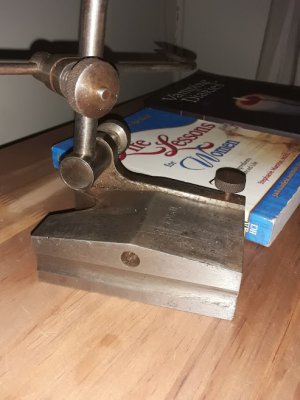
The bodies on the Starrett surface gages are not stamped, only the staff is stamped.

I destroyed the colors on a couple of my machinists clamps. I put them in vinegar or something to derust them and the color went away... I was not a happy camper.Starretts , at least all I've ever owned , had the cool looking HT colors left intact . Definately nice looking tools .
Used for checking parallelism on different applications . The pins are the contact points .
If you drop two pins, you can run the pins along the edge of a surface plate and use that as your straight line reference.the pins are used on the edge of a project, and can run down the length, to measure lets say an offset of another cut.. either for scribing, or for measuring
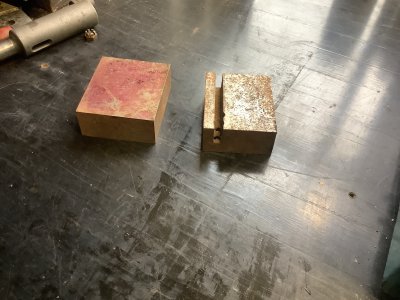
How was it made John?I have to agree that this was not shop made, it reeks of factory made in all the small details.
Thanks Mate!The radius on the sides was done on a horizontal mill with a shell type radius cutter supported in an outrigger so it was very sturdy ,running on an arbor. It did the groove in one cut.
? Stainless?made of silver steel
If I decide to make one and it comes out well, I will send it out for heat treatment.I think to be successful in this job it needs to be hardened and ground tovbe of the quality like starret would produce.