

-
Welcome back Guest! Did you know you can mentor other members here at H-M? If not, please check out our Relaunch of Hobby Machinist Mentoring Program!
You are using an out of date browser. It may not display this or other websites correctly.
You should upgrade or use an alternative browser.
You should upgrade or use an alternative browser.
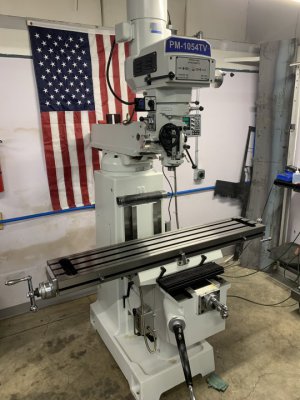
F&S Metal Works Shop Log (PM-1054TV)
- Thread starter sr71xjet
- Start date
So my son is wanting to do this for a career and we are all new at this. Going to need lots of help in this endeavor. Looks like we have come to the right place for this new adventure. Plus I get to play with the new equip......LOL
- Joined
- Sep 1, 2020
- Messages
- 794
Congratulations on the new machine! It looks nice. Did you lift it with the head rotated down? In the photos it looked like you may have put the head up before the lift. If that was the case, remember for future that those machines can be top heavy when the head is up. i saw a guy break the “toe” off a Bridgeport when it tipped forward. You will have fun with that!

Thanks, I hope we will. Looking forward to learning all about it.Congratulations on the new machine! It looks nice. Did you lift it with the head rotated down? In the photos it looked like you may have put the head up before the lift. If that was the case, remember for future that those machines can be top heavy when the head is up. i saw a guy break the “toe” off a Bridgeport when it tipped forward. You will have fun with that!
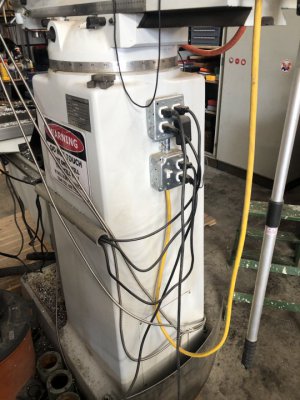
Well, made some good progress. Got the x y and z power feeds installed. Installed the unisorb adjustable feet and set unit in place hopefully only this one time. Cafeteria trays came in and i cant remember where i saw them, but it looked like a good idea. Also got the "Gavintoobe clone" accessory arm built and installed. Now got to work on what to put on it. Electrical box (4 plug) and 220 added to back of the mill. Just
got to do a little painting on the arm and elec cover.


got to do a little painting on the arm and elec cover.
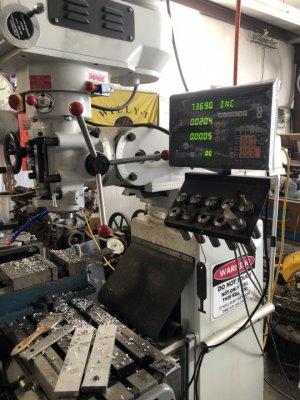
Everything’s looking good here’s a few tips that I made on my 1054
1. go ahead and add that second four hole receptacle you’ll need it.
2. add two more handles to your quill handle.
3. did they not supply you a collet holder under the DRO read out?
1. go ahead and add that second four hole receptacle you’ll need it.
2. add two more handles to your quill handle.
3. did they not supply you a collet holder under the DRO read out?